Building a professional website doesn’t have to be a daunting or time-consuming task. With the right tools and a clear plan, you can create a stunning website in no time. One such tool that simplifies this process is the Astra Theme for WordPress platform. Known for its lightweight design, flexibility, and compatibility with popular page builders, Astra empowers both beginners and seasoned developers to setup professional websites with ease.
In this article, we’ll walk you through the step-by-step process of setting up a professional website using the Astra Theme. This article is written for those who are new to building their website with WordPress. We explained with free version of Astra theme and touch upon the premium features.
Why Choose Astra?
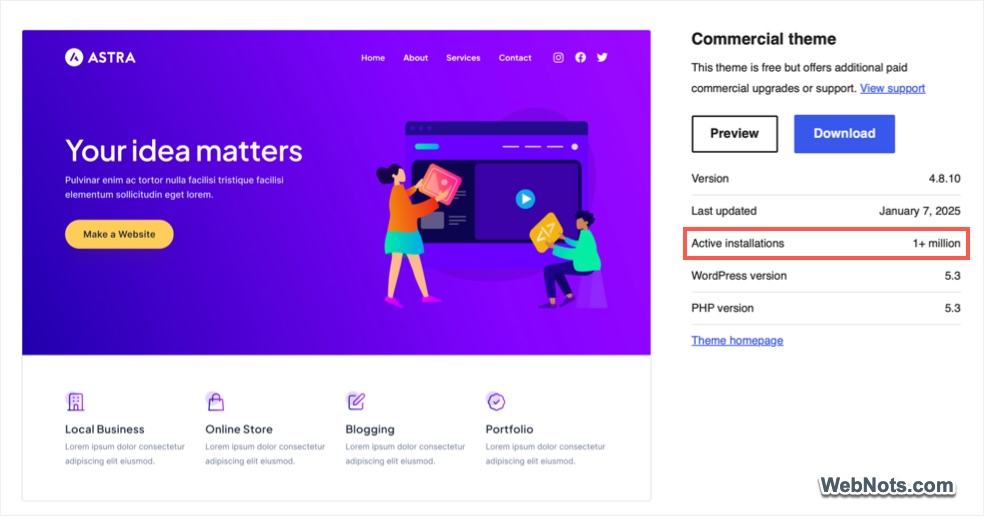
Before diving into the setup process, let’s explore why Astra is a preferred choice for 1+ million users.
- Lightweight and Fast: Astra’s performance-optimized design ensures quick load times, which is important for SEO and user experience.
- Customizable: You will have extensive customization options, allowing you to design a website that aligns with your brand.
- Pre-Built Templates: Library with 100+ professionally designed starter templates for various industries, cutting down on design time.
- Compatible with Page Builders: Astra integrates seamlessly with page builders like Spectra, Elementor, Beaver Builder, and Gutenberg.
- Free and Premium Options: It is a free theme with robust features, and a premium version for advanced functionalities.

Astra Theme
Get the most popular WordPress theme to build your site with complete suite of tools and grow your business online.
Step 1: Buy Domain, Hosting and Install WordPress
To use Astra theme, you’ll need a domain, hosting, and a WordPress installation. You can check out our comprehensive WordPress hosting handbook for purchasing a hosting plan. Here is a summary:
- Purchase a Domain and Hosting: Choose a reliable hosting provider like SiteGround or Kinsta. During the setup process, you can register your domain name. Companies like SiteGround offers 1-year free domain registration which you can make use of to save cost.
- Install WordPress: When purchasing a managed hosting plan, SiteGround will automatically install WordPress on your domain. Otherwise, you can use the one-click WordPress installation to install WordPress in less than a minute (this is a common process with most hosts).
Once WordPress is installed, log in to your admin panel by visiting https://www.yourdomain.com/wp-admin. You need to login with the password and username (or email) provided during WordPress installation.
Note: WordPress comes with dummy content and your hosting company may also add additional stuffs to the core WordPress software. Check our checklist to remove unnecessary stuffs that come with the installation.
Step 2: Install Astra Theme
Now that your WordPress setup is ready, it’s time to customize the appearance. Your site will use twenty-twenty five or the latest default theme that comes with WordPress software. However, the default theme is a block-based theme which is completely different than the classic themes like Astra. Follow the below steps for changing the theme:
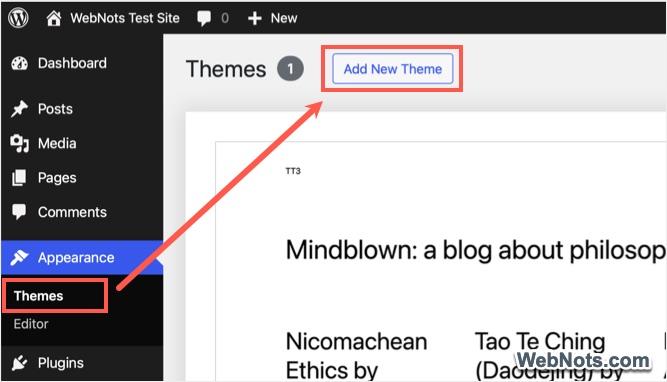
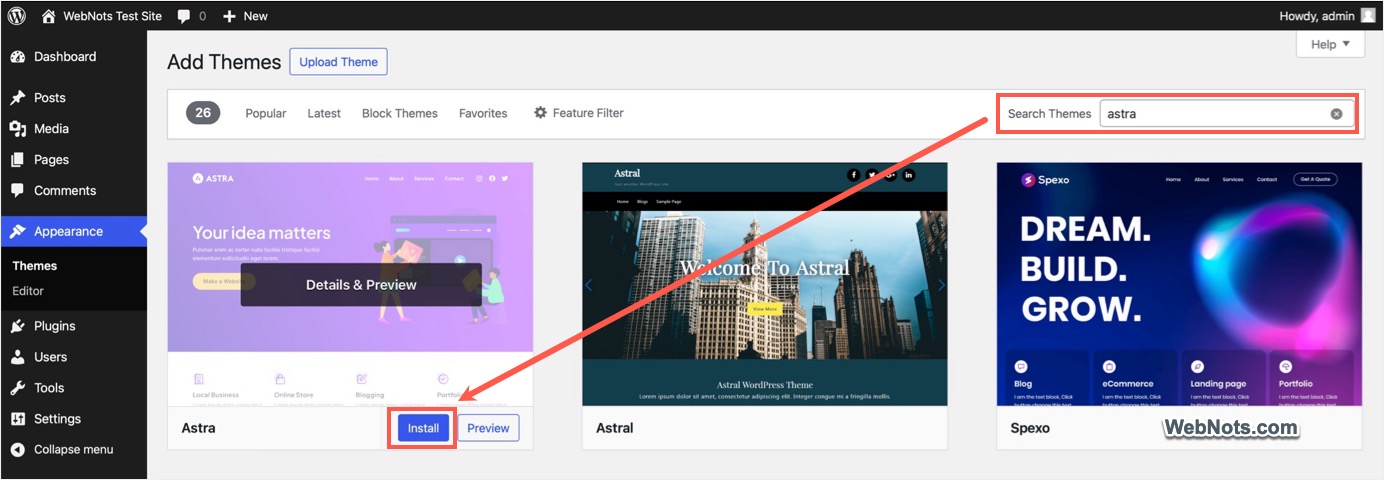
- Navigate to “Appearance > Themes” section in your WordPress admin panel and click on the “Add New Theme” button at the top of the page.
- In the search bar, type “Astra” and find the theme.
- Hover on the thumbnail image and click on “Install” button.
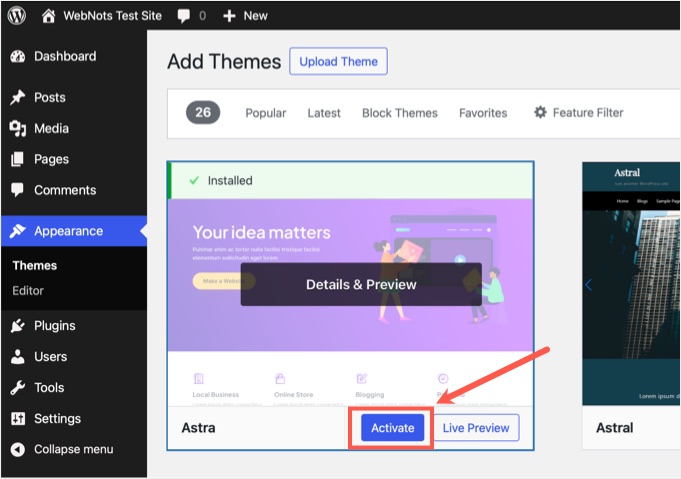
- One the theme is installed, click on the “Activate” button.
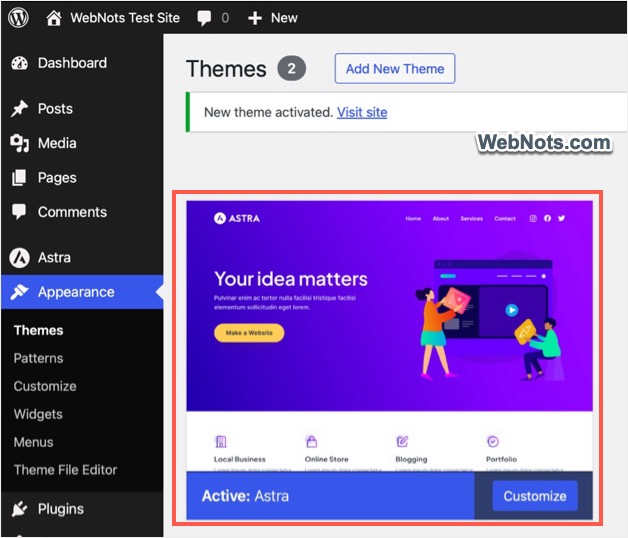
- Now, you can find the Astra under “Appearance > Themes” section. you will also notice new “Astra” menu is added in the sidebar and the submenus under “Appearance” section are changed.
Step 3: Import a Starter Template
Astra’s pre-built templates save you significant time and effort. So, before you start customizing the installed theme, it’s a good idea to install a template that you like.
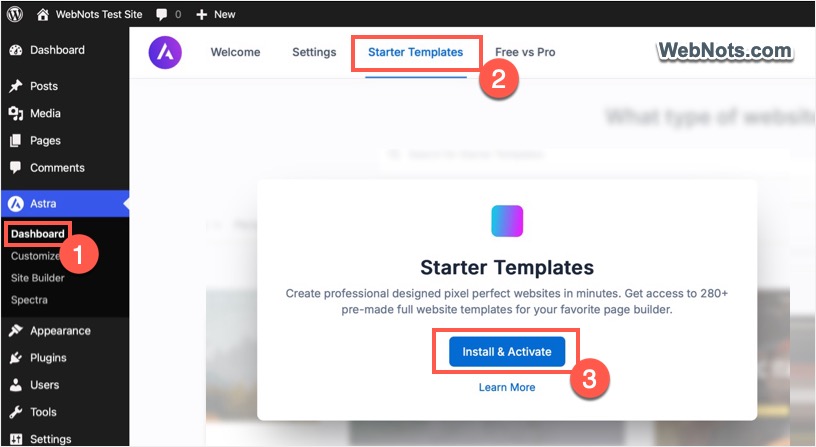
- Go to “Astra > Dashboard > Starter Templates” section.
- Click on the “Install & Activate” button.
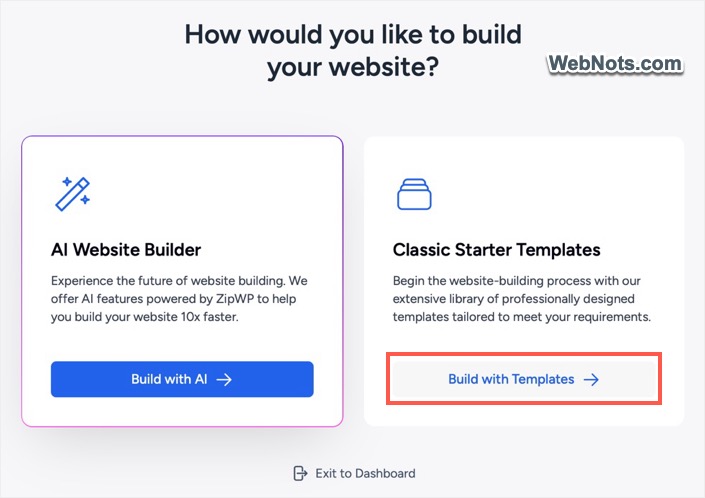
- You will be prompted to choose to build with AI or use classic templates and click on the “Build with Templates” button. Though AI can assist here, it needs ZipWP account. So, we will explain here with manual setup.
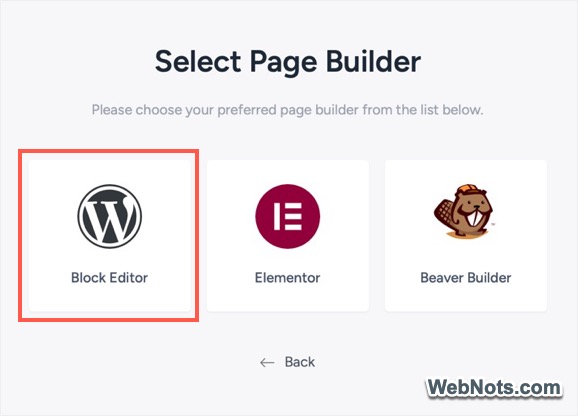
- Select your preferred page builder – Block Editor (Gutenberg), Elementor, or Beaver Builder. This will show the applicable templates for that page builder. Let’s select Block Editor which is the default Gutenberg editor in WordPress.
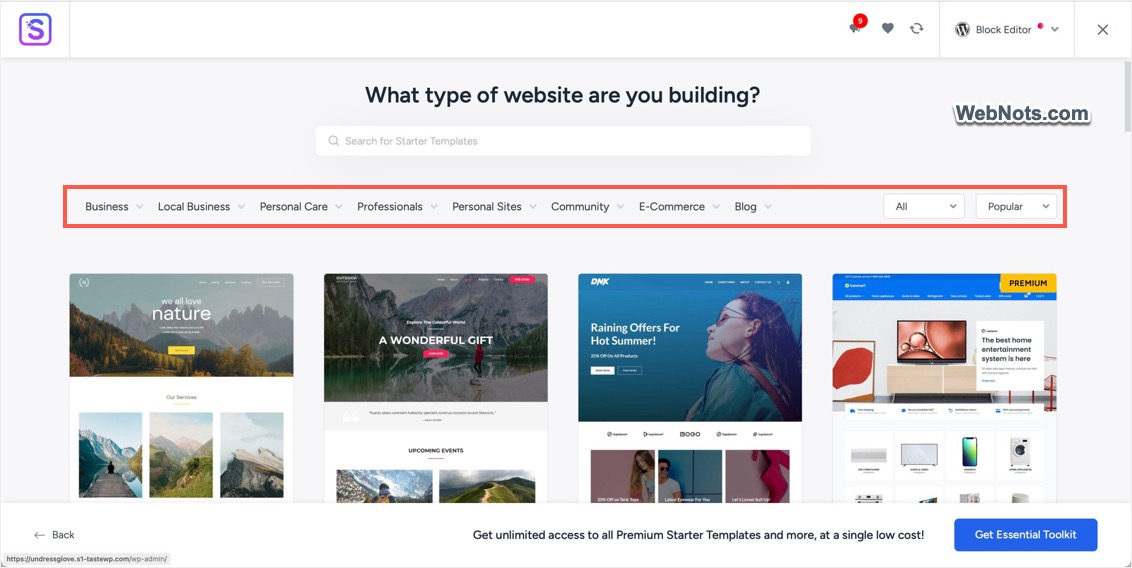
- You will see a huge list of templates categorized by industries such as business, professional, blog, etc. Let’s select a template for Marketing Agency.
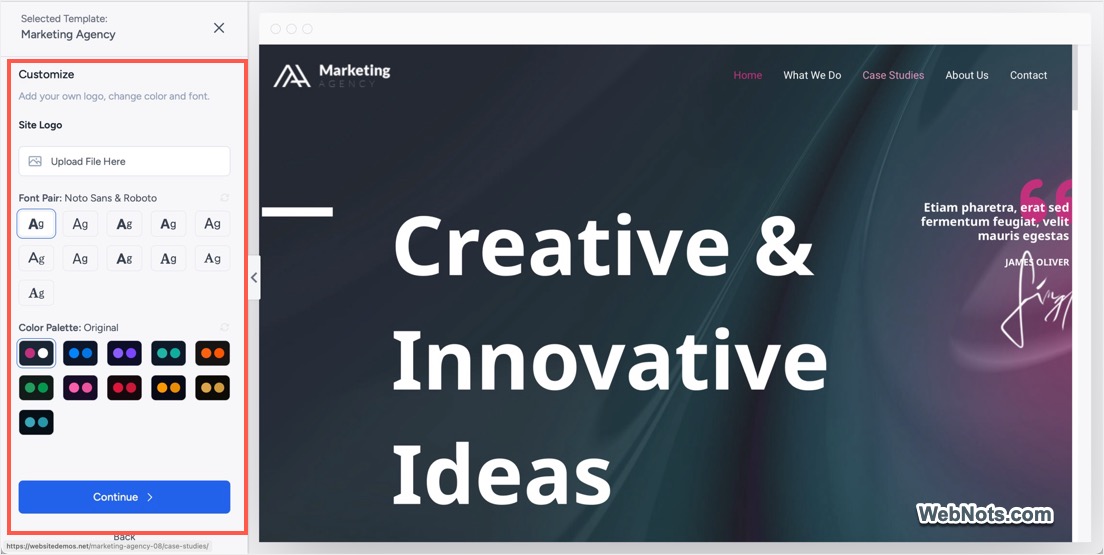
- The preview will open along with the options to upload your logo, change fonts and colors. If you are happy with the template, click on “Continue” button.
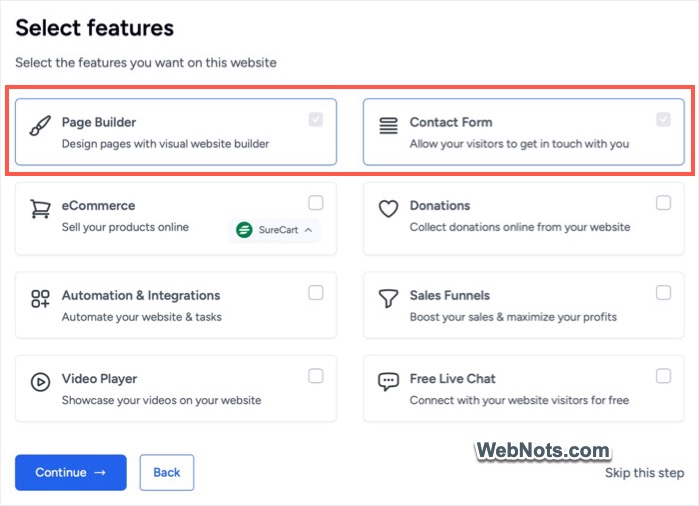
- You will see additional set of features like Donations, Live Chat, etc. Let’s ignore those stuffs for now and click on “Continue” button.
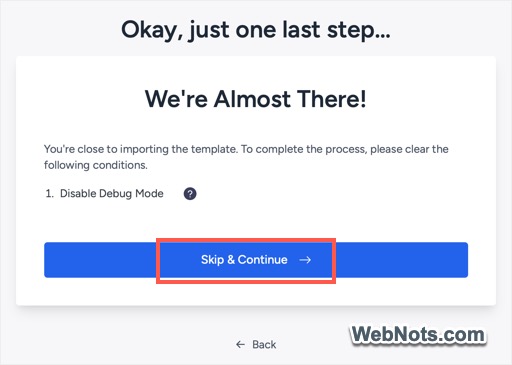
- You will see a warning if you have debug mode enabled. Generally, this will not be the case for a new WordPress setup, so, you will not see this message. Otherwise, simply click on the “Skip & Continue” button.
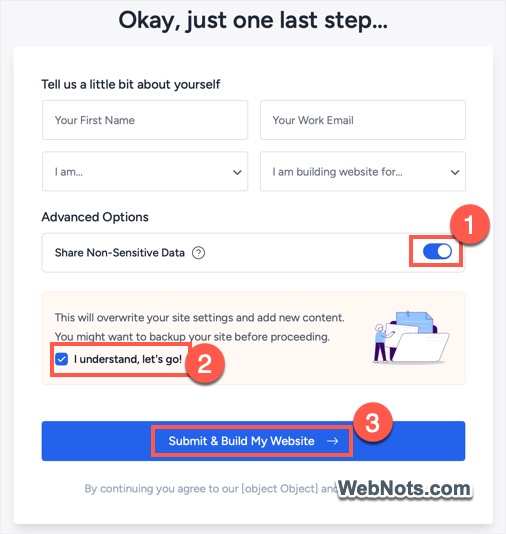
- Finally, you will be prompted to provide some personal details. If not interested, do not provide your details and turn off “Share Non-Sensitive Data” option. Check, “I understand, let’s go!” and click on the “Submit & Build My Website” button. Demo template will replace all your existing site’s settings which is the reason we recommended to import templates before customizing your theme.
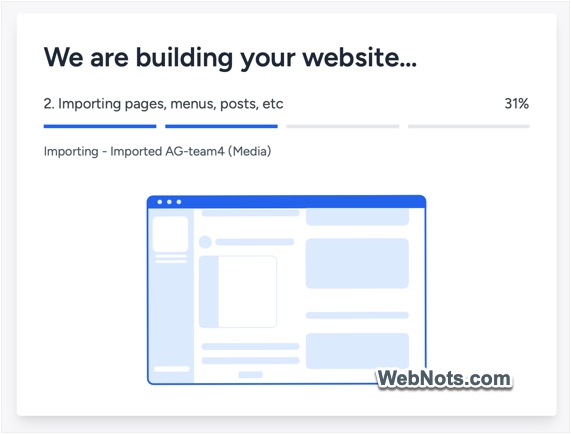
- The template import process will start running which normally take less than a minute.
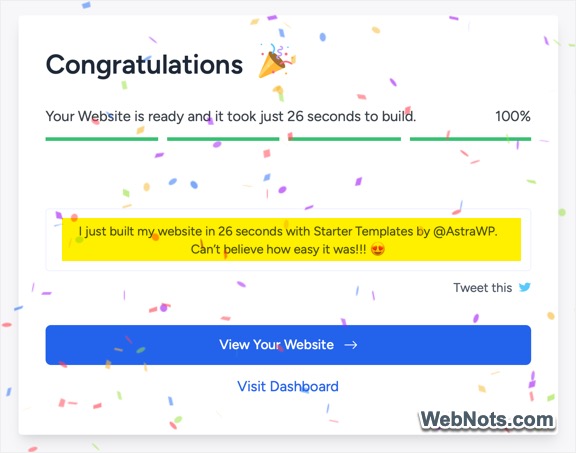
- Once finished, you will see a congratulations message. It took 26 seconds as you can see in the below screenshot. Click on the “View Your Website” button to check how your live site is looking with the imported template.
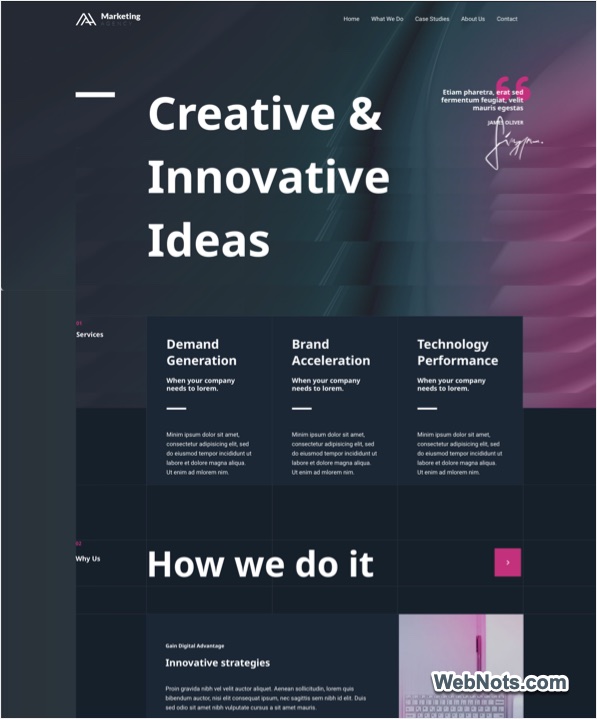
- Your site will open in a new tab and will look exactly like the imported template.
- Get back to the import wizard and click on the “View Dashboard” link to go to the admin panel.
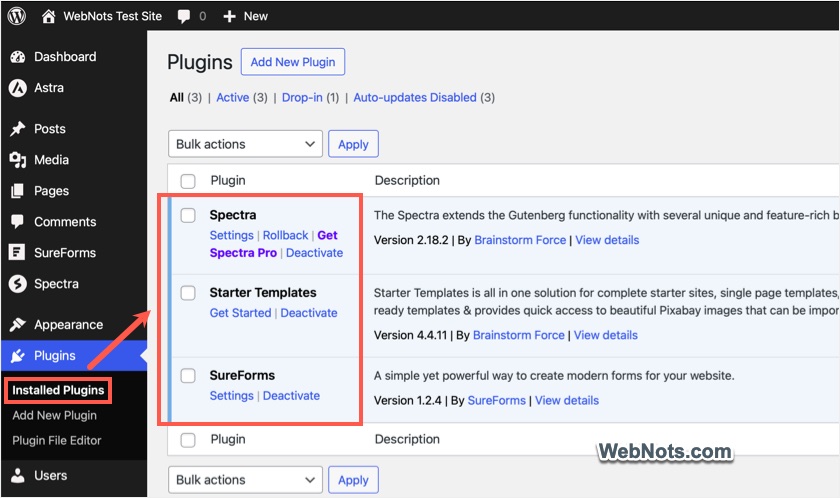
Note: Starter Templates is a separate plugin that can installed with any theme. However, it works perfectly with Astra since the theme and the plugin are developed by the same developer. Most of the templates also will install the Spectra page builder and SureForms contact form plugin. Go to “Plugins > Installed Plugins” section and check the newly installed plugins required to use the imported template.
Step 4: Customize Your Website
Before creating or editing your content, it’s time to customize the colors, typography, and layouts of your site to suit your brand. Go to “Astra > Dashboard” menu to find the free options available for you. You can either click on the individual items like Color or click the “Start Customising” button.
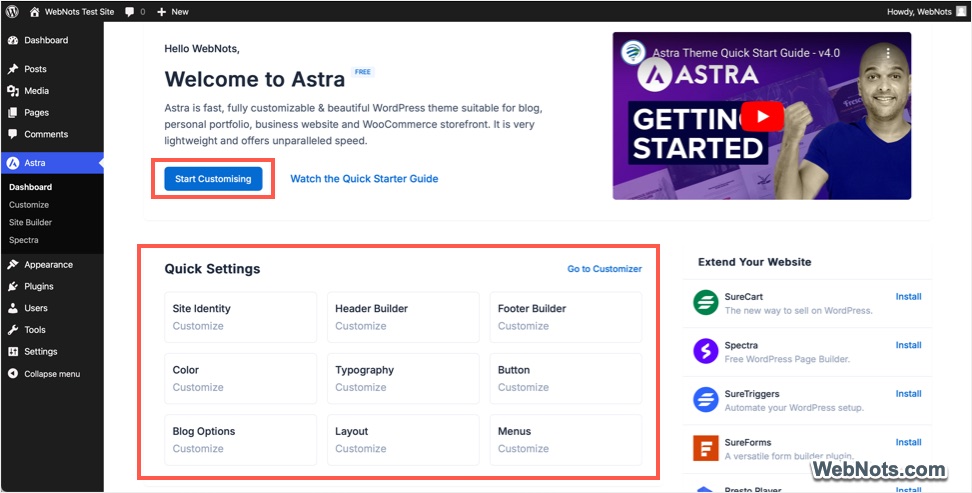
Let’s click on the “Start Customising” button to open the default WordPress customizer section (you can also reach this section from “Appearance > Customize” menu). Go through each section and setup the layout for your site. For example, go to “Pages > Single Page” section to select the container layout and sidebar layout for all your static pages under “General” tab. You can adjust the margins and paddings under the “Design” tab.
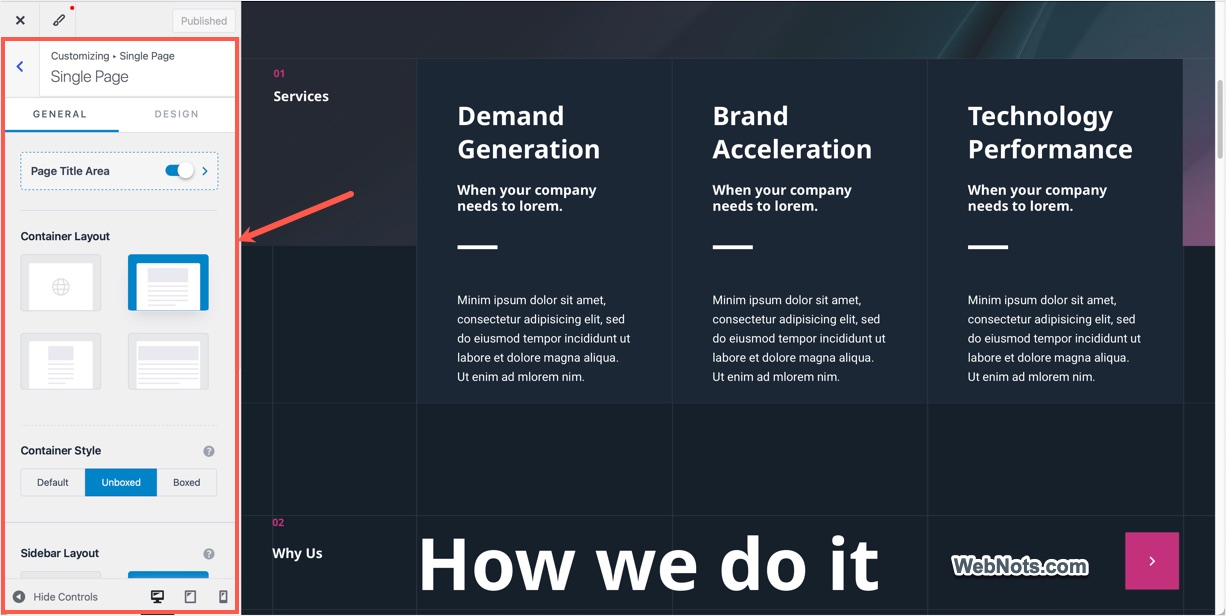
If you have imported templates, we do not recommend adjusting the setup again which will defeat the purpose of readymade import. All you need is to replace the logo, site title, and other elements in header and footer. Go to “Header Builder” and “Footer Builder” sections to adjust the elements.

If required, you can also go to “Global > Colors / Typography” sections to change the colors and fonts for your site.
Step 5: Creating Pages with Spectra
Once the template is imported, it’s time to tailor it to your needs. WordPress comes with two content types – blog posts and static pages. You should use the default Gutenberg editor to create blog posts under “Posts > Add New Post” section. Since Spectra page builder is installed, you can make use of that plugin for editing or creating pages for your site. Most templates will automatically create the basic pages like Contact and About Us. You can check the created pages under “Pages > All Pages” section.
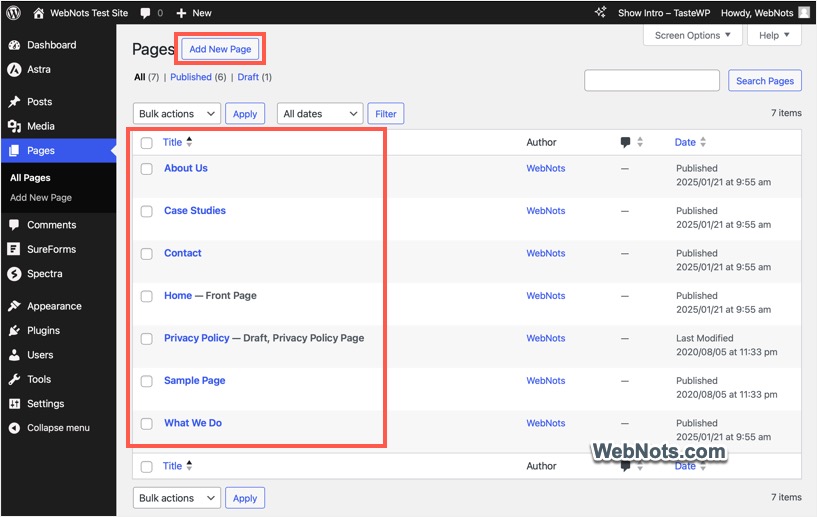
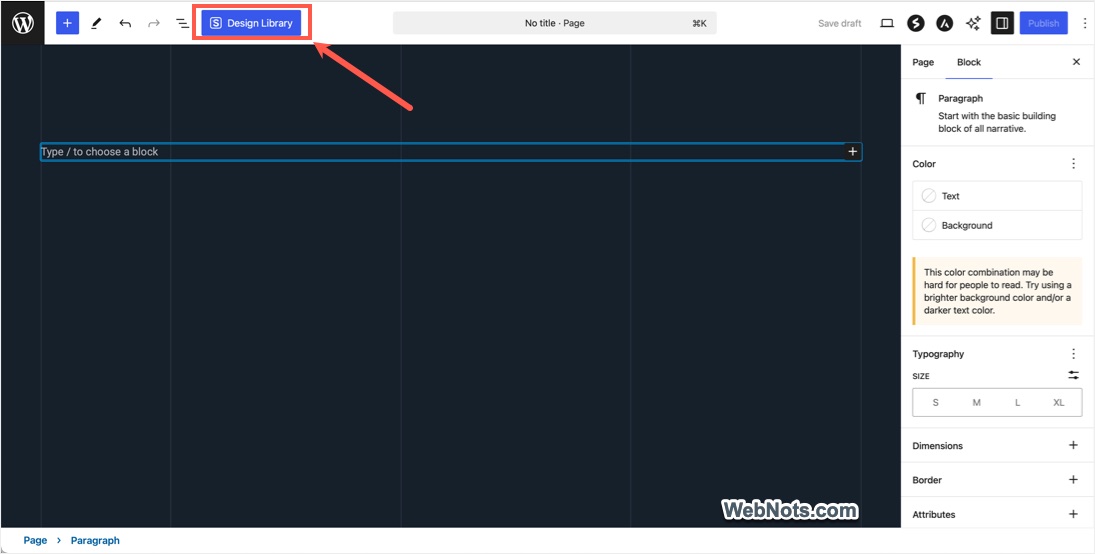
Click on any page to edit or click on the “Add New Page” button to create a new page. When you are on the editor, click “Design Library” button to view all readymade available items to import.
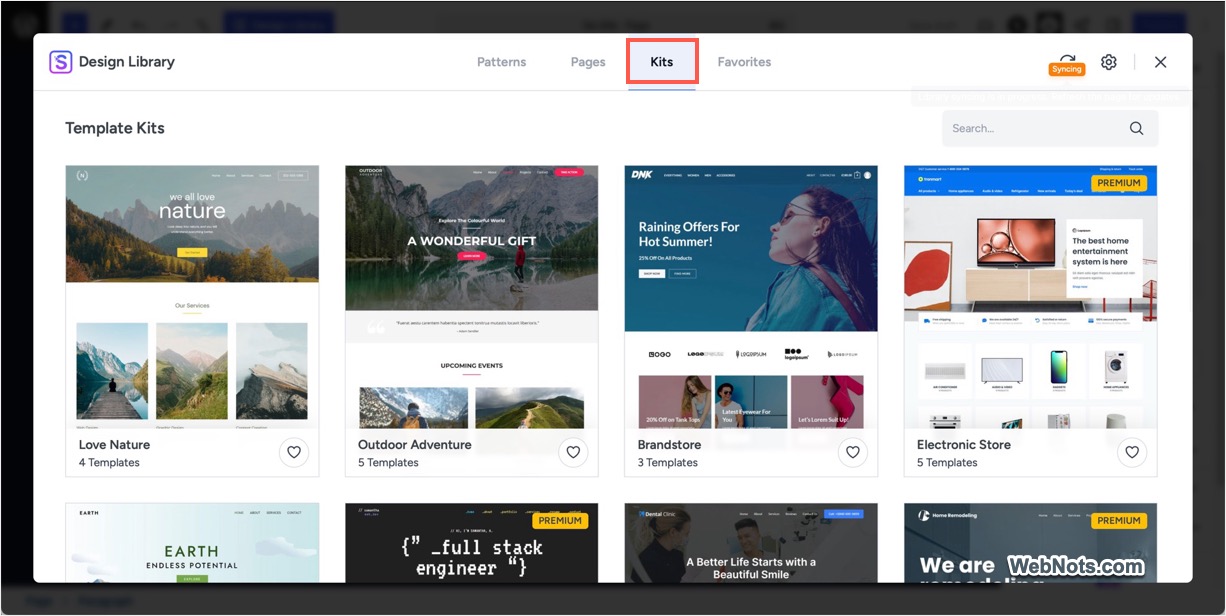
If you do not prefer to import templates as explained in step 3 above, go to “Kits” and import the template from here. This will be more visually appealing for a beginner as you can click on a template and view all includes pages individually.
If you do not want to import a complete template, then it is possible to import only a specific page template. Go to “Pages” tab and select the page you like to import. It is also possible to view design variations of the page and select the one you like.
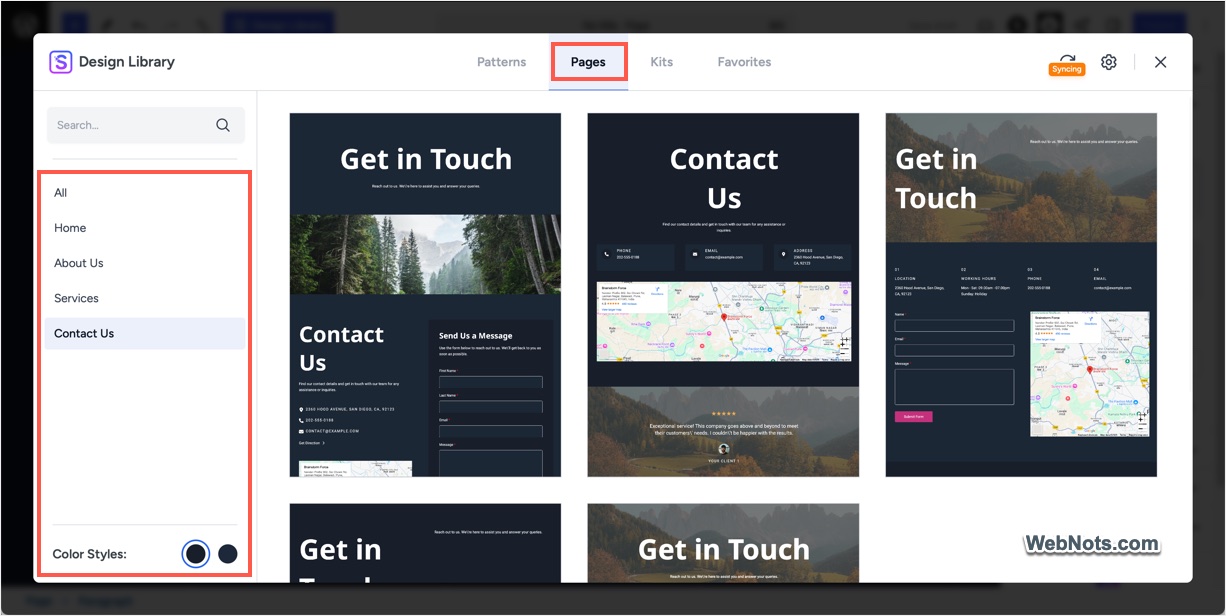
If you neither want to install an entire template nor a single page, then you have an option to import elements. Go to “Patterns” tab and import the elements to insert them on your page. For example, you can create a “Contact” page and insert the contact form instead of designing it from scratch.
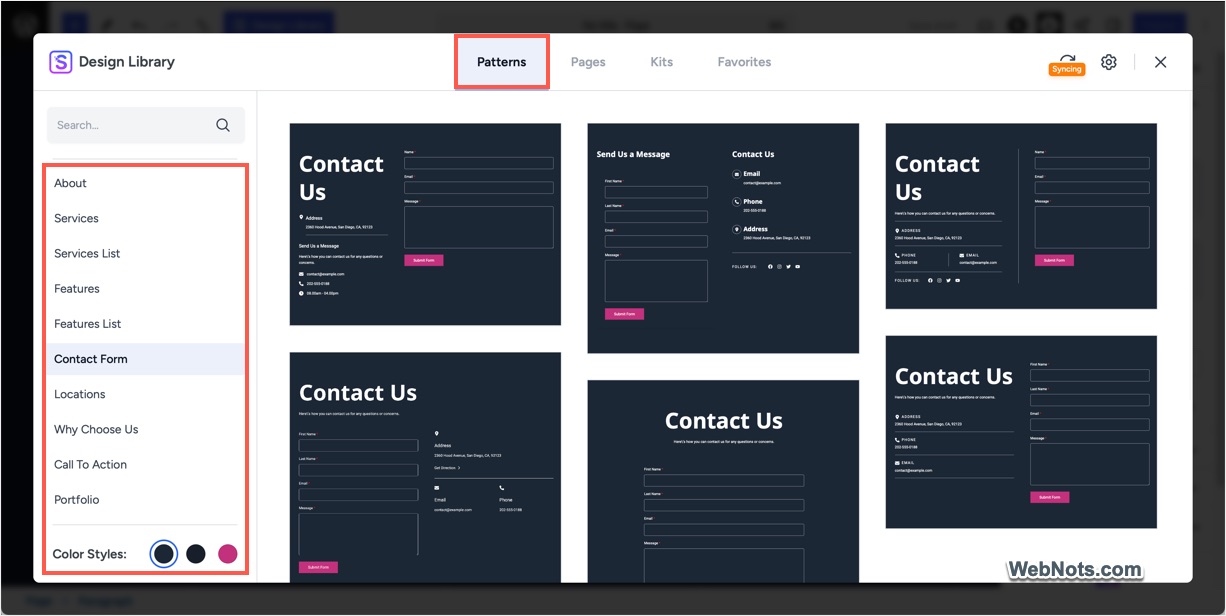
Note that for importing pages and patterns, you need to create an account with ZipWP but the kits can be imported freely.
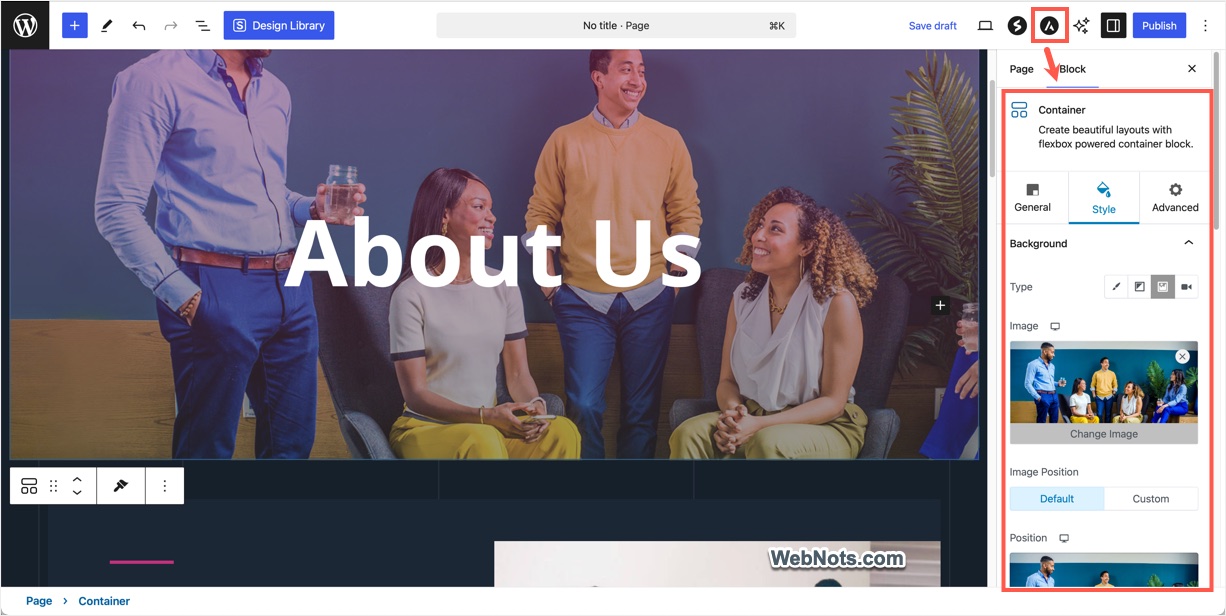
After importing required items, you can edit and change the content. Click on the “Settings” icon (this is the default WordPress Gutenberg’s settings) to change the style, container setup, etc.
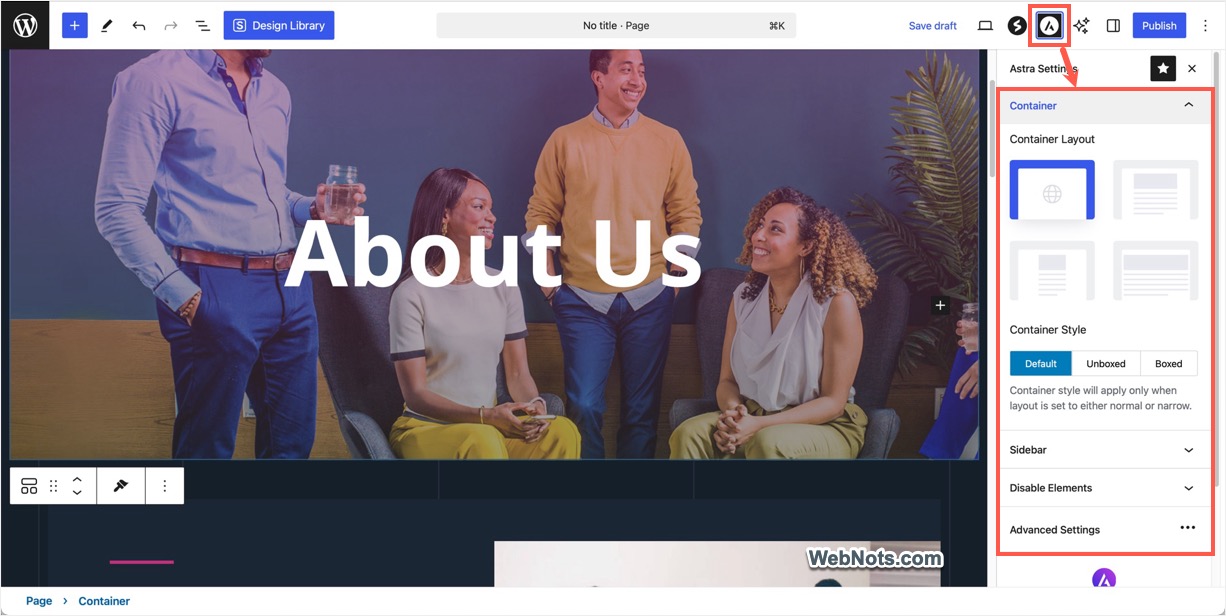
You can also click the “Astra Settings” icon to adjust the container, page layout, and manage elements. Remember that the page level settings will supersede the site level customizer settings.
Once the page is ready, click on the “Publish” button and the page will be live immediately. As mentioned, go to “Posts > Add New Post” section to create your blog posts using Gutenberg editor.
Step 6: Optimize Your Website
Though Astra theme is optimized for lightweight, it does not include SEO features like many other commercial WordPress themes (that you can purchase from Themeforest marketplace). Since a professional website is more than just looks and should also perform well, you need to optimize your site by following these tips:
- Optimize your site for search engines using Yoast SEO or Rank Math plugin.
- Enable server level caching if offered by your host. Otherwise, use page-level caching plugins like WP Rocket.
- Use Perfmatters to remove unnecessary items added on your site by WordPress core to further improve page loading speed.
- Since everything is controlled with CSS, Astra theme would tend to break some layouts especially if you built with other plugins (for example – WooCommerce product and archive pages). So, ensure your site looks great on mobile, tablet, and desktop.
- Install a security plugin like Wordfence to protect your site from threats.
Check out the complete list of search engine optimization tips for WordPress sites and take your site to next level.
Note: If you need lot of time for setting up your site (with initial content), make sure to hide your site’s search engine visibility under “Settings > Reading” by checking “Discourage search engines” option. When you are ready, uncheck this option and save your changes to make your site available for search engine crawling.
Step 7: Astra Free Vs. Pro
As you can see, the free version of the theme is sufficient to build a professional looking website without any footer ads or copyright notice. The premium version is offered as Astra Pro add-on plugin for $49 (discounted price) and you will get the following additional features:
- Additional customization options for colors, backgrounds, typography, spacing, layouts, mega menu, etc.
- Complete integration with third-party plugins like WooCommerce, Easy Digital Downloads, LearnDash and LifterLMS.
- Custom site builder elements for header, footer, pages, posts, etc. (you can find under “Astra > Site Builder” section).
- 24/7 premium support.
Other than Astra Pro, there are two more pricing plans available:
- Essential Toolkit ($79 discounted price) – includes Astra Pro features, Elementor premium templates and add-on, Spectra Pro page builder and premium templates.
- Business Toolkit ($149 – discounted price) – includes all Essential Toolkit features, SureWriter Pro, SureFeedback Standard annual plan, SureTriggers Pro & CartFlows Starter for 6 months, ZipWP Pro for 3 months and SkillJet academy membership.
All three plans include unlimited website usage, 14-days money back guarantee, 1-year free support and 1-year theme updates. Check out the complete review of Astra theme to understand the Pro features and also check our coupon page for getting the latest discounts on Astra theme.
Conclusion
With its lightweight framework, starter templates, and user-friendly customization options, Astra makes creating a visually stunning and functional website accessible to everyone – even those with little to no coding knowledge. If you are already using Squarespace, Wix or Weebly type of platform, setting up Astra theme on WordPress domain may look like a daunting task. However, this is a one-time setup and you can make use of the predefined templates to save hours of work. Another advantage is that you can use the settings and style across multiple websites to maintain branding (there are plugins to export and import settings).