The Settings app in Windows 11 replaced much of what used to be handled exclusively by the classic Control Panel. You can perform important actions like personalizing colors / themes, uninstalling apps, controlling privacy settings, manage network connections, system updates, etc. all in one place. Unfortunately, Settings app does not provide a built-in option to restore all configurations to their default values at once if you have changed the options. There are, however, few hidden methods to reset all options in the Settings app.
Before Resetting the App
Before resetting the app, make sure to take a system backup. You can create a system restore point and also use the Windows Backup app to store all your settings in the cloud (for restoring with new install).
Reset Using App Settings
- Click the Start icon and then right-click on the Settings app under “Pinned” section. Select “App settings” option from the context menu.

- If you don’t find the Settings app is pinned, click on the “All” button and find Settings in the list. Right-click on it and select “App settings” from “More” menu.

- This will take you to the hidden “System > System Components > Settings” section in Settings app.
- Scroll down to “Reset” section and click “Reset” button.

- Again, confirm your action by clicking on the “Reset” button.
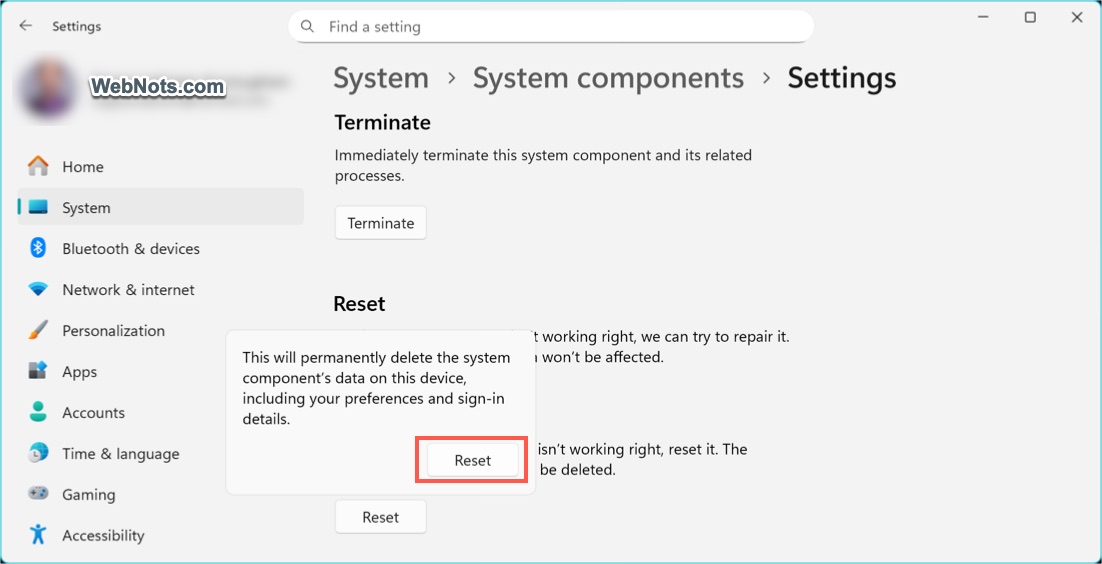
As you can see in the warning, all your settings will be permanently deleted and restored to factory defaults. This is the reason you should have a backup in case if you need to restore the old settings.
Note: You can’t access the “App settings” page by navigating through the Settings app. So, you need to access as explained above.
Reset Settings App from PowerShell
Sometimes, you may not be able to open the Settings app at all, which makes the steps above inaccessible. In these cases, you can use Windows PowerShell to re-register or reset Settings app with a simple command.
- Right-click the Start button and choose “Terminal (Admin)” option. Click “Yes” if the User Account Control pop-up appears.

- If Terminal opens with Command Prompt, press “Control + Shift + 1” or click the small arrow on the title bar and select “Windows PowerShell” option.

- Copy and paste the following command and press enter.
Get-AppxPackage *Windows.ImmersiveControlPanel* | Reset-AppxPackage- You will not see any success or confirmation message. However, this command will delete and reset all your settings.
Final Words
You can also repair the Settings app when it crashes frequently, closes immediately after opening or certain sections of Settings do not respond. Good thing is that repairing the app will not delete your customizations. If repairing doesn’t help, use reset to restore Settings app to its initial state. Remember that resetting will delete all your preferences and customizations and you need to redo the setup afresh like setting a custom color or theme.