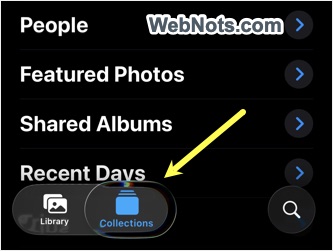
Apple introduced Liquid Glass effect with translucent elements in iOS 26 and macOS 26. Though Apple calls it as a revolutionary design, it’s a simple pain on eyes even if you don’t have any vision problems (especially on iPhone). Paying such a high price for the devices and inviting trouble for eyes with poor Liquid Glass design is unacceptable for any user. After initial rollout, Apple also added an option to reduce the transparent effects and improve accessibility. Below is an example of how Liquid Glass icons show in iPhone Photos app.
If you are frustrated, here is how to reduce the impact of Liquid Glass effect on your iPhone and Mac.
iOS: Enable Reduce Transparency and High Contrast
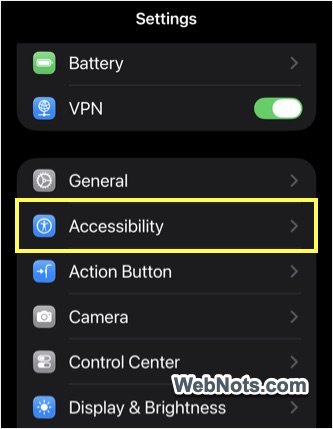
- Open Settings app and navigate to “Accessibility” section.
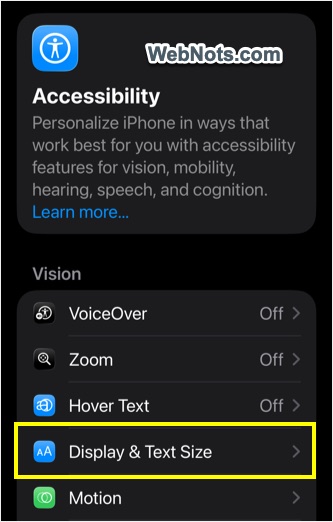
- Tap on “Display & Text Size” option under “Vision” heading.
- Turn on “Reduce Transparency” and “Increase Contrast” options.
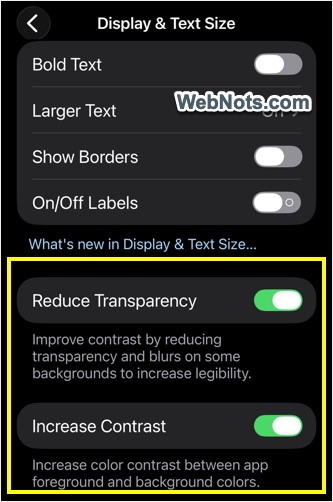
This will reduce the transparent effects and smooth your eyes especially when you are looking the screen in dark mode (or during nighttime).
iOS: Use Tinted Liquid Glass Style
First, turn off transparency and contrast options as explained above and then follow the below steps.
- In Settings app, navigate to “Display & Brightness” section.
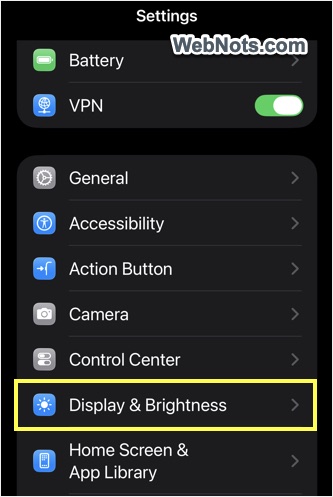
- Tap on “Liquid Glass” option.
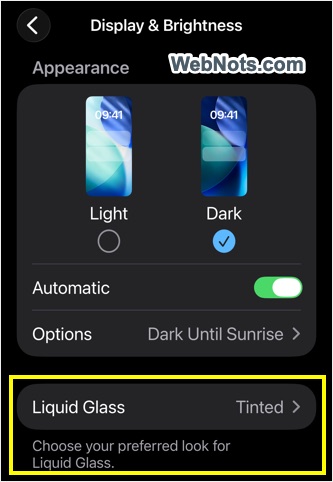
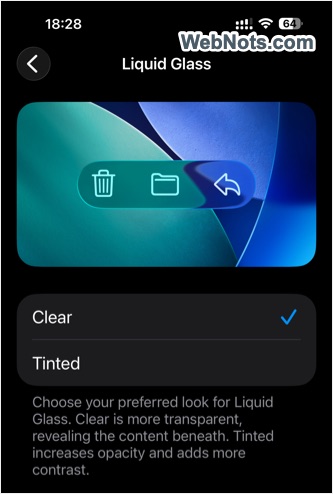
- You will see two options – Clear will have more transparency showing the content beneath while Tinted will increase the opacity and contrast. Select “Tinted” option and check the preview looks better.
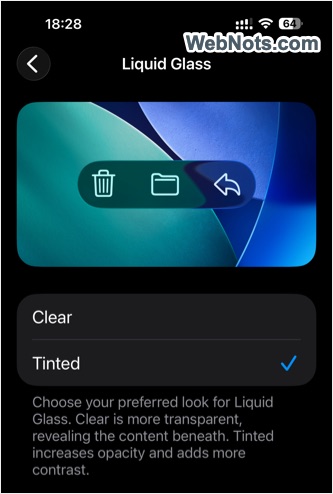
- Now, navigate to “Accessibility > Display & Text Size” section and turn on “Reduce Transparency” and “Increase Contrast” options.
- This will further reduce the Liquid Glass effects by improving the contrast.
You can also always use “Light” appearance mode and check if that helps during nighttime (instead of using dark mode). All these settings are also available on iPadOS.
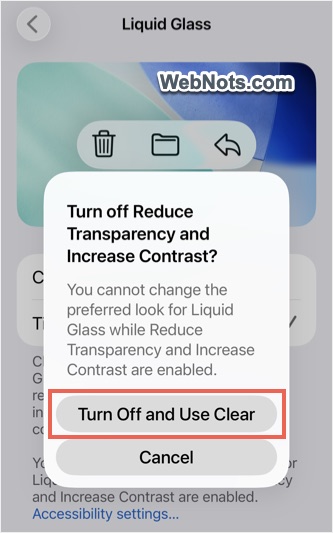
Note: As of iOS version 26.1, “Liquid Glass” options will be disabled if you have not turned off transparency and contrast options in “Accessibility” section. From 26.2 onwards, iPhone will show a notification to turn off accessibility settings and you can switch to Tinted or Clear option on the same screen without navigating away.
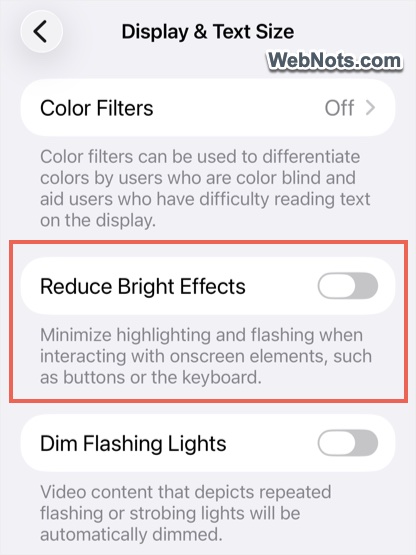
Reduce Bright Effects
Apple added another feature in iOS 26.4 for reducing the highlighting and flashing effects when using elements like menus. Go to “Settings > Accessibility > Display & Text Size” section and turn on “Reduce Bright Effects” option. This will help to further reduce the Liquid Glass effects on your iPhone.
iOS: Remove Liquid Glass Effect on Lock Screen Clock Widget
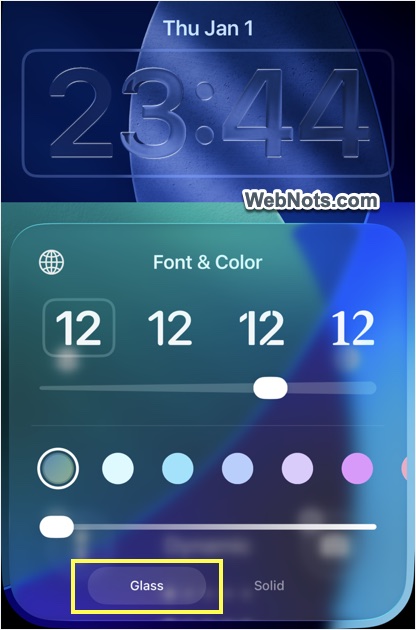
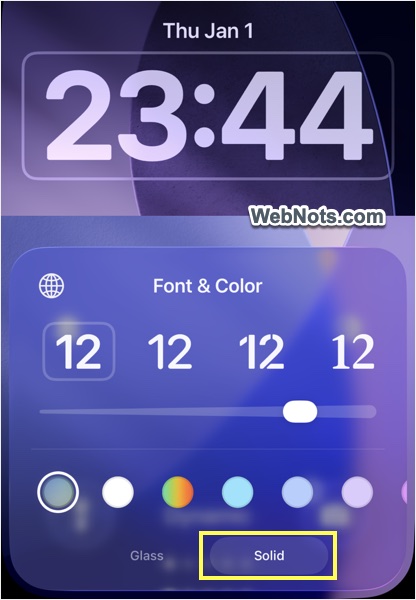
In iOS 26.2, Apple added an option to adjust the opacity of the clock widget showing on iPhone’s lock screen.
- Long press on the lock screen and tap on “Customize” button.
- Now, tap on the clock widget to see the available options.
- Select “Glass” style and adjust the slide to reduce Liquid Glass effect (move the slide to the right end).
- Otherwise, simply select “Solid” style to completely remove the Liquid Glass effect and use the solid clock.
Reduce Liquid Glass Effect on Mac
The same steps can be followed on macOS as well.
- Click on the Apple menu and select “System Settings…” option.

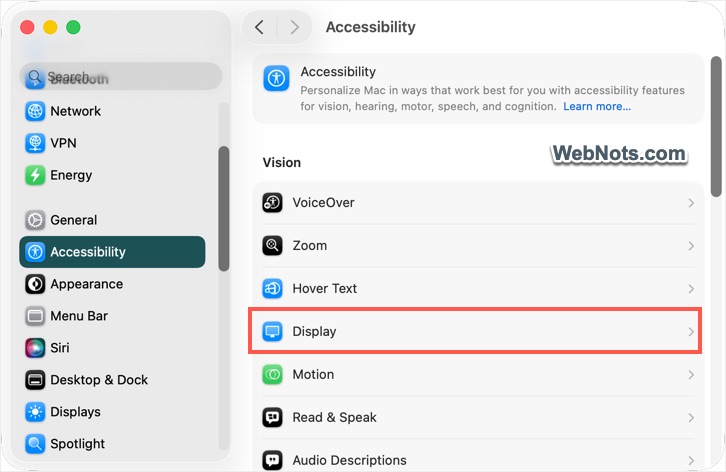
- Navigate to “Accessibility” section and select “Display” option under “Vision” heading.
- Turn on “Reduce Transparency” and “Increase Contrast” items.
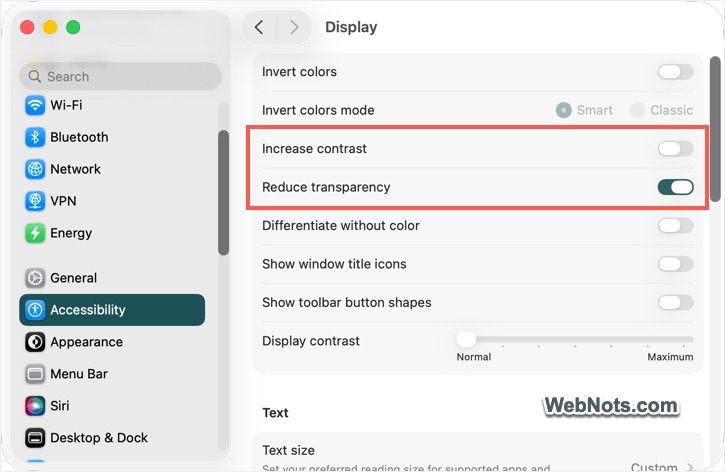
- Check if that helps to have a clear text and screens. Otherwise, disable those settings and navigate to “Appearance” section.
- Select “Tinted” against “Liquid Glass” option.
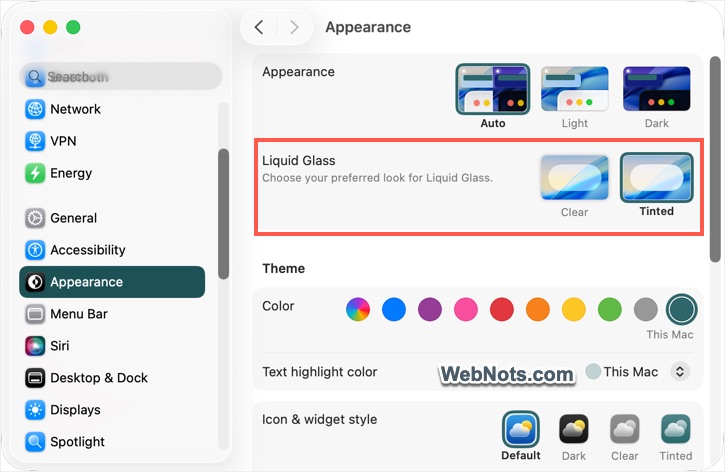
- Now, go back to “Accessibility > Display” section and enable “Reduce Transparency” and “Increase Contrast” settings.
On macOS 26.2 onwards, you will see a notification on the same “Appearance” screen for switching off accessibility settings. You can switch to Tinted or Clear option without going to “Accessibility” settings section.
Note: On iPhone, you can control transparency and contrast options independently. However, on macOS, turning on contrast option will also automatically enable transparency option or you can only enable reduce transparency.
Final Words
As mentioned, these settings will not completely disable Liquid Glass effect. At this point, all you can do is playing around with those available settings to improve the visibility and reduce eye strain. This will help while moving between home screens and navigating inside apps. Hopefully Apple will soon allow to completely get rid of the Liquid Glass as an accessibility feature.