Data is one of the most important assets in today’s digital world. It could a collection of your photos, documents for a project, contacts or any type of files. Unfortunately, data loss can happen to anyone and at any time, leaving a lasting impact on your productivity and finances. You may loss data due to many reasons like accidentally deleting files, formatting your hard disk and file corruption with software. Viruses, malware, OS problems and physical damage to your hard disk are other causes of data loss. If you are in a situation to recover permanently deleted files in Windows computer, here is how you can do that.
Recovering Lost Data in Windows
By default, Windows will send the deleted file to Recycle Bin. The file will not go to Recycle Bin when you permanently delete with “Shift + Delete” keys or delete from external drives. If you find out that you have permanently deleted important data or your data files are corrupted, you should not panic and do things that could make the recovery harder. Luckily, there are various ways of recovering your lost data ranging from a simple system restore to use of advanced data recovery solutions.
- Restore the data from system restore point.
- If you enabled backing up data to external in Windows Settings try to restore it from that drive.
- If you have backed up your data in local storage or using cloud services, you can easily restore data from the backup.
However, you should have configured the system restore / backup / cloud storage options in advance. In addition, you can only recover files as at a specific point in time meaning you could still lose your most recent files. If you do not have the backup or encounter problems with the backup data, then Microsoft has an official Windows File Recovery app which you can use to recover your data. It works on your local drives (like C: or D:) as well as on external drives (USB, SD card or external hard disk) and help to get back your lost photos, videos, documents and other files.
1. Installing Windows File Recovery App
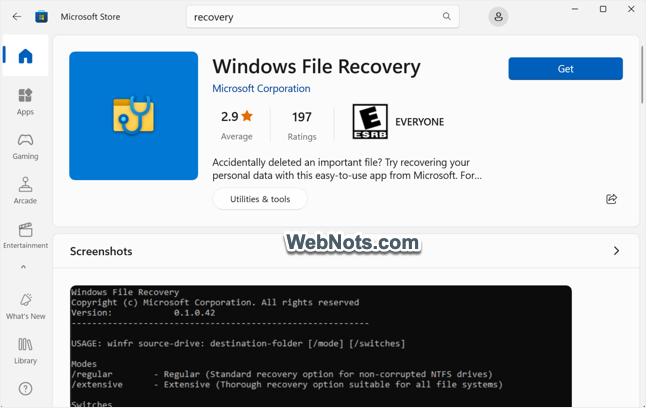
- Search and open Microsoft Store app.
- Type “recovery” in the search box and filter the results.
- Find and install “Windows File Recovery” app.
2. Launching and Understanding Syntax
After installing the app, search and open it. Unfortunately, the app does not have any graphical user interface. It will open Command Prompt with administrator access showing the example syntax of the recovery command.

Below is the simple syntax you can use in Windows File Recovery app:
winfr source-drive destination-folder [/mode] [/switches]- winfr – recovery command.
- source-drive – from where you want to recover the files.
- destination-drive – drive where you want to save the recovered files.
- mode – you can use regular or extensive mode.
- switches – filters for file path where you want to save recovered files. You can use specific file path or wildcard file names to recover. It is also possible to use multiple filters each starts with /n.
Regular mode is sufficient for NTFS drive with accessible data. However, if the data is corrupted or drive is non-NTFS, then you should use extensive mode. You can find the link to user guide below the syntax in Command Prompt. If required, go to that page to read the Microsoft documentation and get more details about the recovery command.
3. Recovering Files
Let’s say, you have permanently deleted some files from screenshots folder located in C:\Users\<username>\Pictures\Screenshots\. Now, you want use Windows File Recovery app and recover the files to D: in a regular mode. In this case, the command should be like below:
winfr C: D: /regular /n \Users\<username>\Pictures\Screenshots\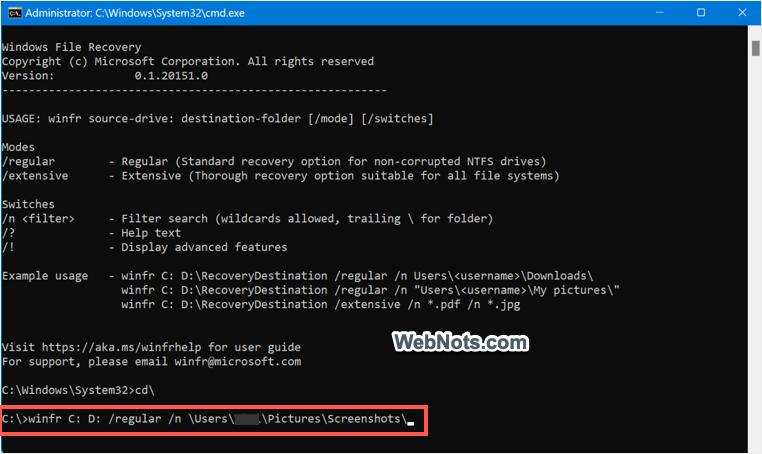
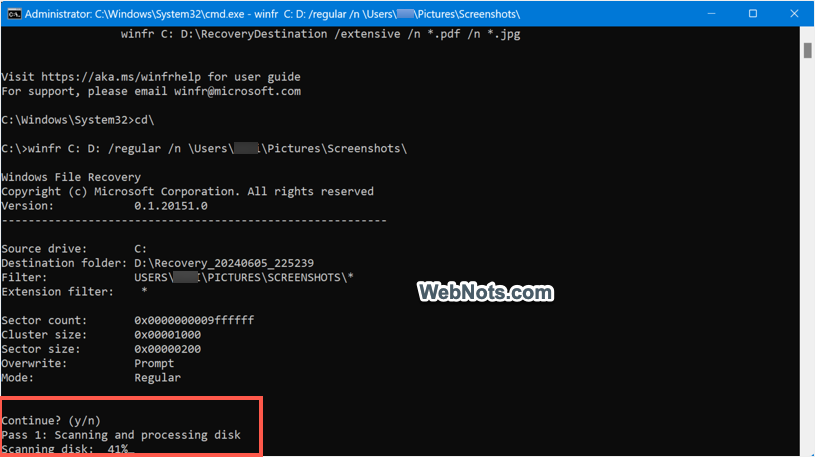
Press enter key after typing the command, the app will show the summary and prompt you to confirm the action.

Press “y” and the app will start scanning the source drive for possible file recoveries.
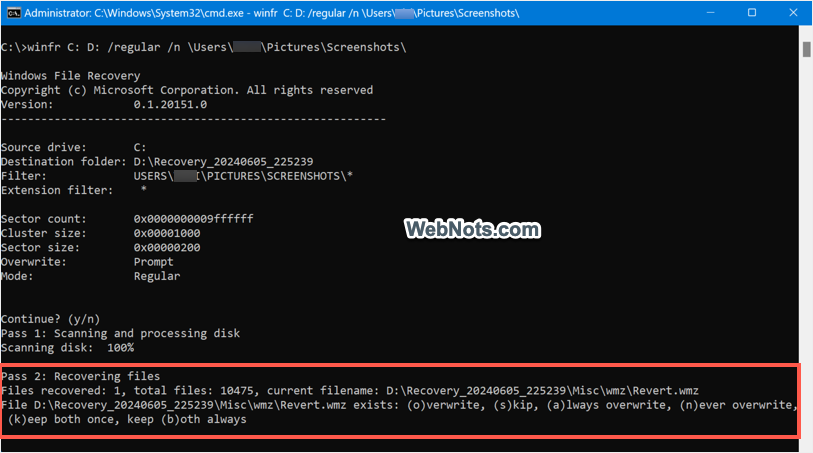
Scanning will take some time depending on the drive size and you will see the recovered file details with options to take action. Simply press “a” so that the files will be always overwritten and stored in the destination folder (or press another shortcut key mentioned in the bracket if you do not want to overwrite).
4. Check Recovered Files
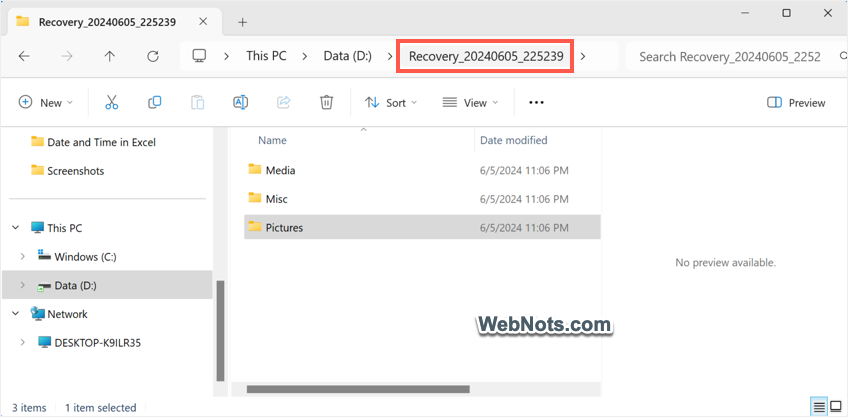
All recovered files will be stored in a folder under the destination drive mentioned in your command. The folder will have a name format like “Recovery_date_time” so that you can find it easily.
Recovery Command Examples
As mentioned, the recovery command is powerful and you can customize the filters to quickly recover the files. Here are some examples for you to understand better:
Recover all PDF files from Documents folder using regular scanning mode:
winfr C: D: /regular /n * .PDF /n \Users\<username>\Documents\Use extensive scanning mode and recover all document files with the string sales from C: drive.
winfr C: D: /extensive /n * .docx /n *sales*Summary
Data loss can be both expensive and frustrating, especially if you don’t have an updated backup or the backup files are inaccessible. Fortunately, follow the above basic steps to recover lost data using Windows. File Recovery app. It works on Windows 10 and 11 and with any internal and external drives. The only problem is that the app does not offer any user interface which means you need to use Command Prompt. This may be inconvenient for some users and in such case, you may need to look for other third-party apps with graphical user interface.