In our earlier article, we have explained on how to find the mouse point on Windows PC. Similar to Windows, macOS also offers few options to quickly locate the trackpad or mouse pointer. This helps if you have a vision problem or trouble in finding the pointer with lighter / darker screen.
System Settings Vs System Preferences
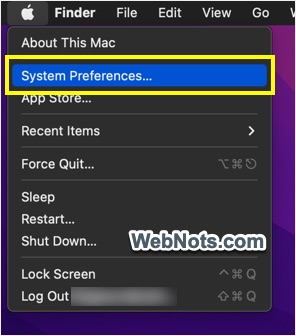
macOS Ventura and later versions use the System Settings app, whereas macOS Monterey and earlier versions use System Preferences. Although the options mentioned below are available on all macOS versions, the interface differs significantly. For this reason, we have explained both scenarios, and you can follow the instructions that match your macOS version. Simply click the Apple logo on top left corner and you will find the “System Settings…” or “System Preferences…” menu based on your macOS version.
1. Finding Mouse Pointer in macOS Ventura or Later
Follow the below steps if you are using macOS Ventura or later with the System Settings app.
1.1. Shake to Find Mouse Pointer
You can simply shake the mouse back and forth to locate the pointer quickly on Mac. Alternatively, swipe like scratching on the trackpad to highlight and enlarge the pointer.
- Click the Apple logo on top left corner and select “System Settings…” menu.

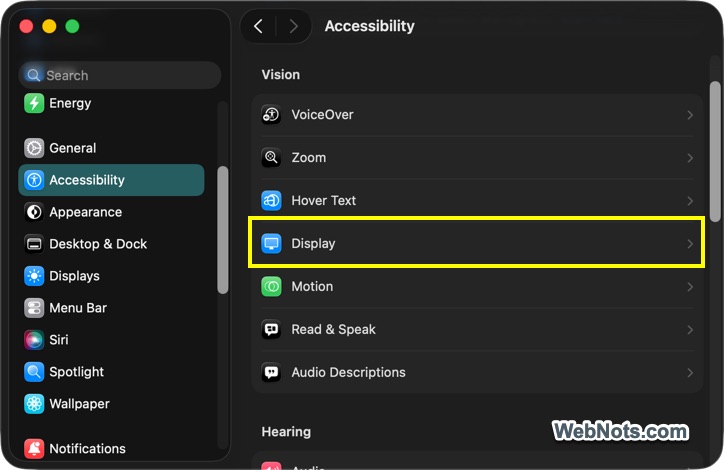
- Go to “Accessibility” section and open “Display” option under “Vision” heading.
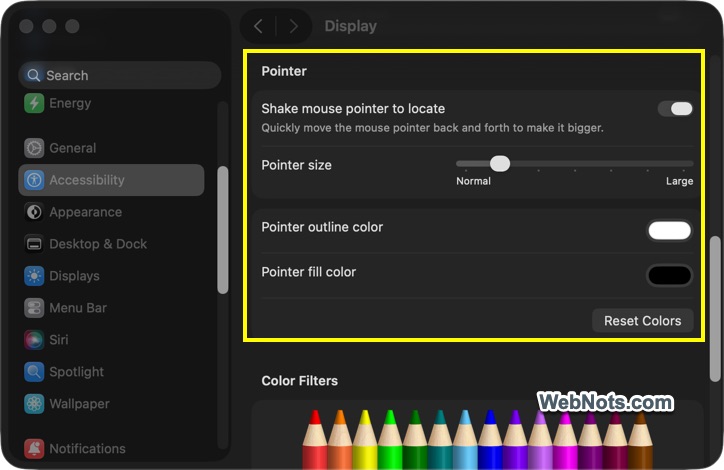
- Scroll down on the right pane to “Pointer” section and turn on “Shake mouse pointer to locate” option. You can also change the pointer’s size and colors (outline and fill) to easily locate it.
1.2. Use Head Pointer
Using head movement (yes, your head’s movement) is another option to track the pointer in macOS.
- Go to “Apple Menu > System Settings… > Accessibility” section.
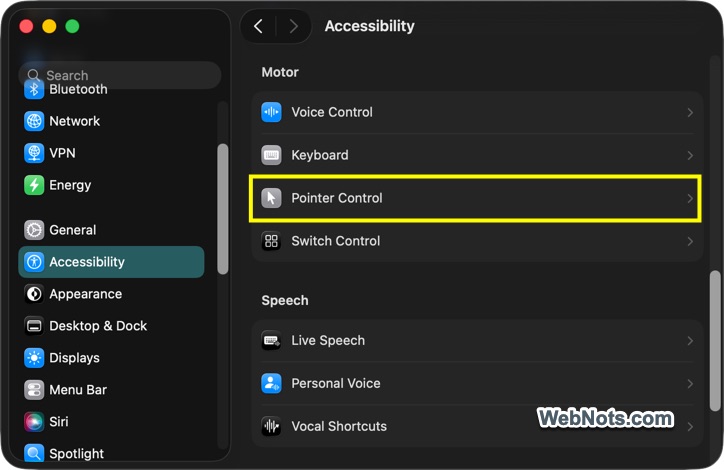
- Scroll down and open “Pointer Control” option under “Motor” heading.
- Scroll down to bottom and turn on “Head pointer” option under “Alternate Control Methods” heading.
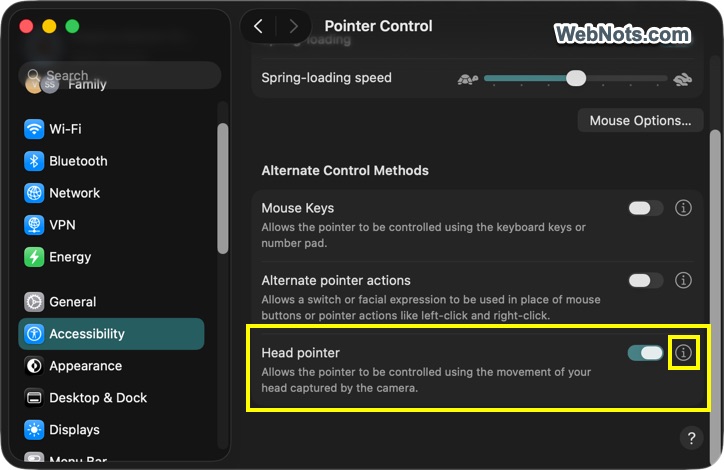
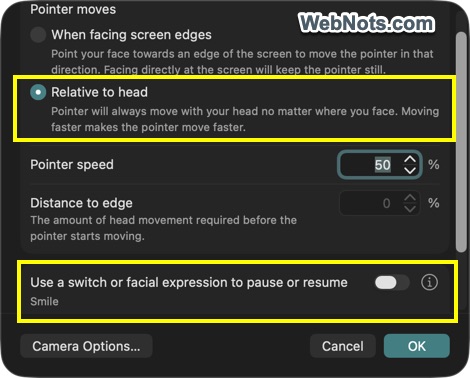
- Click the ⓘ icon showing next to “Head pointer” option. Select “Relative head” under “Pointer moves” section.
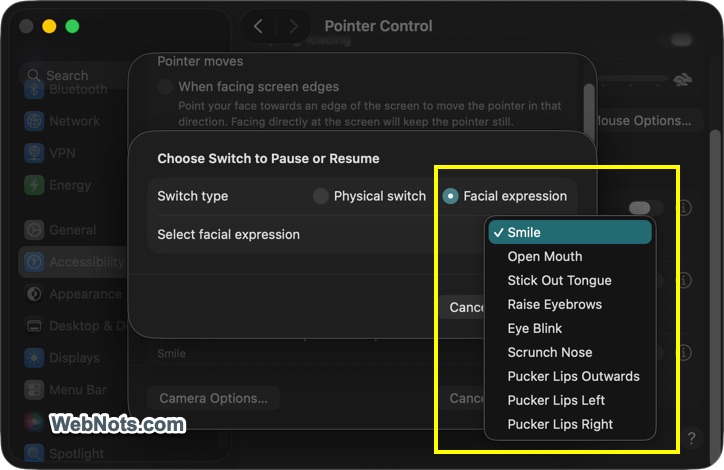
- Turn on “Use a switch or facial expression to pause or resume” and click the ⓘ icon.
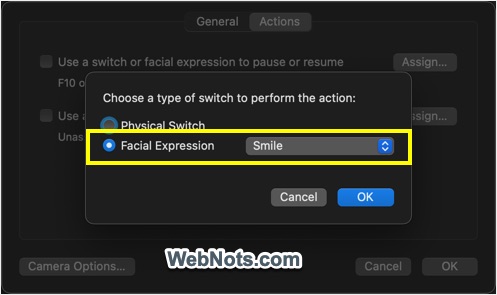
- Now, select “Facial expression” as “Switch type” and select one of the actions from the drop-down like “Smile or Eye Blink”.
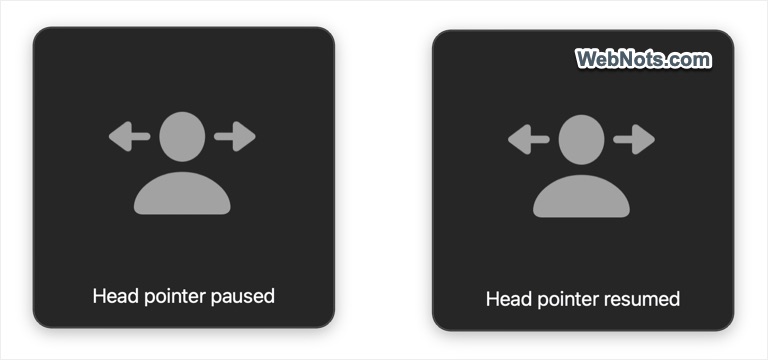
From this point on, you can control the mouse pointer using head movements (your device also works). Mac uses the built-in camera to track your head and move the pointer accordingly. Since continuous pointer movement can be distracting, it is recommended to first perform the selected action, such as a smile or an eye blink, to pause the head pointer. Whenever you need to locate the pointer, perform the same action to resume head tracking. You can then move your head to locate or reposition the pointer. Once done, pause the head pointer again and continue your work without interruption.
2. Finding Mouse Pointer in macOS Monterey or Earlier
Follow the below steps if you are using old macOS Monterey or earlier.
2.1. Shake to Find Pointer
- Go to “Apple Menu > System Preferences…” section.
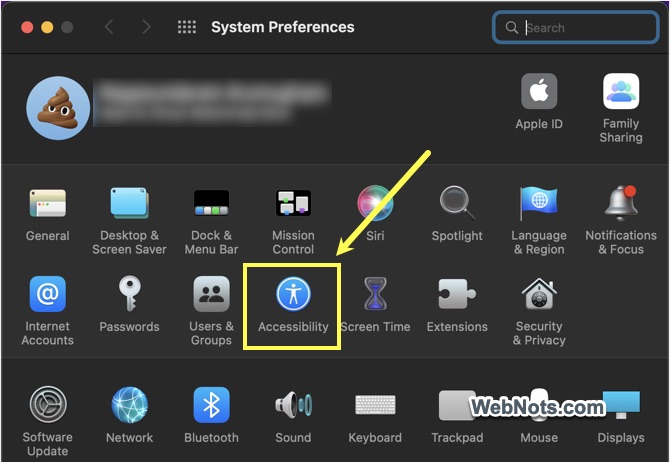
- Click on “Accessibility” icon and go to “Display” section.
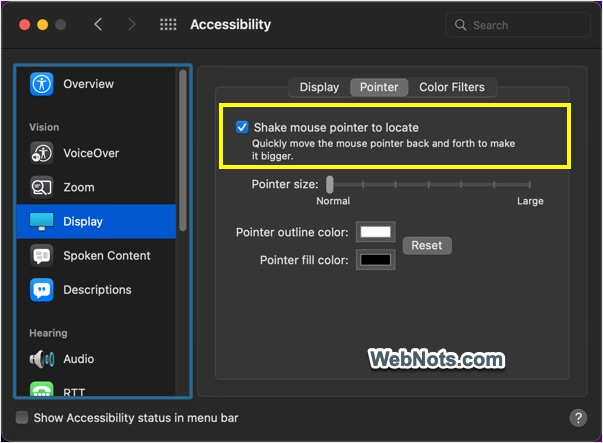
- After that, click on “Pointer” tab (earlier it was named as Cursor). Here, you can enable the option “Shake mouse pointer to locate”, adjust the pointer’s size and colors.
2.2. Use Head Pointer for Tracking
- Go to “Apple Logo > System Preferences… > Accessibility” section.
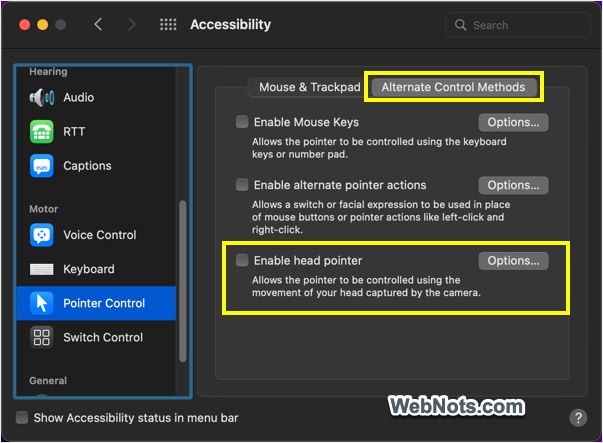
- This time open “Pointer Control” under “Motor” heading.
- Go to “Alternate Control Methods” tab and check “Enable head pointer”. After that, click the “Options” button.
- Check “Use a switch or facial expression to pause or resume” under “Actions” tab and then click the “Assign…” button.
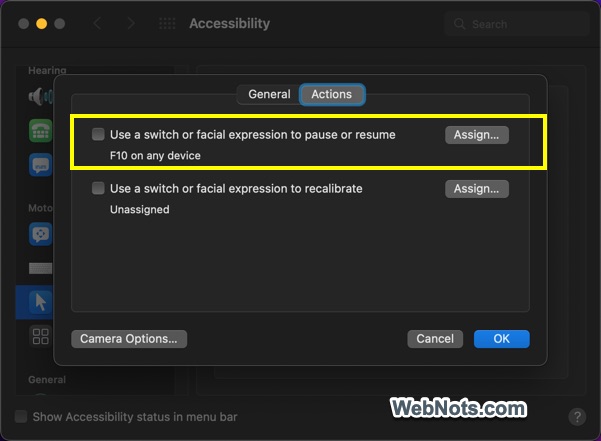
- Now, select “Facial Expression” and choose an action from the drop-down.
Final Words
Hereafter when you miss the pointer, drag the mouse and shake it up and down or sidewise to show the pointer bigger. You can also swipe back and forth on the touchpad to show the mouse pointer bigger. Alternatively, use the head movement for tracking the pointer. You can also schedule night shift or light or dark modes to see if that helps.