A picture is worth a thousand words – you can easily explain a lengthy concept using a single image. WordPress also makes it is super easy to upload images on your site. But many people do not aware that WordPress automatically limit the large image dimensions to specific size. However, you can also manually limit the image width and proportionate height to save server space and improve page loading time.
WordPress Default Behavior
Before proceeding, it is important to understand the default behavior of WordPress. Let’s upload a big image of 2500 x 2000 pixels original size through Media Library section. The uploaded image size is of 2500 x 1536 pixels which means the width is 2500 pixels and the height is 1536 pixels. As you can see, the width is retained while the height is limited to 1536 pixels.
Again, let’s upload the image with 5000 x 3000 pixels. This time you will find WordPress restricts both width and height to 2560 x 1536 pixels.
So, if you did not modify the default behavior, WordPress will scale the large image to 2560 x 1536 pixels. This feature was introduced with WordPress version 5.3 as explained in this documentation.
Limit Maximum Image Width Dimension
If the default behavior is not sufficient for you, then you can use additional plugins to restrict the width.
- Login to your WordPress admin dashboard.
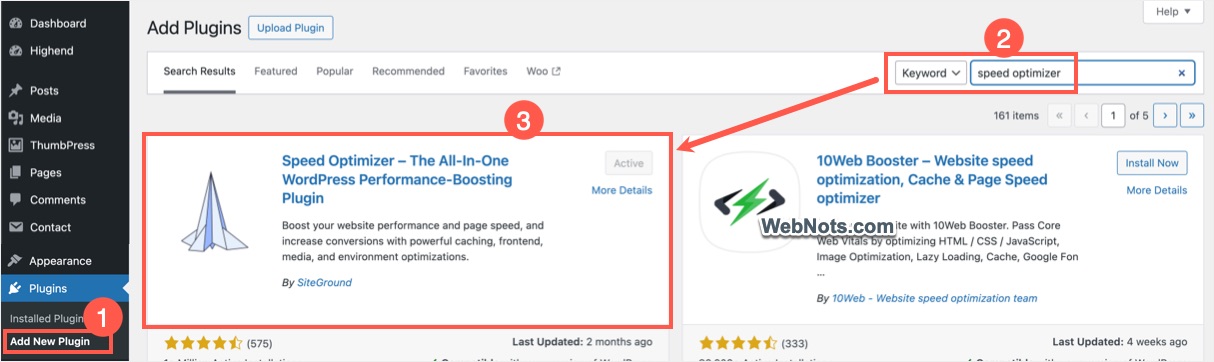
- Navigate to “Plugins > Add New Plugin” section.
- Search for “speed optimizer” and filter Speed Optimizer plugin.
- Click the “Install Now” button and then “Activate” button.
- Go to “Speed Optimizer > Media” section.
- Scroll down to bottom and click the dropdown against “Maximum Image Width” option under “Media Optimization” heading.
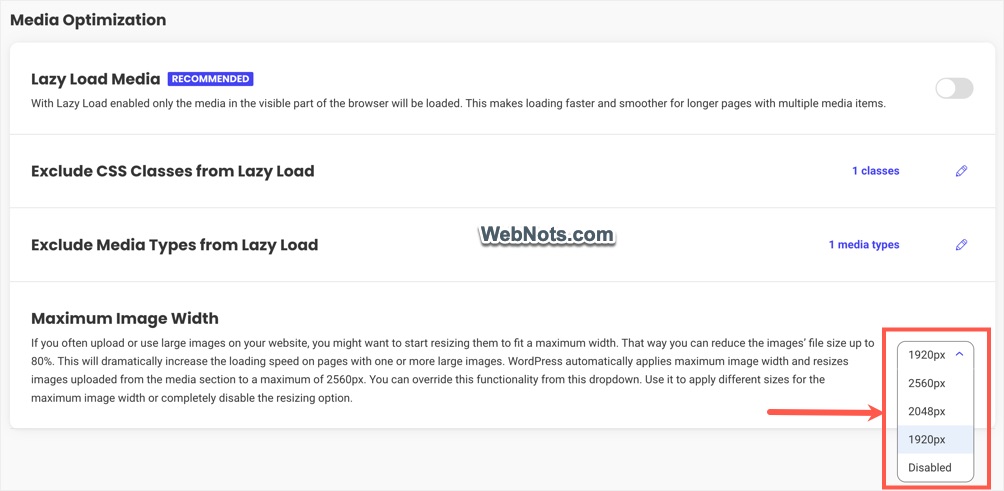
- Select one of the available width options – 2560px, 2048px or 1920px. You can select 1920px which is more than sufficient for normal usage.
- The changes will be instantly saved and the image upload restriction of 1920px width will be effective immediately.
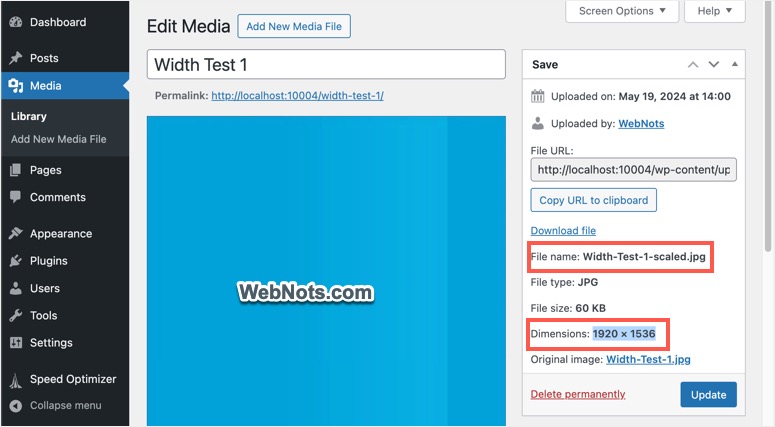
Now, upload an image with 2500 x 2000 pixels through “Media > Add New Media File” section. The uploaded image will be of 1920 x 1536 pixels size. This is due to the plugin will restrict the width to 1920 pixels and WordPress default will restrict the height to 1536 pixels.
Completely Restrict Uploading Based on Height and Width Dimension
Many plugins work on the above logic by combining WordPress + plugin’s settings which will be confusing for a normal user. If you want to simply prevent uploading images larger than certain size, then you can ThumbPress plugin for that purpose.
- Go to “Plugins > Add New Plugin” section in your WordPress admin panel.
- Search for “thumbpress” to find ThumbPress plugin.
- Install the plugin and activate it on your site.
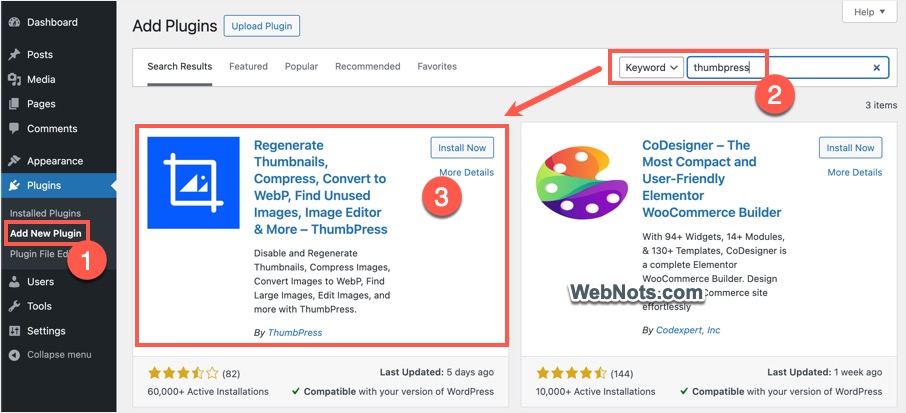
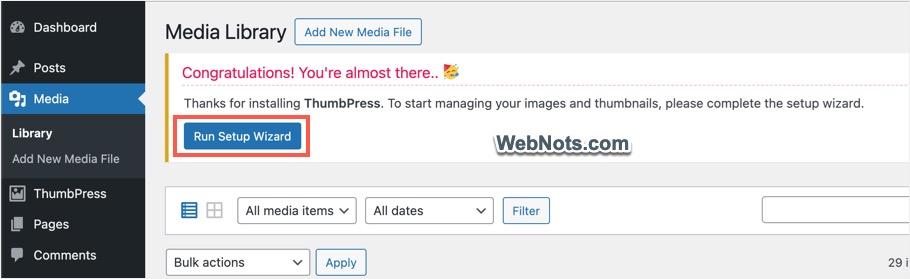
- The plugin will prompt you to run a setup wizard and click on the “Run Setup Wizard” button.
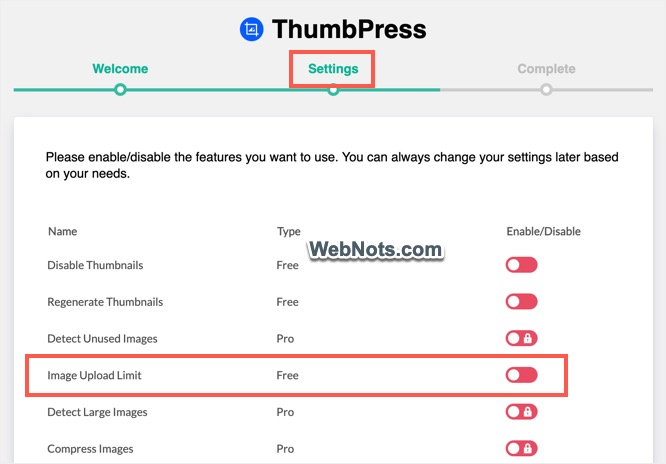
- Turn on “Image Upload Limit” option when you are in “Settings” step.
- Alternatively, go to “ThumbPress > Modules” menu and activate “Image Upload Limit” module.
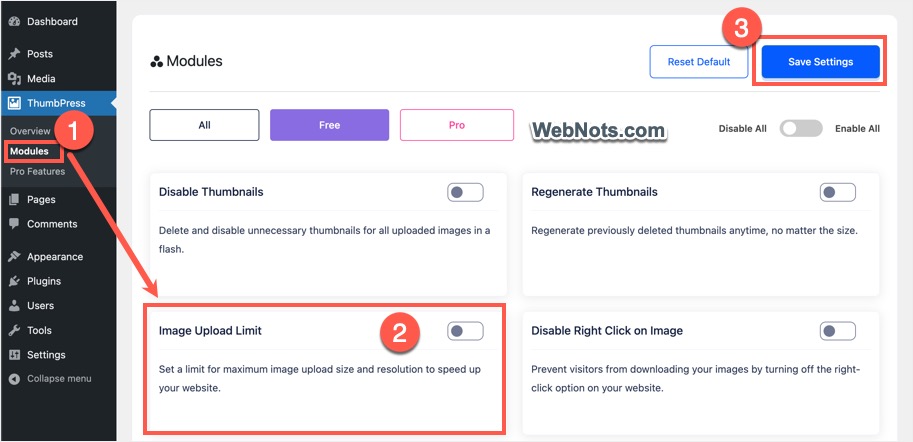
- Now, you will see an additional item called “Image Upload Limit” under “Modules” section and go to that section.
- Set the maximum size in KB, maximum width in pixels and maximum height in pixels.
- Click “Save Settings” button.

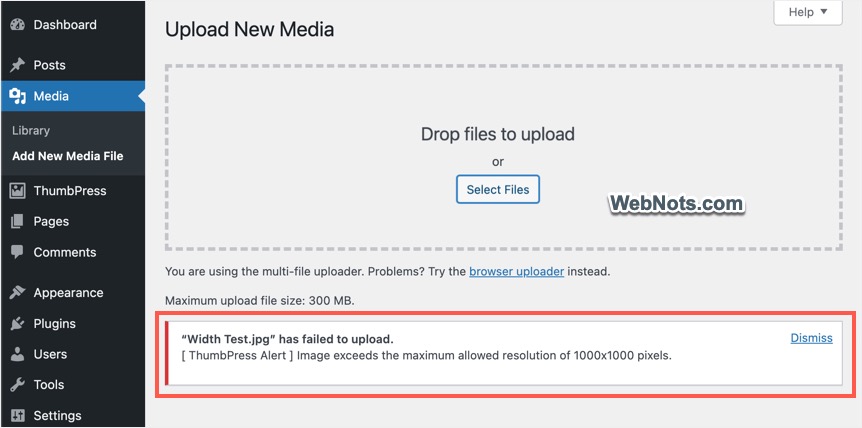
Go to “Media > Add New Media File” section and upload an image larger than the set size in plugin settings page. You will see the upload fails with an alert message from the plugin saying the image exceeded the maximum allowed resolution.
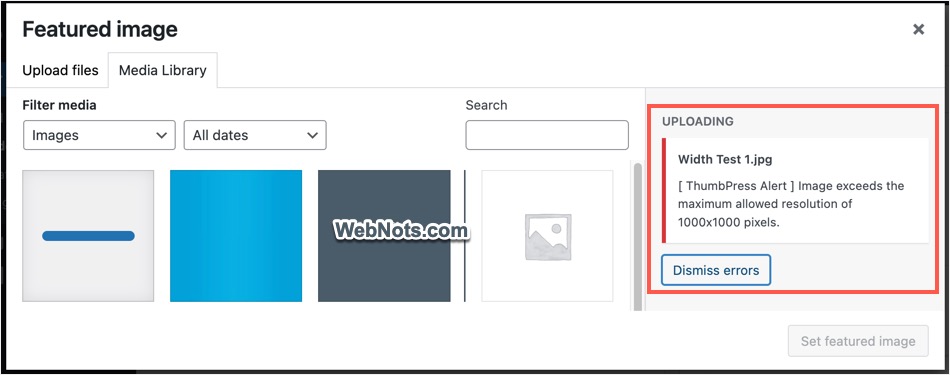
Note: You can also upload the image directly in the post editor using “Image” or any other media block. You will see the same image upload error as shown below:
Other Points to Consider
- Unless you have a photography or portfolio site, you should consider restricting the image dimensions. Plugins like ThumbPress also helps to bypass the WordPress limit and allows you to set any custom width / height.
- If you are seeing Cumulative Layout Shift (CLS) issue in Google PageSpeed Insights, you should add width/height dimension attributes to all <img> tags. You can do this automatically by using plugins like WP Rocket of Perfmatters.