
Managing browsing data – such as bookmarks, history & passwords – helps streamline your browsing experience across devices. It is easy to sync tabs and browsing history from iPhone to Mac or other devices using iCloud. However, as of iOS 18, there are no default options available to import browsing data from one iPhone and export to another. Good thing is that Apple introduced this feature in iOS 18.2 to make your life easier and here is how you can do that.
Exporting Browsing Data from Safari
First, make sure to update your iPhone to the latest iOS version and follow the below steps.
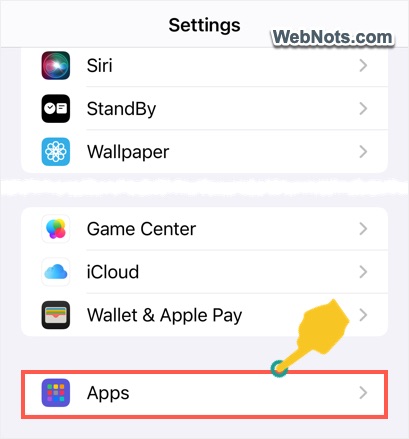
- Open Settings app, scroll down to bottom and tap on “Apps”.
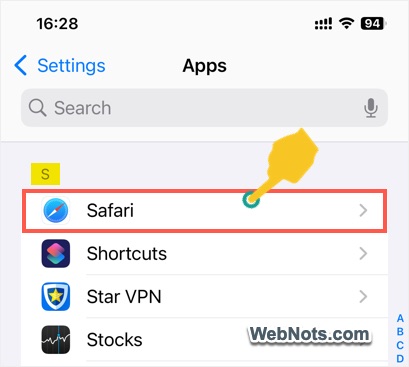
- Scroll to letter S position to find Safari app and tap on it.
- Scroll down to “History and Website Data” section and tap on “Export” link.

- On the “Export Browsing Data” screen, select the items you want to export. You can export bookmarks, browsing history, extensions, saved credit cards and passwords.
- After selecting the items, tap on “Save to Downloads” button.

- Confirm your action with Face ID or passcode for exporting the content.
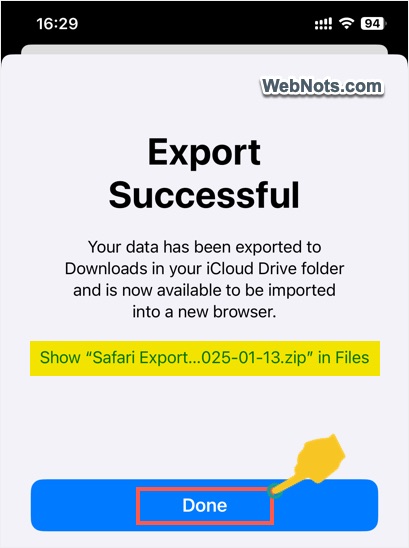
- You will see an “Export Successful” message with a link to downloaded ZIP file.
- Tap on “Done” button to get back to the settings page and now you can close the Settings app.
Viewing Exported File
The ZIP file will be automatically saved in “Downloads” folder in your iCloud Drive. Unfortunately, there are no options to select a different location for exporting.
- Open Files app and navigate to “iCloud Drive > Downloads” folder.
- Find the browsing data file with the name as “Safari Export Date_of_Export.zip (for example – Safari Export 2025-01-13).
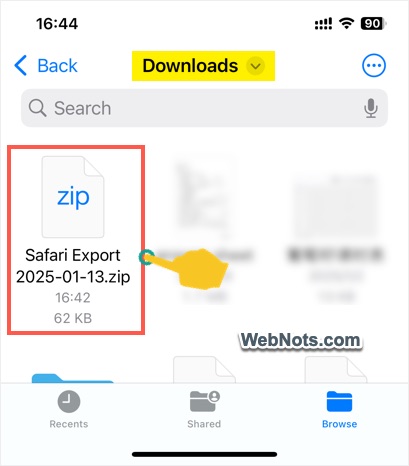
- Tap on the ZIP file and extract the content to a folder.
- You will find separate files for browsing history, passwords, bookmarks, passwords and extensions. Tap on individual file to view its content.

As you can see, the file’s content is not protected and it is stored in iCloud Drive. This means anyone from any of your device can easily check the exported browsing data content like your passwords or browsing history. So, make sure to move the file to local iPhone’s storage or protect it properly to avoid unauthorized access.
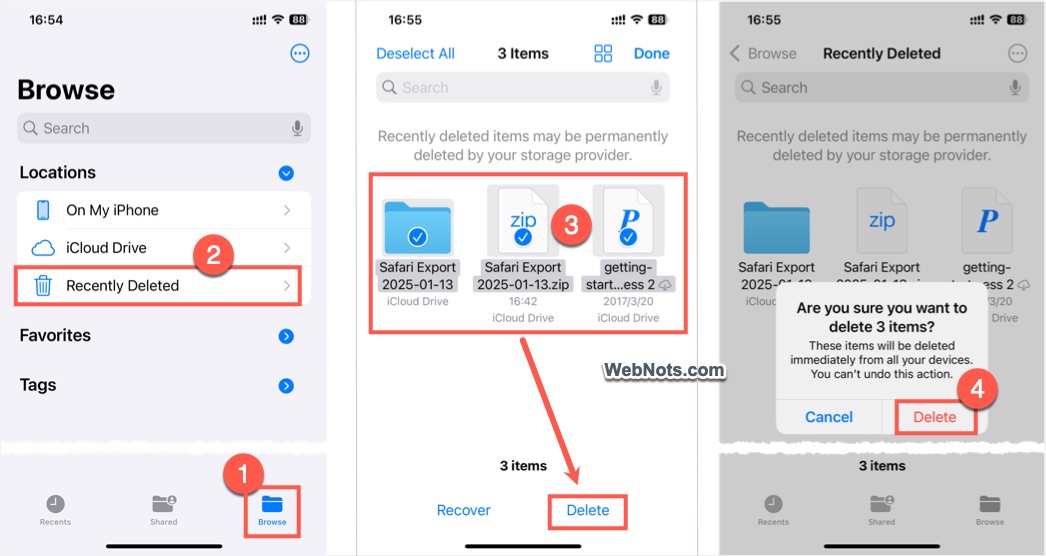
Note: Files deleted from iCloud Drive will NOT be permanently deleted. They will be sent to “Recently Deleted” folder and can be restored within 30 to 45 days. Open Files app, tap on “Browse” on the bottom and then go to “Recently Deleted” folder. Select the browsing data file and delete it to permanently remove from your devices/account.
Importing Browsing Data in Safari
You need the exported ZIP file for importing the content to Safari on any iPhone.
- Open Settings app and go to “Apps > Safari” section.
- Scroll down and tap on “Import” link under “History and Website Data” section.

- On the “Import Browsing Data” screen, tap on “Choose File…” button and select your ZIP file.

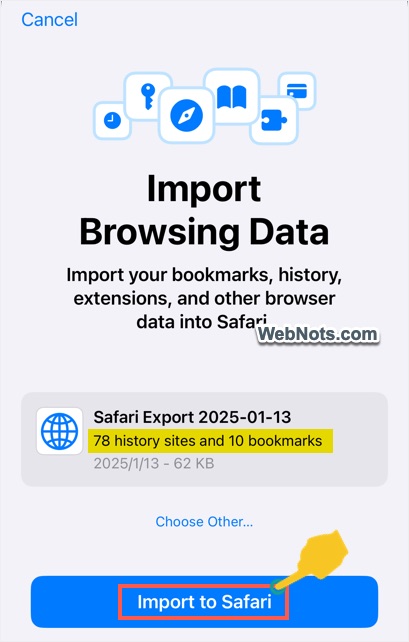
- You will see the number of items in the file that will be imported and tap on “Import to Safari” button.
- Use Face ID or passcode to confirm your action.
- A success message will show with the details of the content imported and tap on “Done” button to finish the action.

Now, Safari will show a prompt to delete the imported browsing data ZIP file to protect your security & privacy. If you do not need the file, tap on “Delete File_Name” button to permanently delete it. Note that deleting in this manner will not send the file to “Recently Deleted” folder and the file will be deleted permanently.


