Apple’s Magic Keyboard is a slim yet powerful device holding week-long battery power and allows you to connect wirelessly. It comes with a Touch ID button to unlock your Mac and can be used for various purposes like authenticating in-app purchases. Sometimes Touch ID will stop working suddenly and always prompt you to enter the password. If you face Touch ID problems with Magic Keyboard, here are some tips to fix the issue.

Touch ID in Apple Magic Keyboard
You can find the Touch ID button or key on top right corner of the Magic Keyboard. It has an internal rechargeable battery and uses Bluetooth to connect wireless to your Mac or iMac. Before troubleshooting the problem, make sure the keyboard is connected with Mac, the key and your finger are clean.
1. Check System Requirements
If you have purchased the keyboard or trying to connect it temporarily from another Mac, make sure your system supports the following prerequisites.
- Your Mac should have Apple silicon chip – click the Apple logo and go to “About This Mac” to confirm the type of processor used on your Mac. it should show the “Chip” information as Apple M1, M2, M3 or any Apple series.
- System should run on macOS (Big Sur) 11.4 or later – check your macOS version on the same “Apple logo menu > About This Mac” screen.
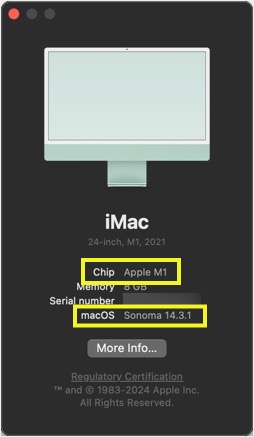
So, if you are using Intel based processor or outdated macOS then Touch ID will not work.
2. Update macOS
If your Mac is running older macOS version, then go to “Apple logo menu > System Settings… > General > Software Update” section and update it to the latest version. This will also help to fix any bugs in the current version you are using.

Also, if you are running beta version, it is a good idea to opt-out and install stable macOS.
3. Disconnect and Reconnect Magic Keyboard
If you notice the Touch ID is disabled without any reasons, then this should help to fix it.
- Click the Bluetooth icon on top bar and then click on the Magic Keyboard option to disable it.
- Again, click the Bluetooth icon and then click Magic Keyboard to enable it.
- You will see a “Connected” notification showing indicating the keyboard is reconnected.
- Now go to Apple menu and select “Lock Screen” option or press “Control + Command + Q” keys.
- You should be prompted to use Touch ID or password to unlock the screen as normal.

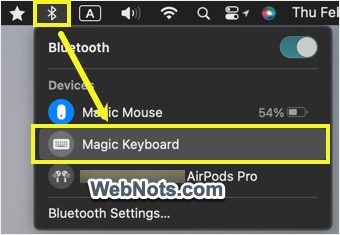
Note: Connected keyboard will show the icon in blue color while it will show in grey color when it is disconnected. If you do not see Bluetooth icon on top bar, check this article on how to use Bluetooth in Mac.
4. Connect Magic Keyboard with Lightning Cable
Sometimes, running with low battery can affect the working of entire keyboard including the Touch ID function. Click on the Bluetooth icon and check the battery percentage of Magic Keyboard. If it shows low percentage, then connect the keyboard with your Mac using the USB-C to lightning cable that comes with the purchase. Wait for some time for the keyboard to charge fully, restart your system and check if that helps to fix the Touch ID issue in your Mac.

5. Check Touch ID Settings
As mentioned, Touch ID on Mac can be used for various authentications purposes like unlock system, in-app purchase, Apple Pay, autofill passwords for website logins and switching user accounts. If you notice the Touch ID is not showing for some of these purposes but working for other purposes, then you should enable the corresponding setting.
- Click the Apple logo and go to “System Settings…” menu.
- Navigate to “Touch ID & Password” section.
- Enable the required settings showing below the fingerprints.

6. Disable Automatic Login
Automatic login allows you to bypass the lock screen and see the desktop without authenticating with password or Touch ID. If you are not seeing the login screen at all, then make sure to disable automatic login and then you will be prompted with Touch ID / password for unlocking.
- Go to Apple logo menu and click “System Settings…” menu.
- Navigate to “Users & Groups” section.
- Click the dropdown against “Automatically log in as” and select “Off”.
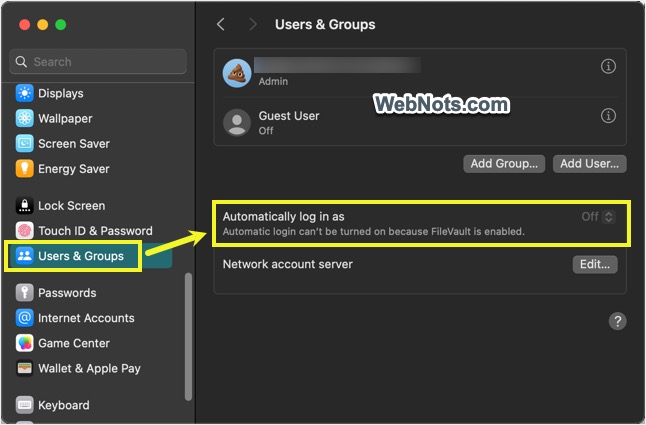
Note: In this case, you should still see Touch ID unlock option for other actions like website logins, in-app purchases, etc.
7. Add New Fingerprints
If none of the above options work, then you can remove all previously added fingerprints and re-add again.
- Go to “Apple logo > System Settings… > Touch ID & Password” section and click the previously added fingerprint.
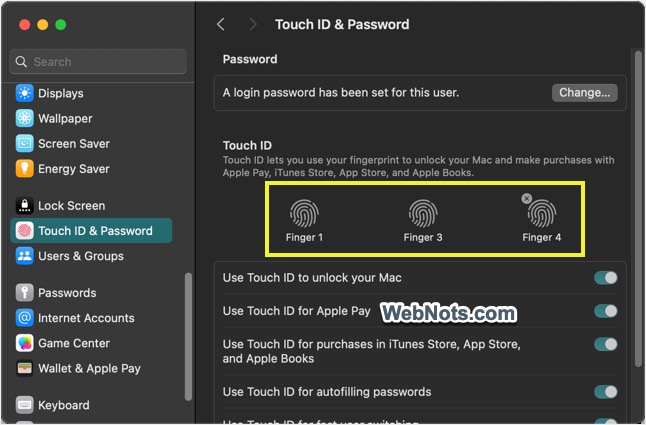
- Enter your admin password and confirm the deleting action.


- Delete all existing fingerprints in similar manner and click on the “Add Fingerprint” option.
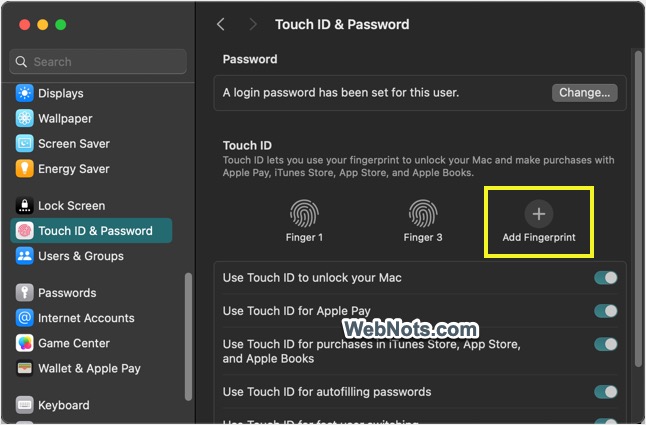
- Place your finger on the Touch ID key and register the fingerprint.

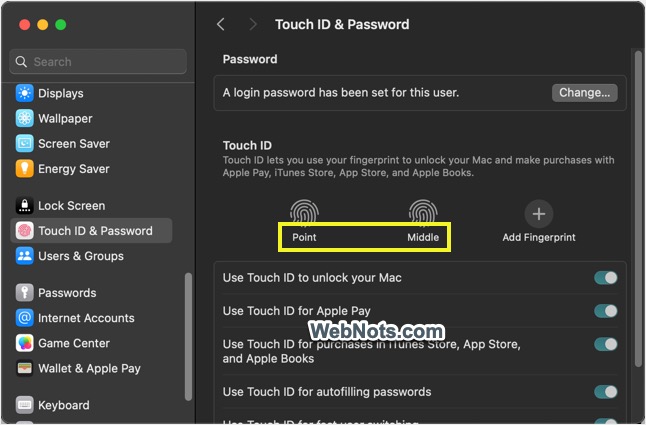
- Click on the fingerprint name and change it descriptive so that you can easily understand which finger is used. This will also helpful when multiple people are using your Mac.
Final Words
In most cases, disconnecting and reconnecting or recharging the Magic Keyboard will help to fix the Touch ID issues on your Mac. If that does not help, you can try other mentioned options. If you suspect a hardware problem, then contact Apple’s Mac support or visit an authorized service provider for further assistance.