
Snagit is the popular app for screen capturing and recording. It has advanced functions and a must needed app for content creators. However, you need to provide multiple permissions for using Snagit app on Mac. After installing the app afresh, it will prompt you to provide a list of permissions as shown below.
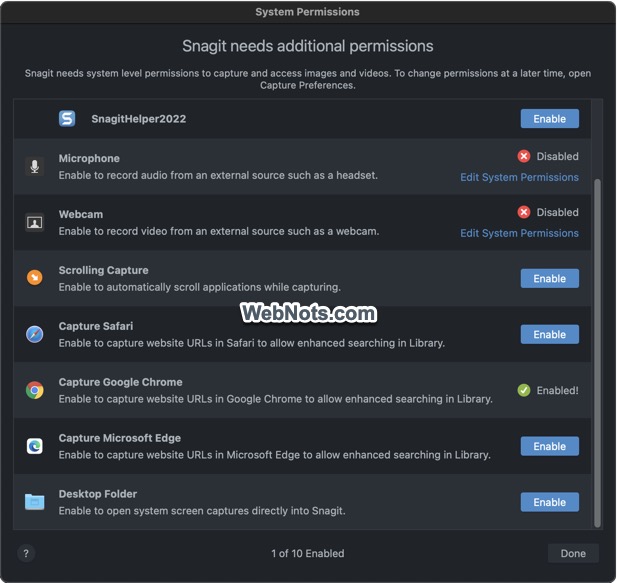
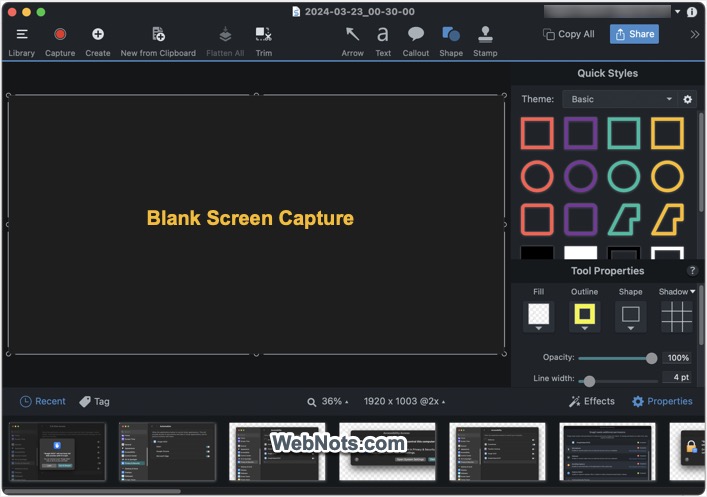
If you have closed the pop-up without enabling required permission, the app will simply capture empty screen. For example, if you did not setup “Capture Safari” option, you will only get the blank image when trying to capture Safari screen. The problem is that you will not know that permissions are missing for capturing the app. In addition, the permissions will be reset when you update macOS and you need to enable them again.
Check Missing Permissions in Snagit
- Open Snagit all and go to “Snagit > Settings…” menu.
- Go to “Capture” tab and check under “Capture Permissions” section.
- Click on the “Fix Capture Permissions” button.
- This will open a list of permissions required by Snagit.

1. Restore Previously Provided Permissions
If you have upgraded the app or macOS, you can simply click on the “Enable” button to reinstate most of the previously provided permissions. Generally, you will see “Enable” button against the applicable items like each browser app (like Safari, Chrome, etc.) and “Desktop Folder” access.
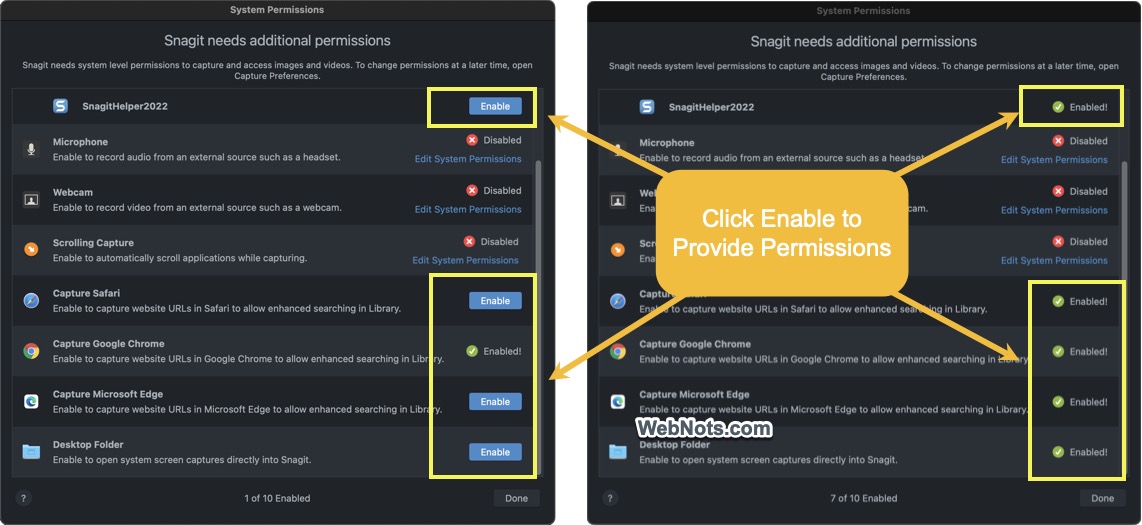
Some other items like Snagit Capture and Scrolling Capture will show “Enable” button after updating macOS or updating Snagit. Otherwise, it will show “Edit System Permissions” link.
2. Fixing Missing Permissions by Editing System Permissions
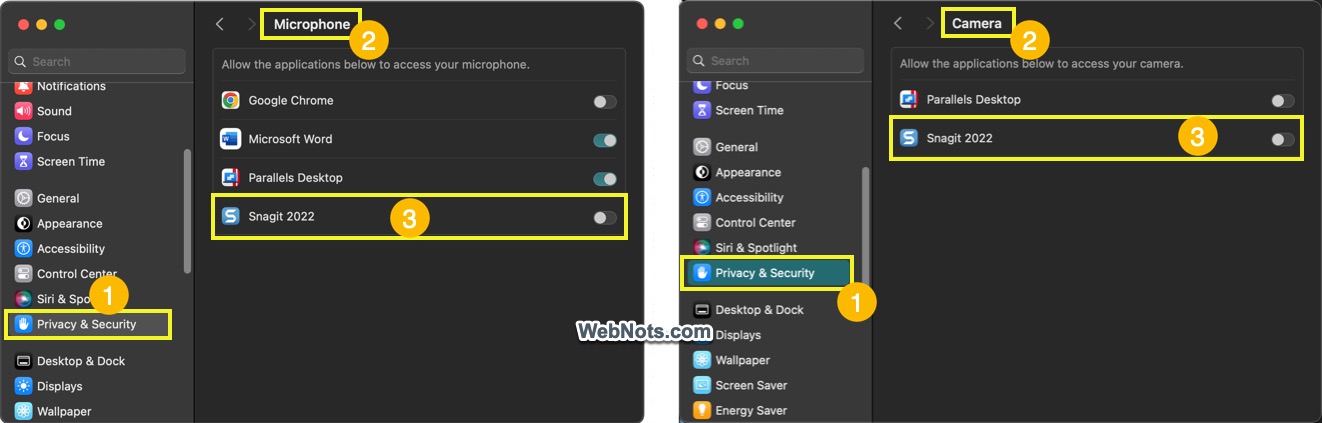
When you have newly installed the app, you will see “Edit System Permissions” link against most items like Snagit Capture, Scrolling Capture, Microphone and Webcam. Click on the link to open corresponding section in macOS Settings app under “Privacy & Security” tab. Turn on the Snagit app in the list to provide required permission for access.
- Snagit Capture / Scrolling Capture access : Settings > Privacy & Security > Accessibility.

- Microphone access : Settings > Privacy & Security > Microphone.
- Webcam access : Settings > Privacy & Security > Camera.
3. Enable Full Disk / Documents / Downloads / iCloud Drive Access
If you have problems in saving Snagit capture to a specific folder, probably the app does not have permission to access that folder. However, this option will not show in the Snagit permissions dialog box.
- Click the Apple logo on top left corner and go to “System Settings…” menu.
- When you are in Settings app, go to “Privacy & Security” section.
- Open “Files and Folders” section and expand “Snagit” app.
- Turn on Desktop Folder, Documents Folder, Downloads Folder and iCloud Drive (enable only the required folders). You may need to provide admin or Touch ID access for applying the changes.
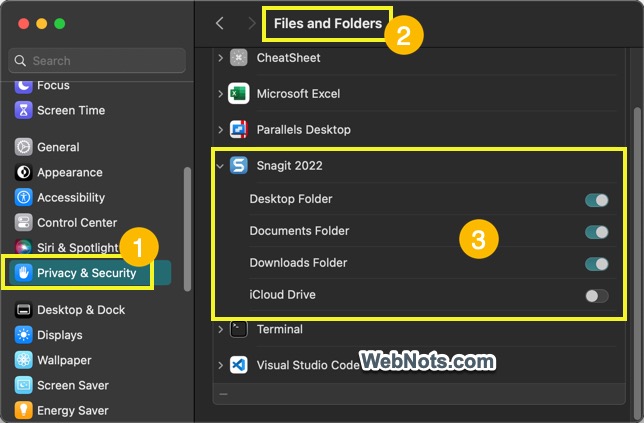
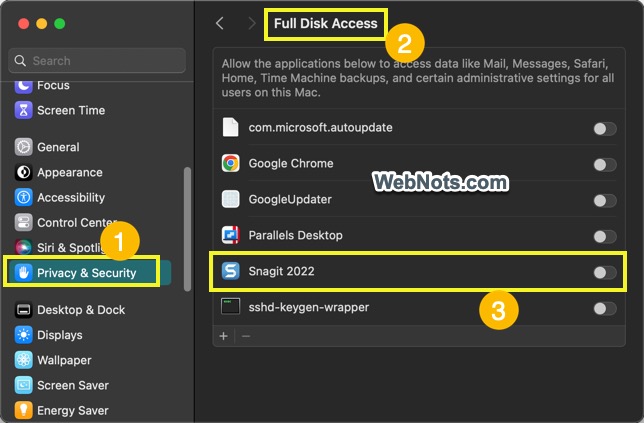
- If you want to provide complete disk access, use the back arrow button to go back to previous page and click “Full Disk Access” option. Enable “Snagit” so that the app can be allowed to access your entire disk.
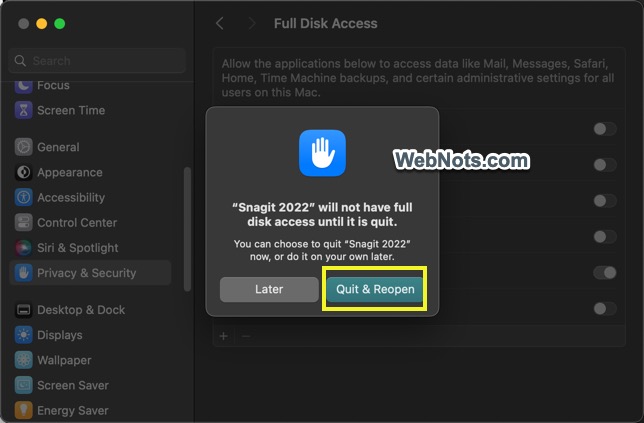
When enabling full disk access, you will be prompted to “Quit & Reopen” the app for applying the changes.
4. Enable Browser Screen Capturing
Snagit needs permission from macOS for accessing each browser’s screen. This can be a problem when you install a new browser on your Mac. If you are not able to capture the browser’s screen, you need to manually enable the permissions.
- Go to “Apple logo > System Settings…” menu,
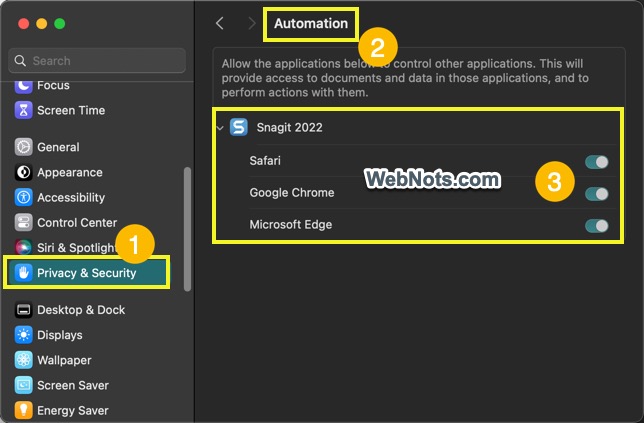
- Navigate to “Privacy & Security > Automation” section.
- Expand Snagit app and enable the browser name to provide access.
Disabling Snagit Permissions
Unfortunately, you can’t remove the permissions from the Snagit app once provided. You need to go through the macOS settings as explained above and disable the permissions manually. For example, for disabling desktop access, go to “Apple logo > System Settings… > Privacy & Security > Files and Folders > Snagit” and turn off “Desktop Folder” option. You also need to disable “Full Disk Access” option for this to work.
Note: Snagit app will get an upgrade and new name each year. The app name will show the year at the end like Snagit 2024 or Snagit 2023. So, your Settings screen will show the app version you have installed on your Mac. Remember to enable both Snagit and SnagitHelper items when both items are shown in the permissions list.


