
Gutenberg editor changed the way of content creation in WordPress. Blocks and patterns make it easy to create custom and elegant layouts. However, there are lot glitches with Gutenberg that may easily annoy you. Attempt recovery is one such problem you may face frequently with Gutenberg blocks. In this article, we will explain why it happens and how to fix the issue.
Why Attempt Recovery of Blocks Appear?
The message will appear like below when you edit the content only in Gutenberg editor. The message will read as “Block contains unexpected or invalid content” with an “Attempt recovery” button.
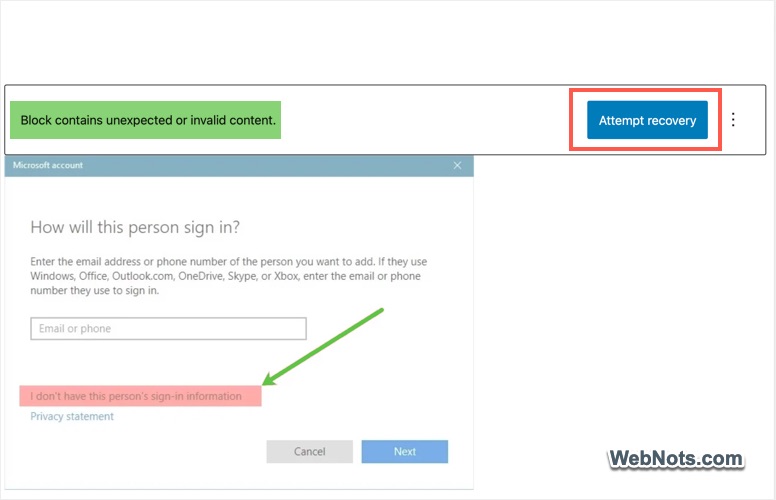
After analyzing, we understood the issue happens due to the conflict in the markup or inline code. There could be multiple reasons for that and below are some common reasons:
Converted Content from Classic Editor
Before WordPress version 5.0, you might have used the old Classic Editor to create content. when you edit such posts (and pages) with Gutenberg, you will be shown a “Convert to blocks” option to convert the entire content using blocks. Block attempt recovery problem primarily happens on the posts converted from Classic Editor to Gutenberg editor due to incompatible code.
Plugin or Theme Updates
The message will appear if the plugin or theme update changes the inline code or markup which is not compatible with the Gutenberg setup.
Manual Image Dimensions
If you have resized the images within the editor (using a plugin or in old Classic Editor), it will add inline CSS to adjust the size. This inline CSS may create problem with Gutenberg and results in block recovery.
How to Fix Blocks Attempt Recovery Issue?
There are two ways to fix the issue:
- Manually recover each affected block.
- Use a plugin to automatically resolve all conflicts.
Manually Resolving Block Recovery
Follow the below steps whenever you see an “Attempt recovery” button.
- Click on the three vertical dots icon showing next to “Attempt recovery” button.
- You will see few options like Resolve, Convert to HTML and Convert to Classic Block.
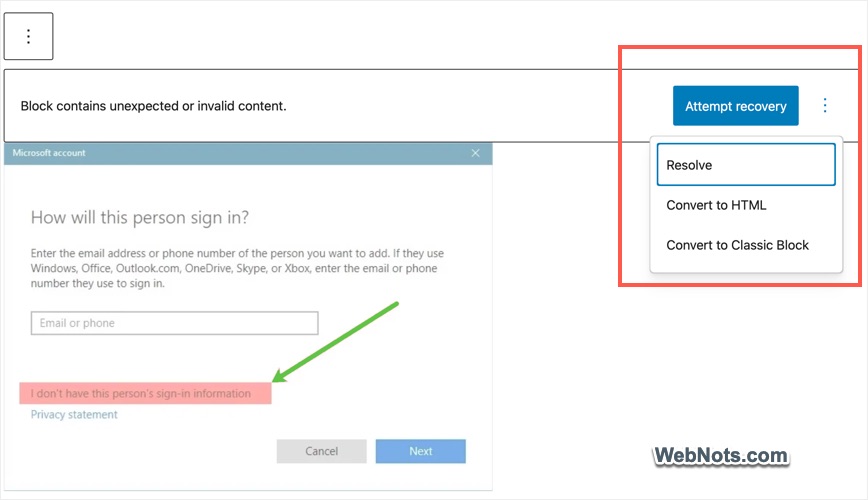
- Select “Resolve” option to view the block’s code comparison of current and after conversion state. As you can see in the below screenshot, the inline CSS highlighted in the red under “After Conversion” section will be removed to resolve the issue. This means the image will be reverted to its original (larger) size as shown in the previews.
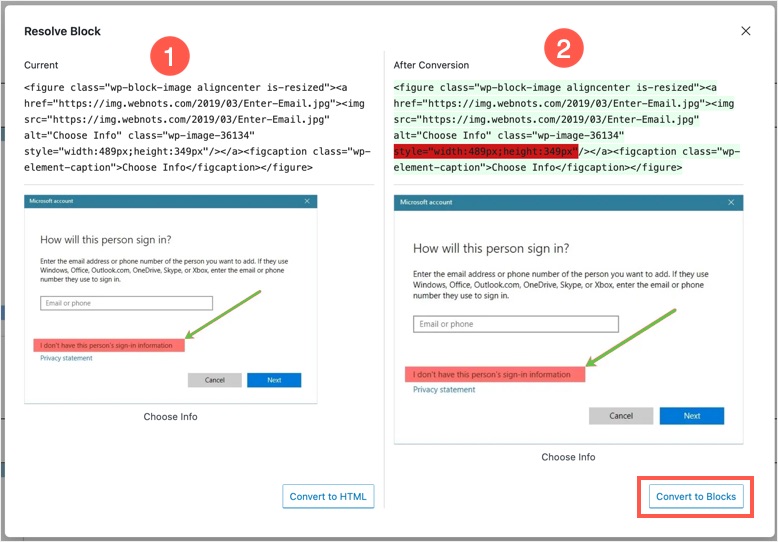
- If you accept the code removal, click “Convert to Blocks” button. Otherwise, click on “Convert to HTML” button to retain the code but the content will be converted to a Custom HTML block.
- If you have converted to block, it is still possible to add the inline CSS code using HTML anchor or using the block’s settings. For example, the image block has options to assign custom width and height which you can use to set the old dimensions (width:489px and height:349px in the above example).
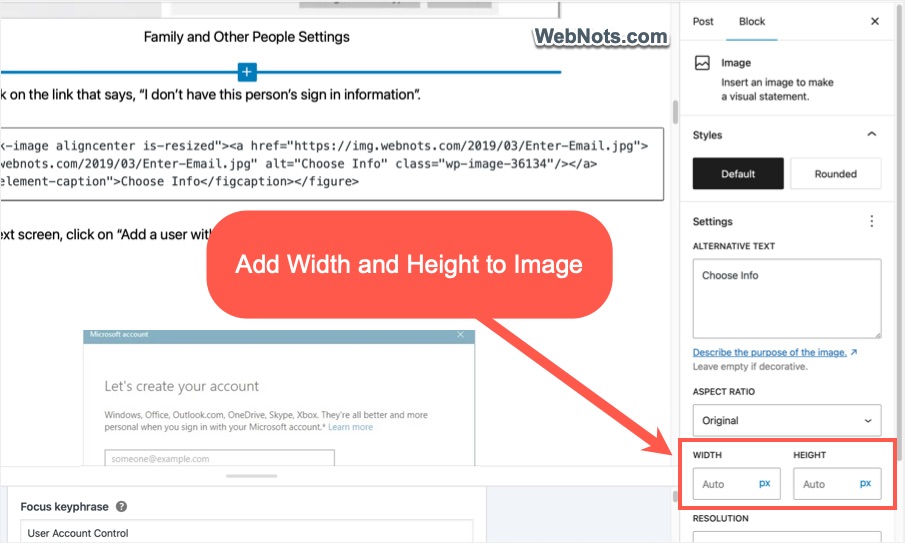
Generally, it is easy to resolve the image block’s recovery with visual preview / result. However, the situation is different with text-based blocks. So, never click on “Attempt recovery” button immediately without understanding the root cause. Though clicking the button seems to resolve your problem, it may change the source code. In most cases, that will simply delete the inline CSS or incompatible markup and recover the content as a block. Select “Resolve” option to compare the codes and then recover if you accept the change(s).
Use Plugin to Fix Block Recovery
Though manually resolving is the correct way, it doesn’t make sense to fix the blocks one by one when you frequently face block recovery issue. Especially, if the issue happens only with images and you are fine with losing image sizes, then it is a good idea to use a plugin to automate the block recovery attempts.
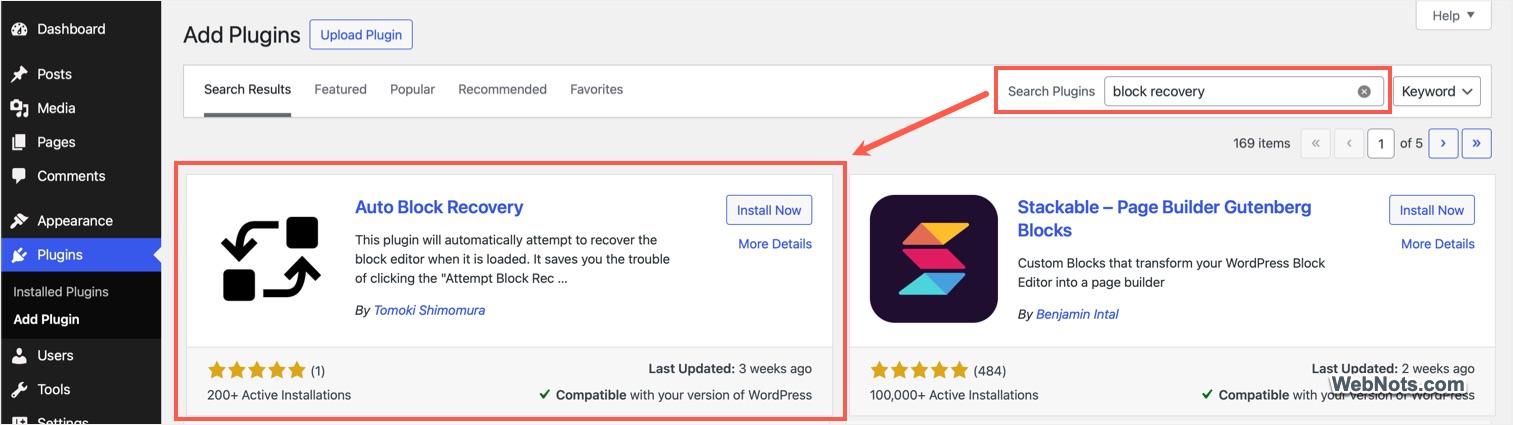
- Go to “Plugins > Add Plugin” section in your WordPress admin panel.
- Type “block recovery” in the search box and find “Auto Block Recovery” plugin.
- Click “Install Now” and then “Activate” button.
- Go to “Plugins > Installed Plugins” section to confirm the plugin is activated.
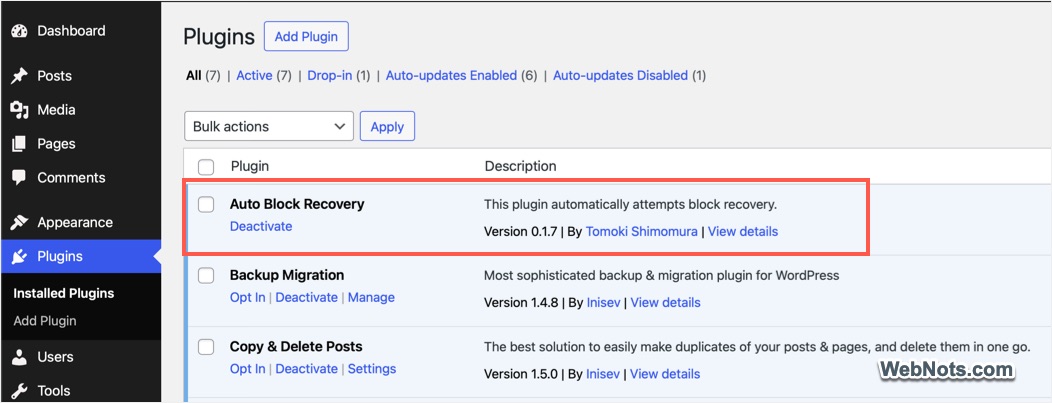
- That’s it!!! The plugin will automatically recover the blocks (by resolving and converting to blocks) whenever the content is loaded in Gutenberg editor.
Good thing is that Auto Block Recovery plugin has no settings page and works out of the box after activating. You can save lot of time by avoiding clicking on the “Attempt recovery” buttons and getting distracted with resolving the issue instead of editing the content.
Final Words
Attempt recovery issue in WordPress Gutenberg editor can be frustrating, but it’s usually solvable manually or automatically using a plugin. Be careful with the plugin as the recovered blocks will permanently loss the source code and there are no ways you can revert to previous state. So, it is highly recommended to take a database backup before installing the plugin. Keep the database safely on the server or on your local machine to restore in case of data loss.


