The router IP address, usually referred to as the “default gateway,” is the address your devices use to communicate with your router (and the internet). This IP address is essential for accessing your router’s web-based configuration interface, where you can update settings, check device activity, and manage security features. Most home routers have a default IP like 192.168.0.1 or 192.168.1.1, but this can vary depending on the manufacturer or custom configurations. Here is how you can find the router’s IP address in Windows 11.
Why Might You Need Your Router’s IP Address?
Here are some of the reasons why you need the router’s IP.
- To change the Wi-Fi network name (SSID) or password, it is necessary to access the router’s settings page.
- Knowing the IP address helps diagnose connectivity problems and troubleshoot network issues.
- For gaming, remote access, or certain applications, you’ll need to adjust port settings on your router.
- Router updates may be performed via the admin interface, accessible through its IP address.
Find Router’s IP Address in Windows 11
Checking the backside of your router is the simple way to find its IP address, admin username and password. If you don’t have access to the router (or lazy to reach the device), here are some of the methods to find the IP directly from your Windows 11 laptop or desktop.
1. Using Windows Settings
This is the most user-friendly method and doesn’t require any technical knowledge.
- Click on the Start button, then select Settings from the pinned apps (the gear icon), or press “Windows keys + I” to open the Settings app directly.
- Go to “Network & internet” section and select either Wi-Fi or Ethernet depending on your active network connection.
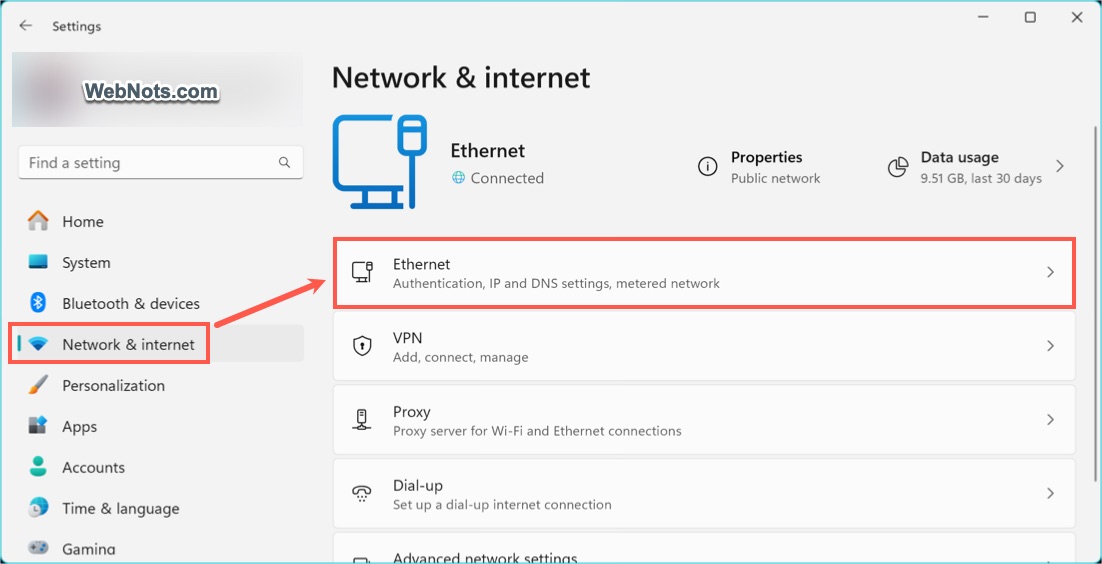
- Scroll down and find “IPv4 default gateway” and the number next to it is your router’s IP address.

2. Using the Command Prompt
The Command Prompt offers a quick way to retrieve network details, including your router’s IP address.
- Press “Windows key + R” to open the Run dialog box, type cmd and press enter to open the Command Prompt.
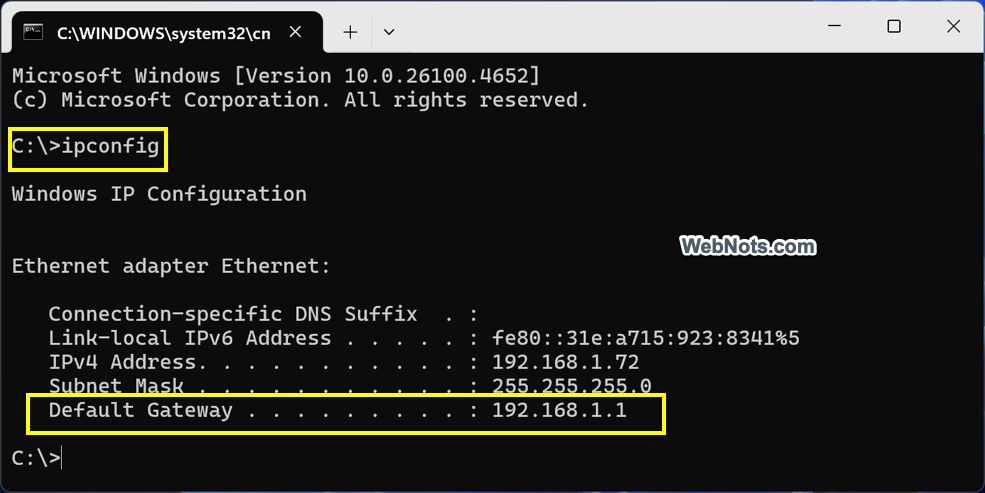
- Type ipconfig in command prompt and press enter.
- Check the details under your active network adapter (usually labeled as Wireless LAN adapter Wi-Fi or Ethernet adapter).
- Look for the line labeled “Default Gateway” and the number listed next to it (like 192.168.1.1) is your router’s IP address.
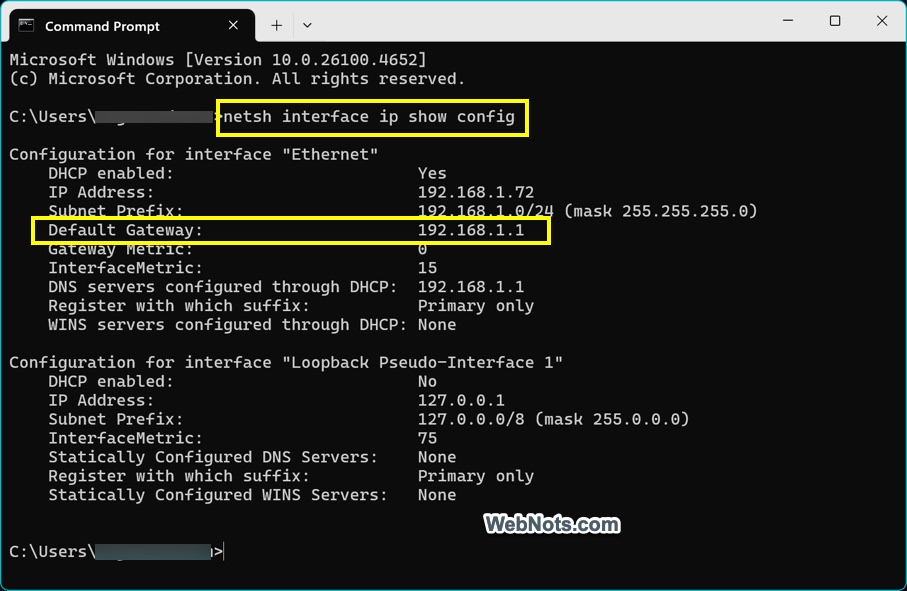
You can use the network Shell command netsh interface ip show config to find the router’s IP address. After running the command, check the configuration interface details for your network adapter and find the “Default Gateway” entry.
Note: Sometimes, especially in complex networks or with VPNs enabled, you may see more than one gateway address. Usually, the one associated with your main network adapter is your router’s IP address.
3. Using Windows PowerShell
PowerShell, a more advanced tool, can also be used to find your router’s IP address.
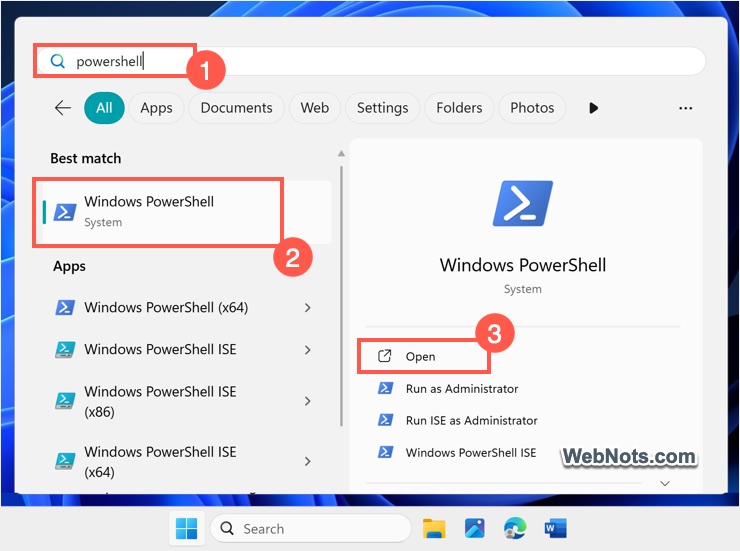
- Click the Start button, type “powershell” and open Windows PowerShell app.
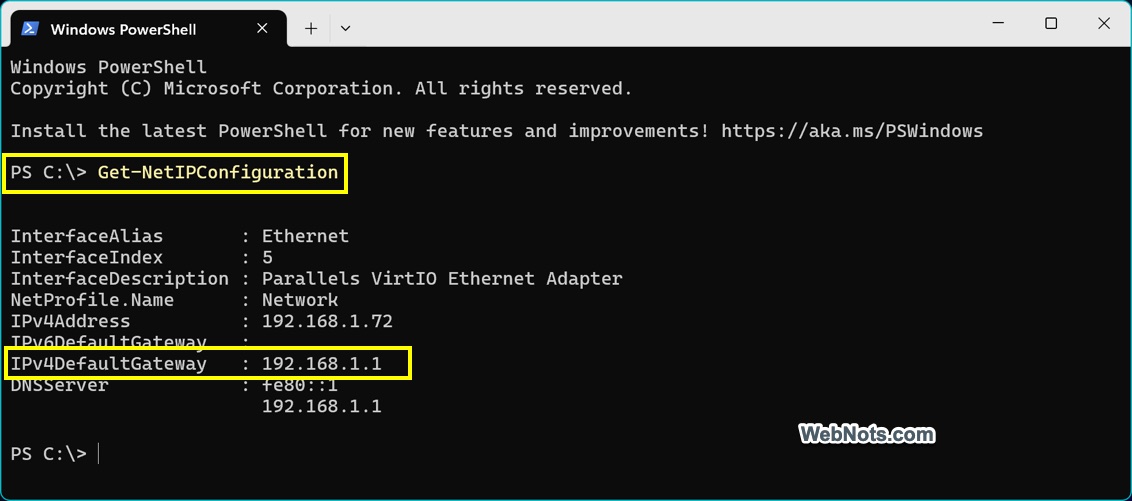
- In the terminal window, type Get-NetIPConfiguration and press enter.
- Look for the “IPv4DefaultGateway” field in the output. This will display your router’s IP address.
4. Using the Control Panel
While Windows Settings has largely replaced the Control Panel for network management, this classic tool is still available and useful.
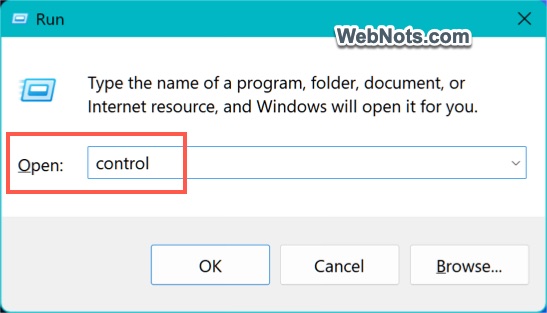
- Press “Windows key + R”, type control, and press enter.
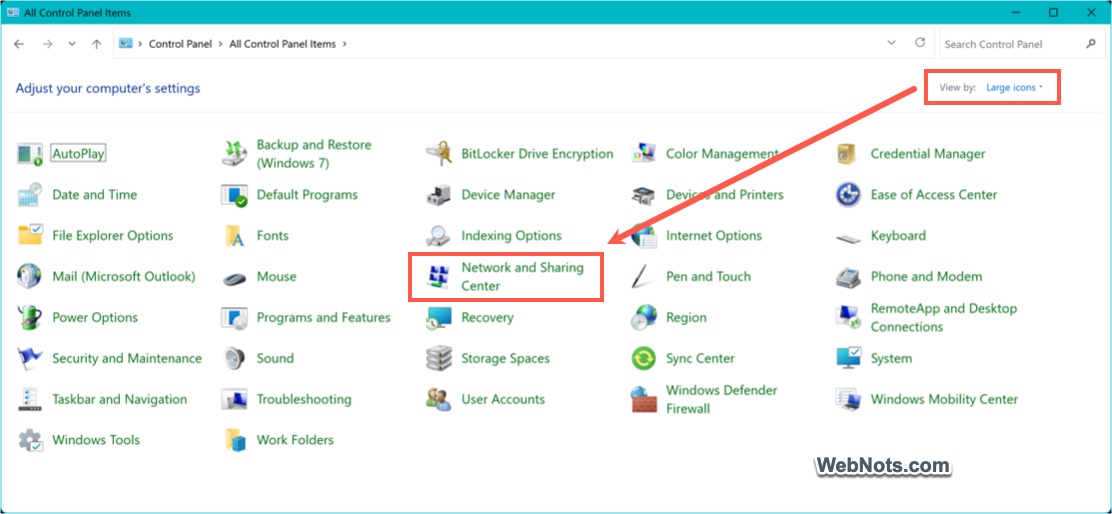
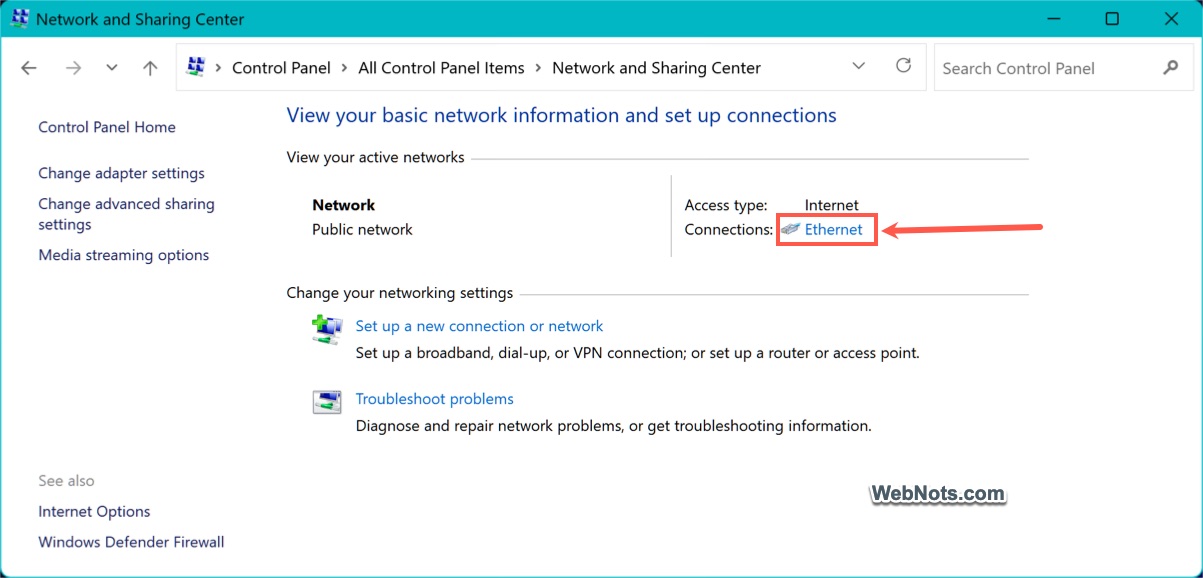
- Change the “View by” to “Large icons” and click on “Network and Sharing Center” option.
- Next to “Connections”, click on your current network name (it will be a blue link).
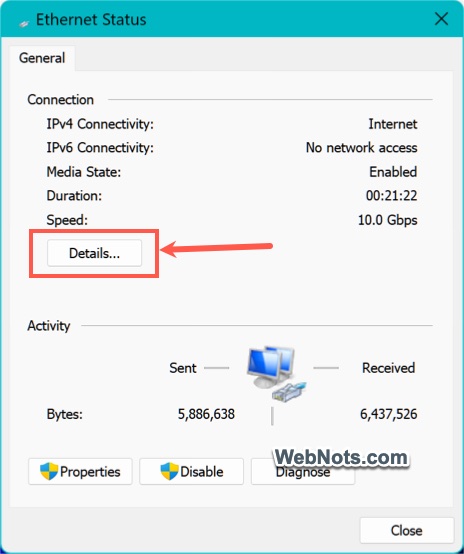
- In the Status window, click the “Details” button.
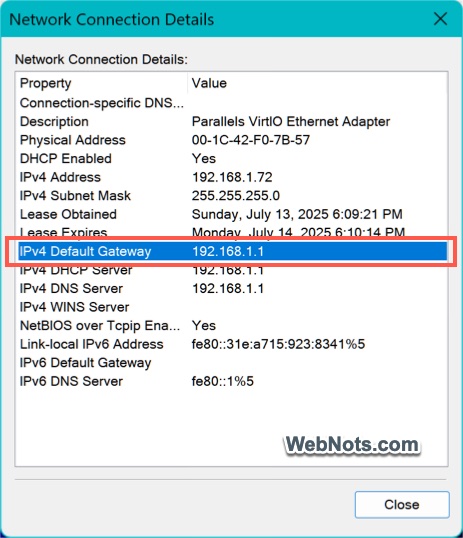
- In the “Network Connection Details” window, find the line labeled “IPv4 Default Gateway” which shows your router’s IP address.
How to Access Your Router’s Settings Using the IP Address?
Once you have your router’s IP address, you can access its settings by:
- Open a web browser like Microsoft Edge, Chrome, or Firefox.
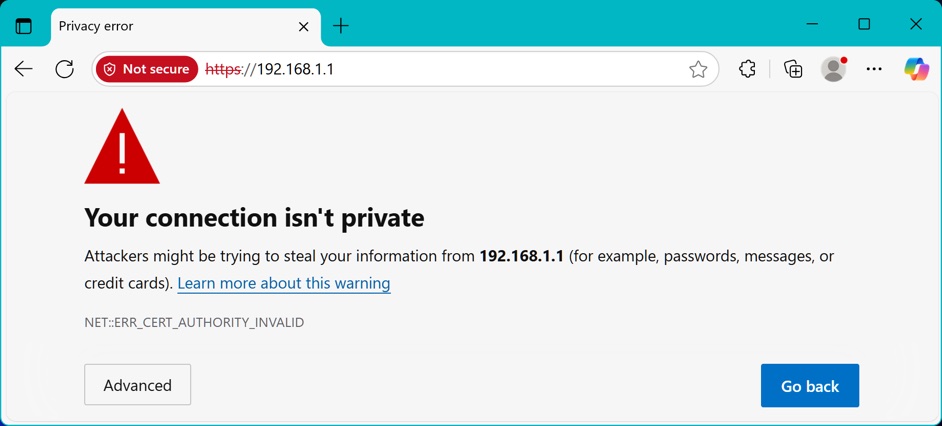
- Type the IP address in the address bar and press enter. If you see your connection isn’t private or any other HTTPS related error, type http://192.168.1.1/ and press enter.
- Login with your router’s admin credentials (often found on a label on the router’s backside or in its manual).
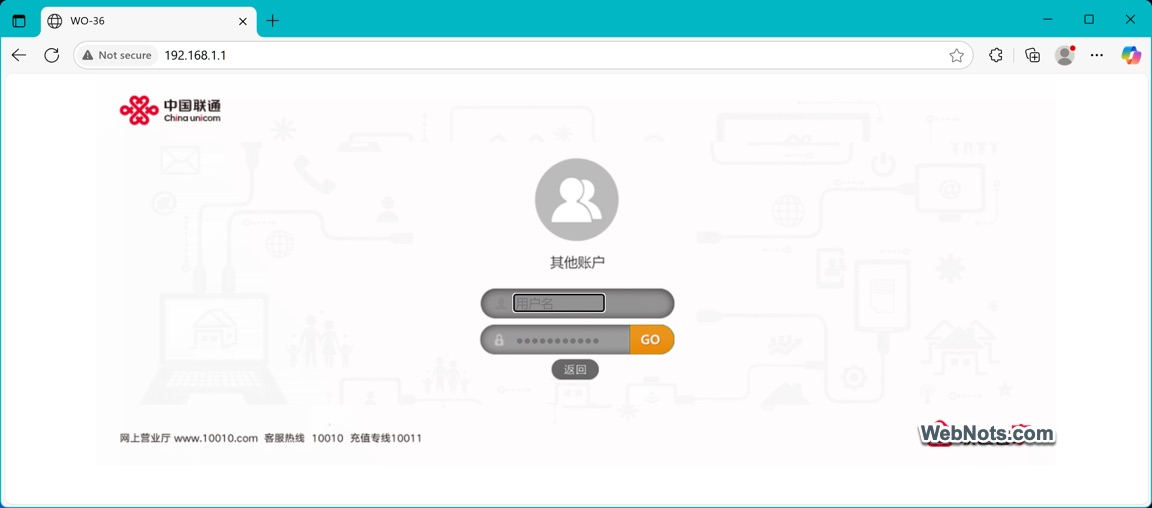
Note: If you’ve never changed these credentials, it’s a good idea to do so to enhance your network security. When accessing your router, always ensure you’re connected to your own secure network. Be cautious about sharing your router’s IP address and login credentials with others. If you need to make changes, such as updating the firmware or adjusting settings, consult your router’s manual or manufacturer’s website for guidance.
Frequently Asked Questions (FAQ)
Yes, both Android and iOS allow you to check your network properties, including the router’s IP address, often in the Wi-Fi settings.
In most home networks, the router’s IP address is fixed (static), but in some advanced setups, it may change if reconfigured.
If you can’t log in, consult your router’s manual for default credentials or perform a reset to restore factory settings (this will erase all custom settings).