Terminal app is the default command-line interface in Windows 11. As Microsoft slowly phases out the old Command Prompt and Windows PowerShell interfaces, Terminal app is becoming an essential productivity tool for anyone relying on command-line. Though you can run the commands similar to other tools, the greatest advantage of Terminal lies in its extensive customization options. You can easily tailor your terminal experience to match your workflow, aesthetic preferences, and even mood.
Launching Windows Terminal
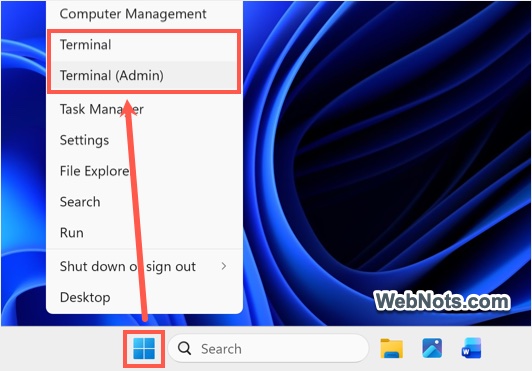
The app comes in-built with Windows 11 OS, simply right-click on the Start menu and select “Terminal” or “Terminal (Admin)” option to launch the app. You will see a tabbed interface with default profiles such as Command Prompt and PowerShell.
In case, if you are not finding the app in your system, download and install it from Microsoft Store app.
1. Creating Profiles
Terminal profiles are somewhat similar to browser profiles you can use in Chrome or Edge to bifurcate things. Each profile represents a shell or command-line environment allowing you to define unique settings for each environment. Terminal comes with three default profiles – Windows PowerShell, Command Prompt, and Azure Cloud Shell. You can create additional profiles for your needs like Git Bash, WSL (Windows Subsystem for Linux), etc.
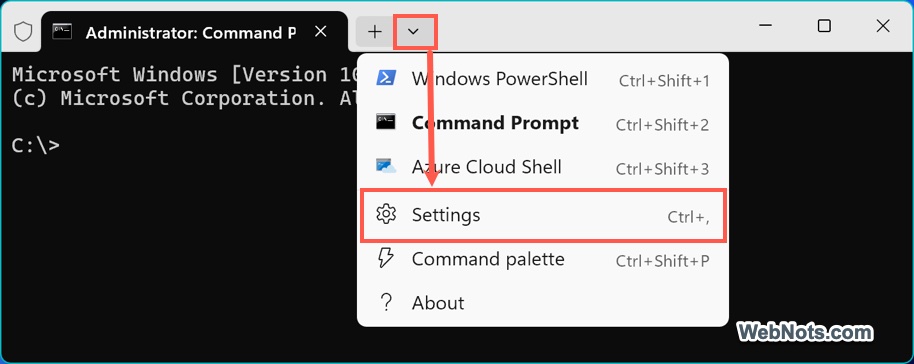
- To create a profile, click the drop-down arrow on the title bar next to the tabs and select “Settings”.
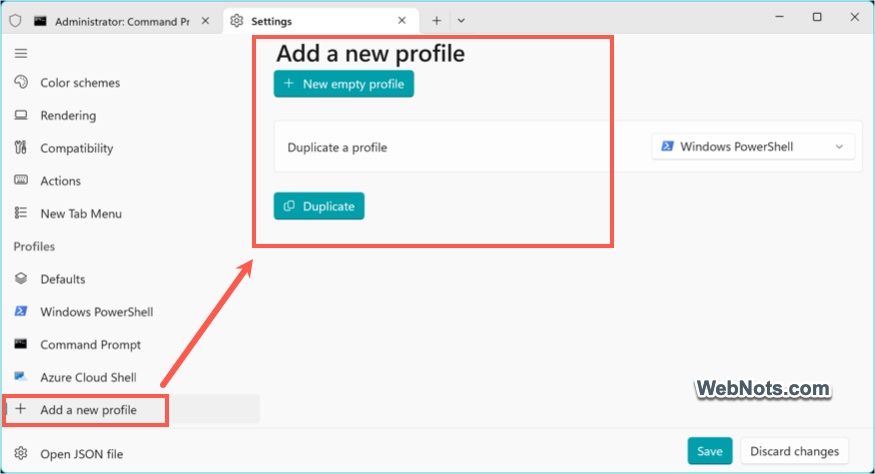
- Go to “+ Add a new profile” section from the left sidebar.
- You can either create a new empty profile and configure as per your need or duplicate an existing profile and then modify the options.
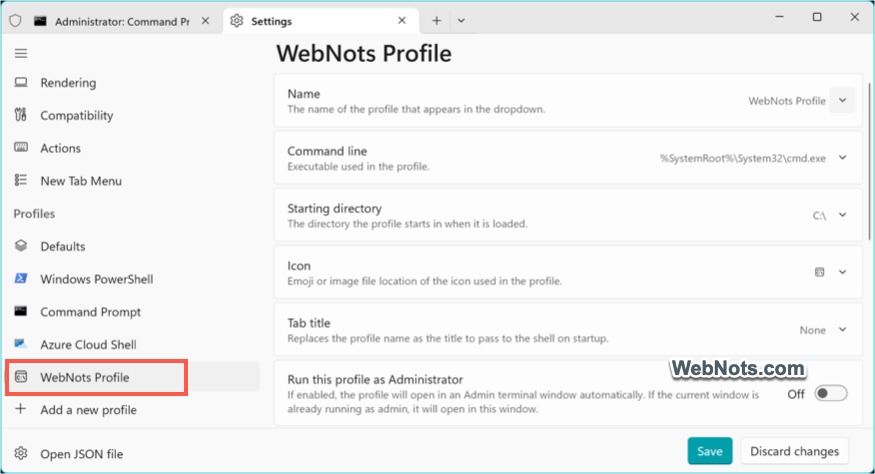
- Provide the necessary details like the starting directory, icon, and select the executable file (like a cmd.exe) to run.
- Save your changes and the newly created item will appear under the “Profiles” section on the left sidebar.
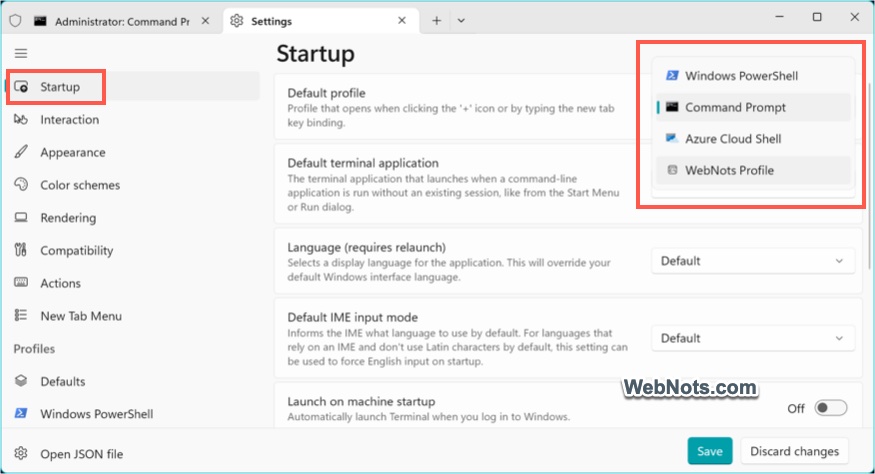
- Go to “Startup” section and select your default profile from the list to run whenever you launch the Terminal app.
Note: Use Control + Shift + n to switch the profile in Terminal interface, where “n” is corresponding number for your profile. For example, Control + Shift + 2 will switch to Command Prompt. You can see the shortcuts by clicking the small arrow in the title bar.
2. Editing Settings JSON File
The settings.json file contains global settings, profile definitions, key bindings, and more. It is possible that you can directly edit or add the settings to the file. Click the “Open JSON file” option on bottom left corner and then edit the file using Notepad or any plain text editor.
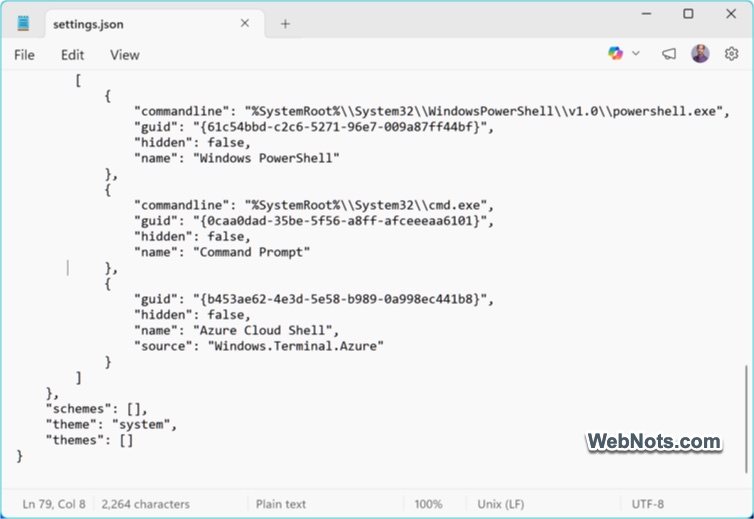
Note: Make sure to back up your settings.json before making major changes.
3. Customizing Default Color Schemes and Fonts
A visually pleasant Terminal app can boost productivity and make long command-line sessions enjoyable. Here is how to customize the default profile:
- Navigate to the “Color schemes” tab and choose from built-in color schemes.
- You can create your own scheme with your preferred color codes for background, foreground, and cursor colors.
- Go to “Appearance > Application Theme” section and toggle the light or dark or system theme for the Terminal app.
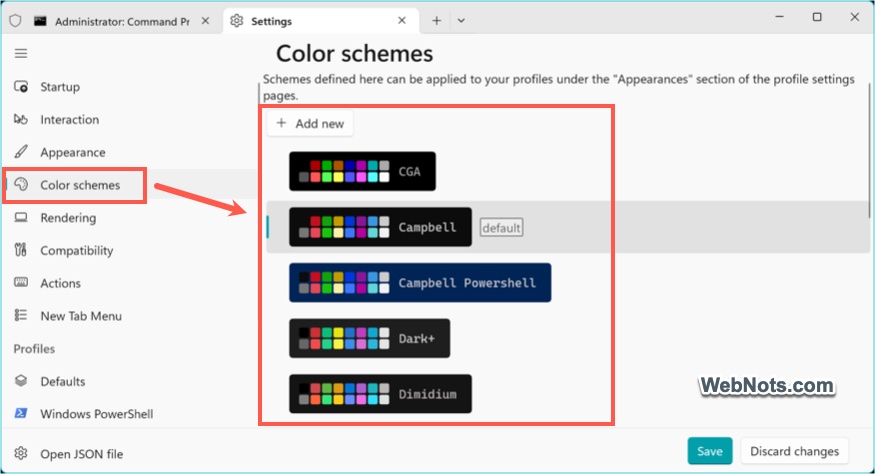
Note: You can also go to “Defaults” tab under “Profiles” heading and select “Appearance” option to change the color schemes for the default profile.
4. Adjusting Fonts and Colors for Individual Profiles
If you frequently switch between profiles, using distinct colors and fonts for each one can make them easier to identify at a glance.
- Select your profile name under “Profiles” section in the left sidebar.
- Scroll down on the right pane and select “Appearance” option showing under “Additional settings” section.
- From here, you can change the color scheme and customize the font settings like size, weight, line height, font face, weight, etc.
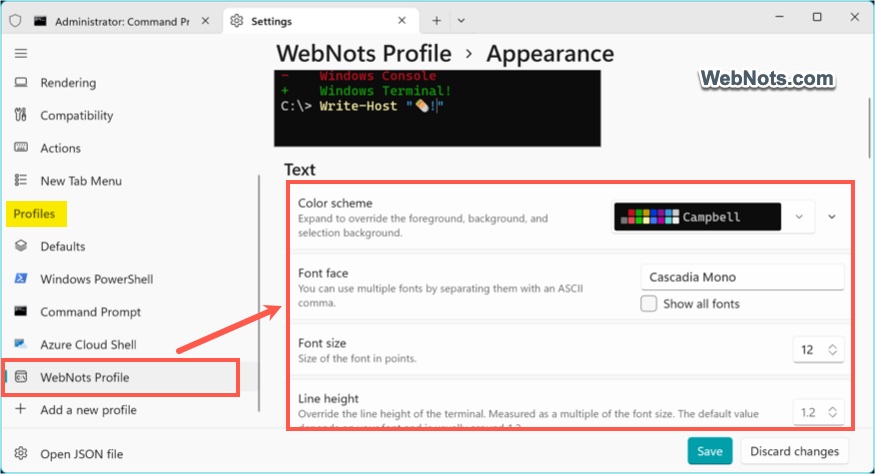
On the same settings page, you can change the cursor share and color, add background image to the app’s interface, and adjust the background opacity.
5. Define Shortcuts for Custom Actions
Terminal offers long list of keyboard shortcuts, also called key bindings to trigger specific actions. For example, you can press Control + Shift + D keys to duplicate a tab. You can easily define custom key bindings or edit existing assignments with your custom shortcut keys.
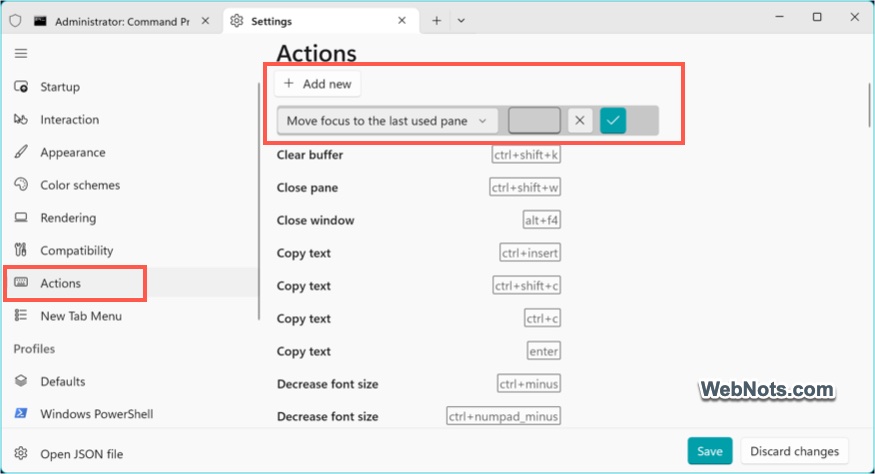
- Go to “Actions” tab from the sidebar.
- Click the pencil icon against any shortcut and assign a new key combination.
- Click “+ Add new” button and select a new action from the drop-down list. Assign your key combination and save your changes.
6. Managing Terminal Tabs
Simply right-click on any tab to find various options for managing your tabs.
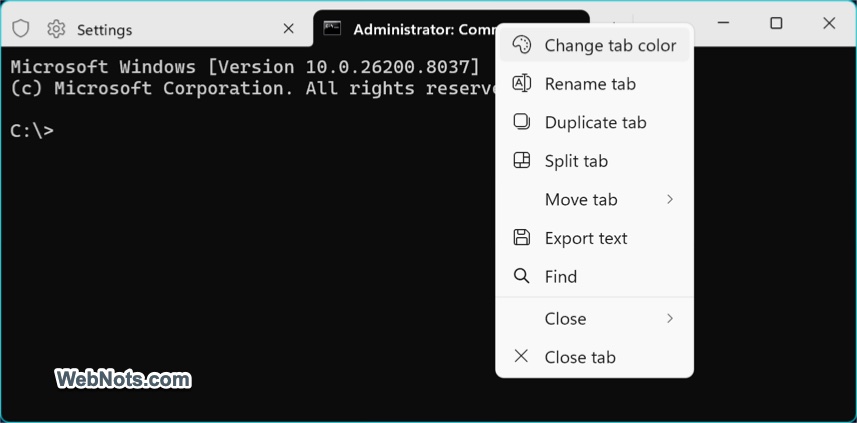
- You can change the color, rename, duplicate tabs.
- Move the current tab to left or right, or open in a new window.
- Split tab into multiple vertical panes to run several sessions side by side. You can also use keyboard shortcuts Alt + Shift + Plus for vertical split and Alt + Shift + Minus for horizontal split.
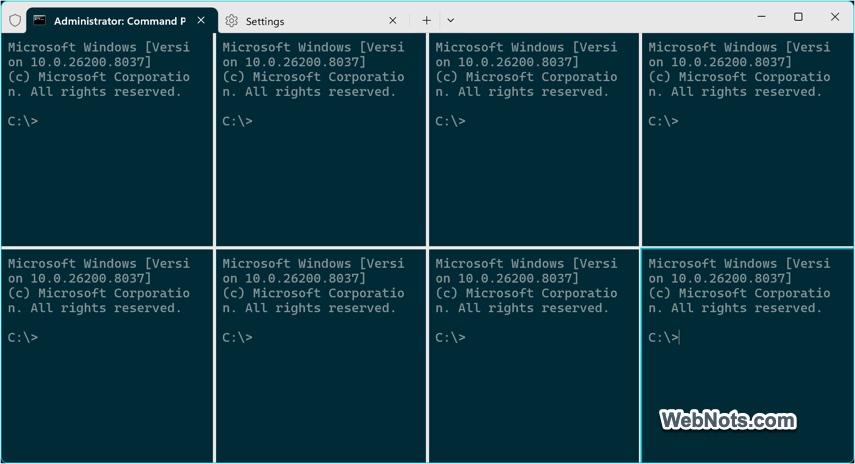
Note: Go to “Appearance” section and adjust the tab width and set full width for tabs.
Conclusion
Customizing Windows Terminal app can turn a basic command-line tool into a personalized, productive, and visually appealing workspace. If the terminal fails to launch after making changes, restore the original settings.json file or check the file for formatting errors such as missing commas or brackets.