Video editing has become one of the mainstream career options for many youngsters. Besides recording videos, there are two main tasks involved in the finishing process: trimming and cropping. While trimming removes the beginning or ending portions of a video, cropping serves a different purpose. It is primarily used to adjust the aspect ratio, focus on a specific subject, or remove distracting edges. While Windows 11 does not have a dedicated “crop” button in its main Media Player, including the legacy version, there are some easy ways to crop videos.
1. Crop Videos in Clipchamp
Clipchamp is a free app that comes preinstalled in Windows 11. In case if you don’t have this app, go to Microsoft Store to download and install it on your computer for free. You need to login with Microsoft account for using the app.
- Search and open Microsoft Clipchamp app on your computer.
- Login with your Microsoft account if this is the first time you are launching the app. Next time onwards, it will automatically login to your account.
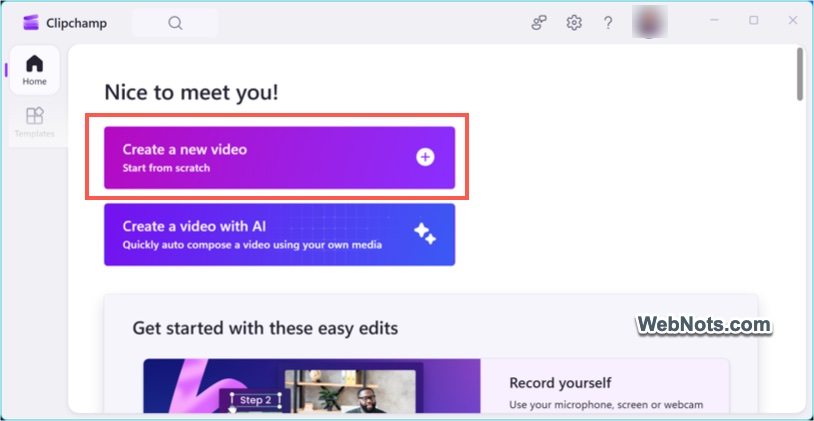
- Click the “Create a new video” option in “Home” section.
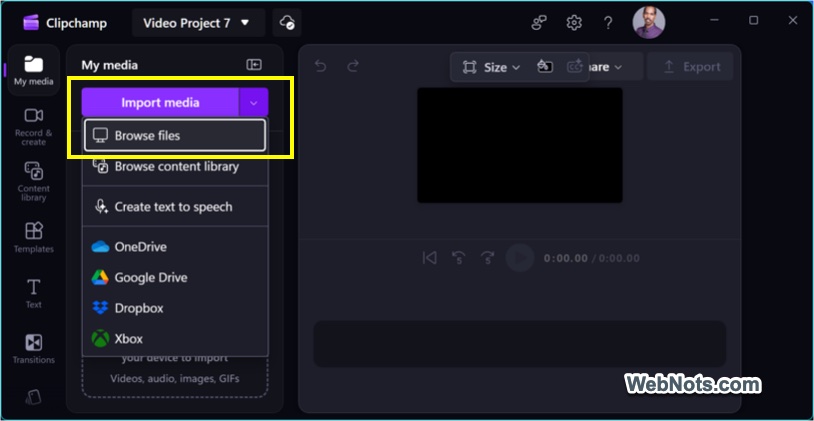
- This will open the Clipchamp editor and click the small arrow next to the “Import media” button.
- Select the option from where you want to upload your video – you can upload from local computer or from cloud locations like OneDrive, Google Drive, Dropbox, or Xbox.
- Wait for the video to upload and you will see the preview once finished.
- Simply drag the video and drop into editor’s timeline view.
- Now, click the “Crop” icon showing above the video in the editor pane.
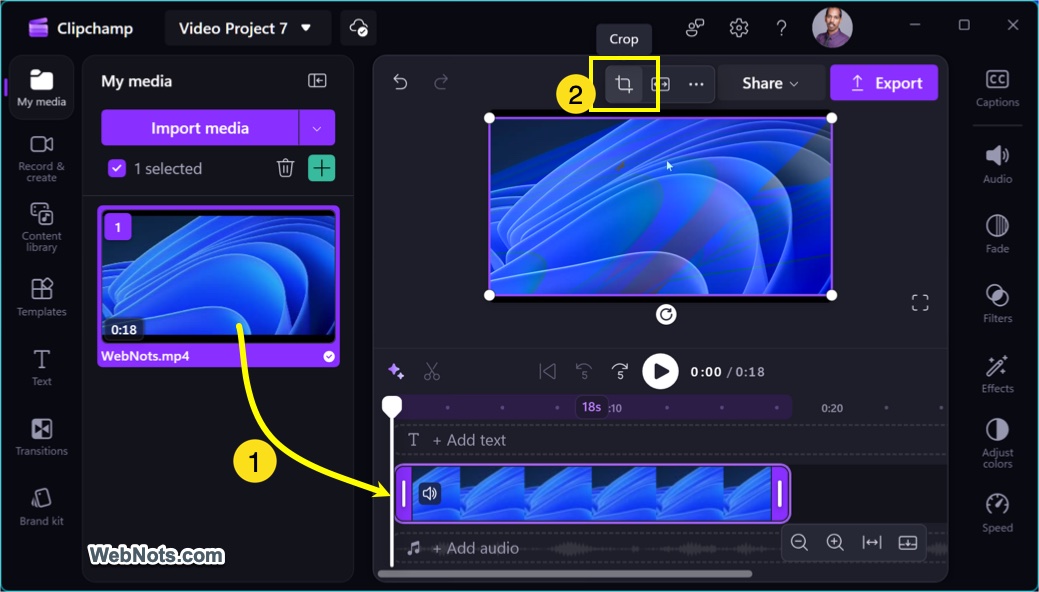
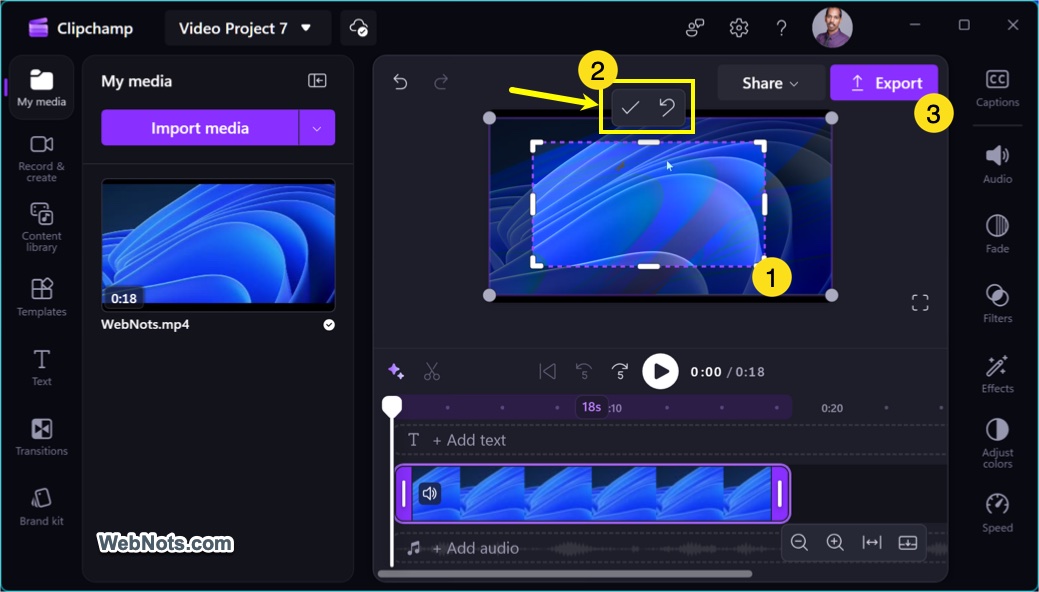
- Drag handles to crop and click the tick mark to accept your changes. If required apply additional filters and effects (using the tools available on right toolbar).
- If the preview is looking fine, click the “Export” button. Otherwise, you can undo and re-crop again.
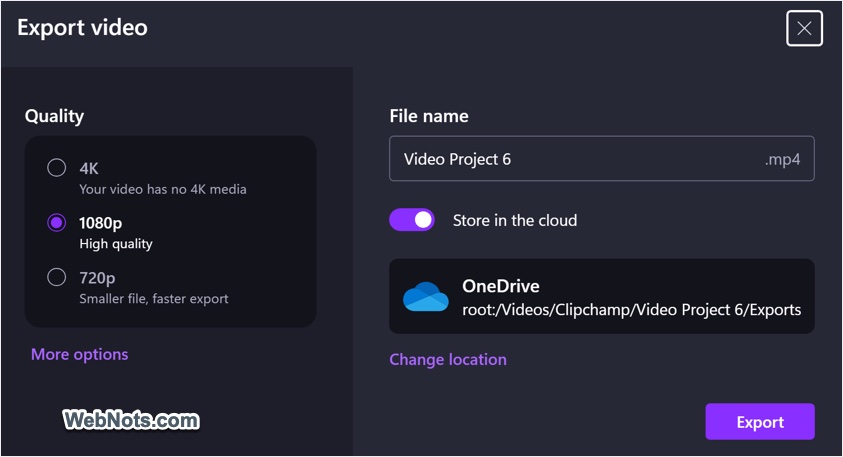
- Clipchamp allows you to save the video in 4K, 1080p, or 720p quality and by default saves the cropped video in OneDrive. Provide a file name and turn off the OneDrive option if you want to get the video in your “Downloads” folder.
- Wait for the final video to be generated and it will be automatically downloaded to your computer or uploaded in OneDrive (based on your selection).
- You will also have options to share the video’s OneDrive link, or upload or cloud locations like Google Drive and Dropbox, or upload on social platforms like YouTube, TikTok, and LinkedIn.
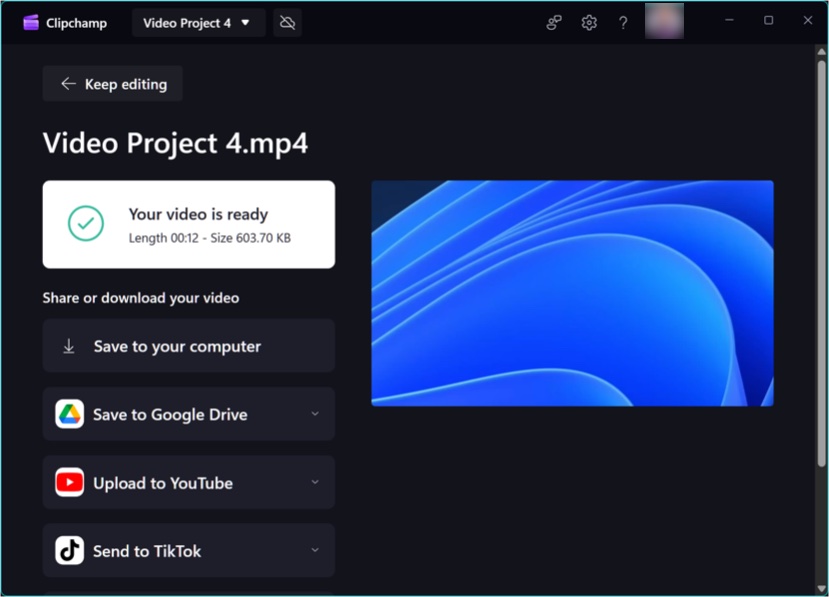
The exported video will have no watermark and in good quality as you have selected.
Note: Clipchamp is integrated into most of the default Windows apps like Photos and Snipping Tool. So, you can directly open your video from those apps instead of opening Clipchamp and importing media as explained above. For example, you can record your screen using Snipping Tool, trim / crop the recorded video using Clipchamp, and then share on YouTube or TikTok.
2. Crop Videos Using Online Tools
If you need to crop a video to a custom aspect ratio or apply advanced filters, a third-party tool is required. Instead of installing software, you can use a professional online tool like Adobe Express. It offers a complete set of video editing features, including trimming, cropping, and resizing. You can get most of these feature for free and sync edited videos with mobile for quick sharing.
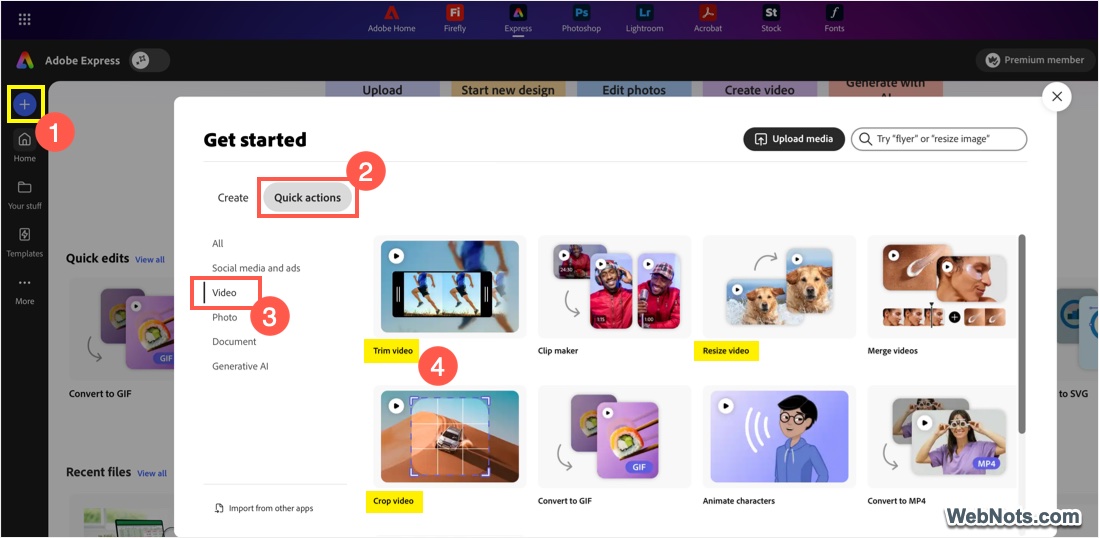
- Go to Adobe Express website and click ⨁ icon on the left sidebar.
- Search for the video related tools under “Quick actions” tab.
- You will find various tools for trimming, resizing and cropping. Select the “Crop video” tool.
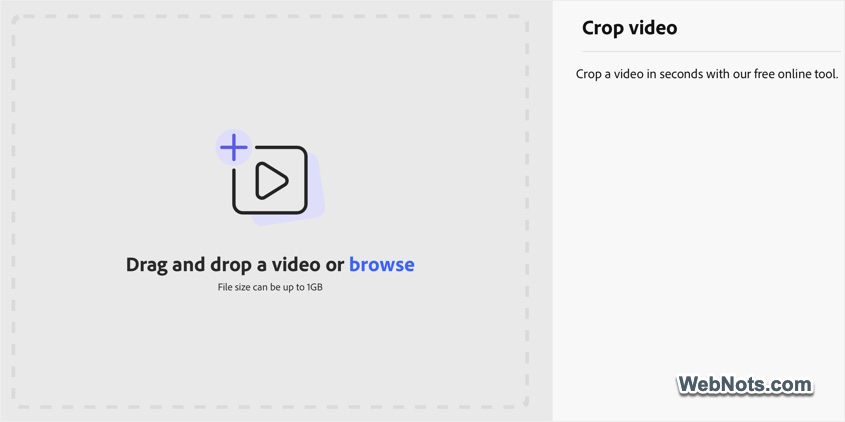
- Click the “browse” link and upload your video in the tool.
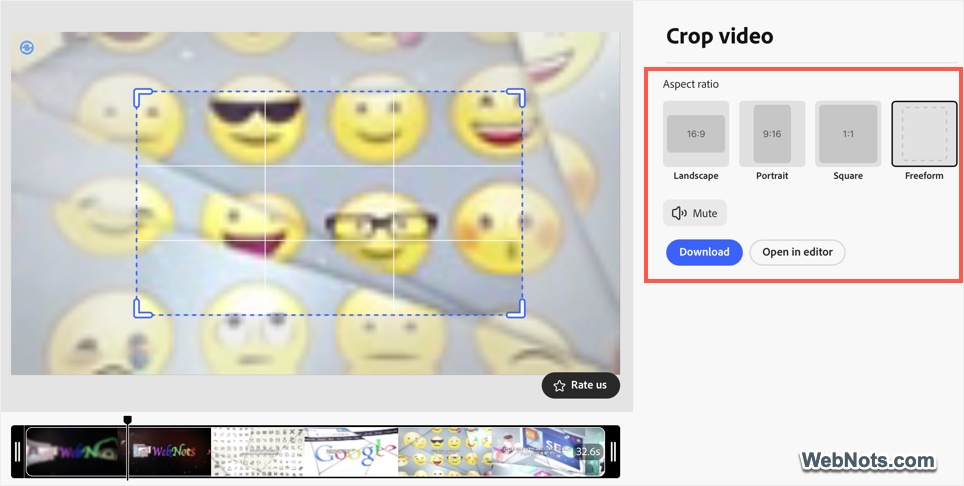
- If you simply want to change the aspect ratio, select one of the available options and click the “Download” button. You can choose from presets like 16:9, 9:16, and 1:1, or use the freeform option by dragging the sliders on the image.
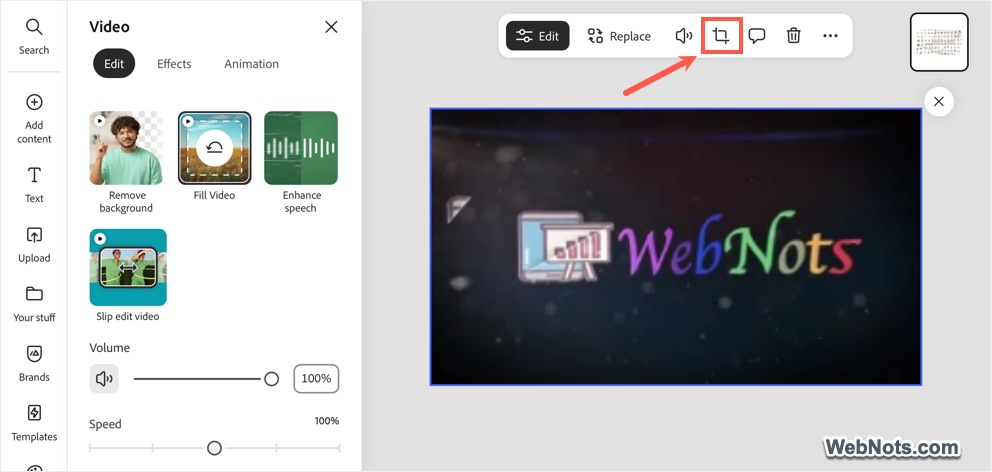
- For advanced editing options, click the “Open in Editor” button to open the video in the editor. When the video opens in the editor, click the “Crop” icon on the toolbar.
- You can either adjust the sliders manually or use preset shapes (like star, heart, square, diamond, etc.) to select the crop area in the video.
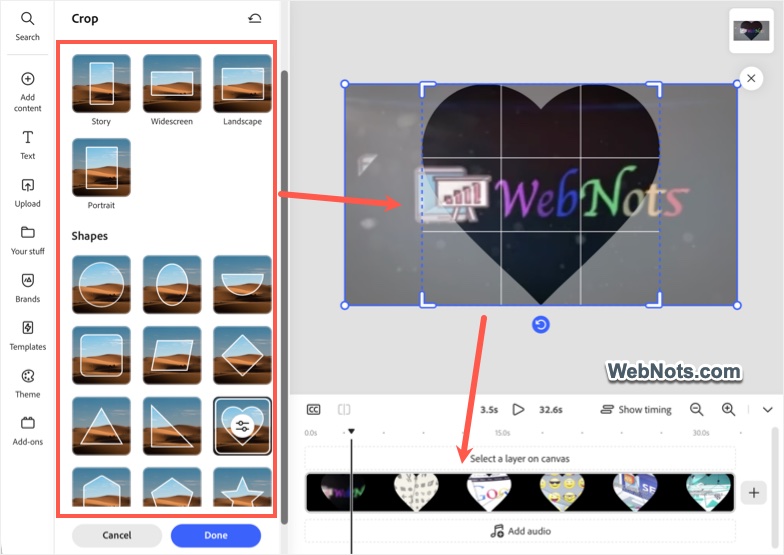
- Click “Done” button and check the preview on timeline.
- If everything looks fine, click the “Download” button to get your cropped video.
Points to Consider for Effective Video Cropping
Unlike trimming, cropping can distort the video if not done properly. Here are some points to consider for better video quality regardless of the tool you use:
- Always keep the subject of the video centered or positioned according to the rule of thirds for visual interest.
- Maintain a consistent aspect ratio if your video is part of a series or intended for a specific platform.
- Preview your cropped video to check for unintended cut-offs or quality loss.
- Consider the final viewing device (smartphones, tablets, and desktops) may benefit from different crop settings.
- Save a backup copy of your original footage before making edits.
The built-in Clipchamp is the best option, while online platforms like Adobe Express offer advanced options with greater control and flexibility.