In our earlier article, we have explained how to change the system date format shown in Windows computer’s Taskbar. On Mac, you can find the date and time on top right corner of the menu bar. Unfortunately, Mac does not offer complete flexibility like Windows OS and you have limited options to customize the date format. Some Mac apps may also take the date format from system’s regional setting for which you have complete flexibility to change.
macOS Interface Difference
The settings are different in macOS 13 or later versions compared to older versions lower than 13. So, we have explained changing menu bar and system date formats using both old and new versions.
1. Change System Date Format in macOS (> 13)
Follow the below steps in macOS Ventura or later versions.
- Click the Apple logo menu and select “System Settings…” option.

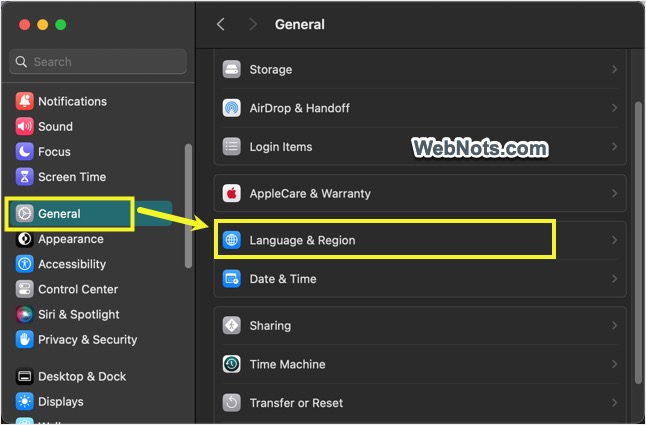
- Go to “General” section from left sidebar and then click the “Language and Region” section.
- Click the dropdown against “Date format” option and change the format.
- You can also change the region (country), calendar system and first day of the week which will also impact the available date formats.
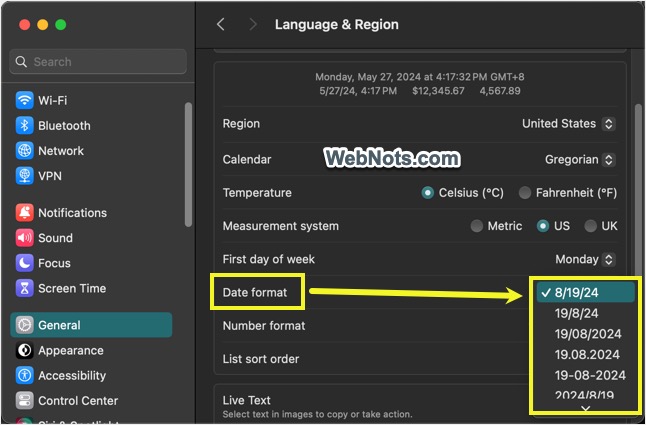
The changes will be automatically saved and the apps using this date format will be impacted instantly.
1.1. Change System Date and Time Format in macOS (< 13)
Follow the below steps if you are still using macOS Monterey or earlier versions.
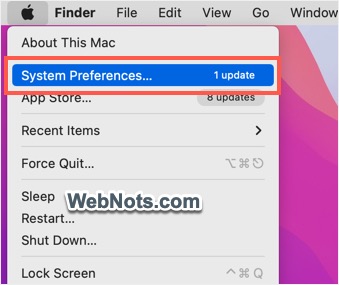
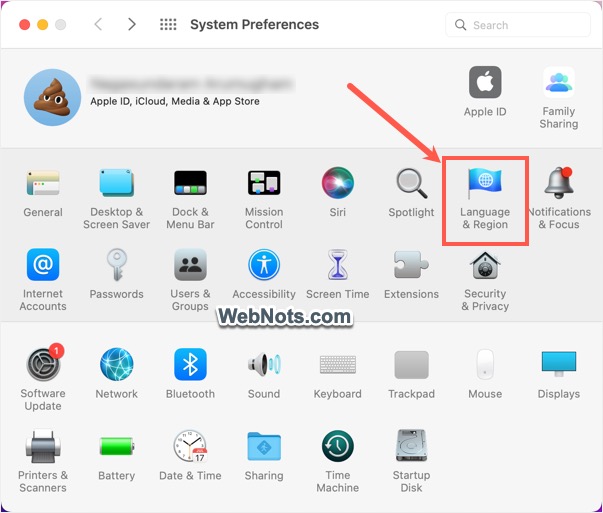
- Click the Apple logo and select “System Preferences…” menu.
- Open “Language & Region” section.
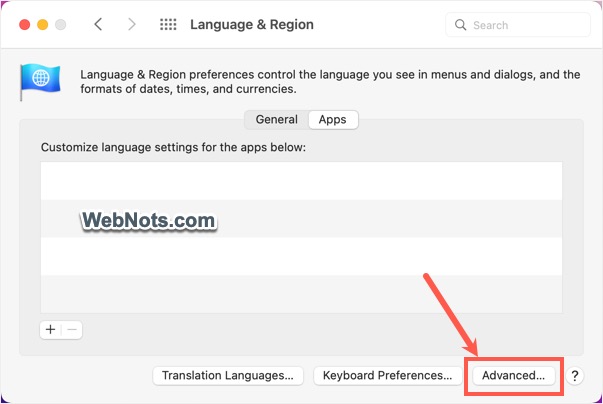
- Click “Advanced” button showing at the bottom.
- Go to “Dates” tab and customize the short, medium, long and full date formats.

- Similarly, go to “Times” tab and customize the short, medium, long and full time formats. You can also change the description for AM and PM if required which will also affect the top Menu Bar clock.
- Click “OK” button to apply your changes.

Anytime, click the “Restore Defaults” button to change the settings to system default.
2. Customize Date & Time Format in Top Menu (macOS >13)
As mentioned, regional date format will not affect the date / time showing in top menu bar. Follow the below steps to adjust the settings:
- Click Apple logo and go to “System Settings…” menu.
- Go to “Control Center” section from the left sidebar.
- Scroll down to the bottom on right side and find “Menu Bar Only” section.
- Click the “Clock Options” button showing against “Clock” option.

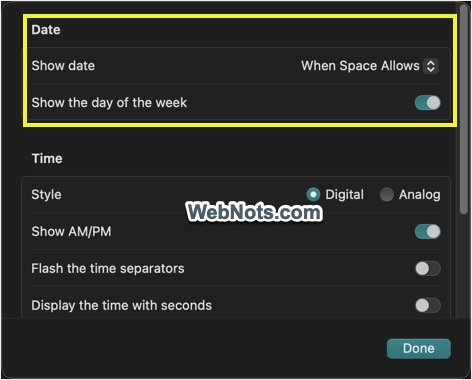
- Date – you can show date always, never or only when space is available and include the day of the week if required.
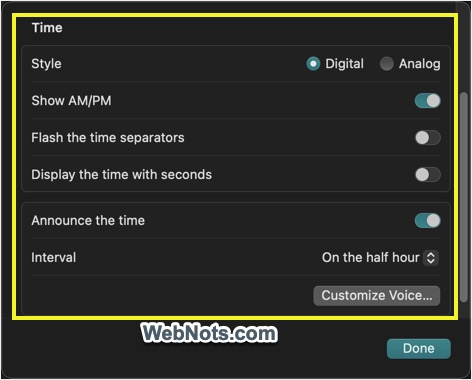
- Time – you can change the time show in analog or digital mode, show AM / PM, flash the separator and display seconds in the clock. It is also possible to announce the time with the set interval with customized voice.
- Click “Done” button to apply your changes.
2.1. Customize Date & Time Format in Top Menu (macOS <13)
Follow the below steps to if you are using macOS Monterey or earlier versions.
- Click the Apple logo and select “System Preferences…” menu.
- Open “Dock & Menu Bar” option.
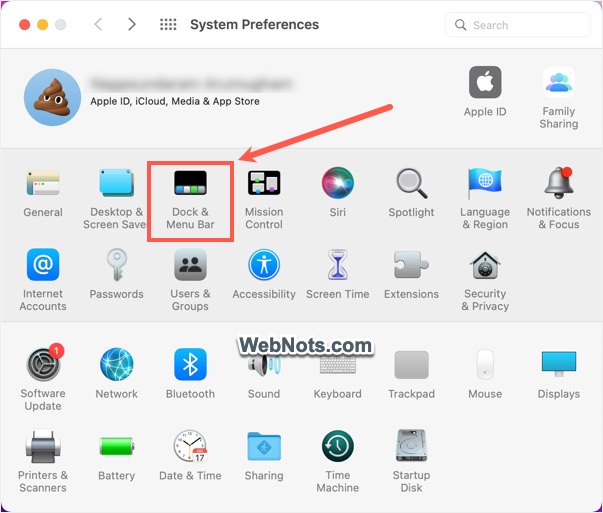
- Scroll down on the left sidebar and open “Clock” section showing under “Menu Bar Only” category.
- On the right pane, adjust “Date Options” settings to show the date always, never or when space allows. Check “Show the day of the week” option to show the day right side of the date.
- “Time Options” allow you to change the time display to digital or analog, use 24-hour format, show or hide AM / PM, flash the separator and add seconds in clock. You can also announce the time with selected voice for the set interval.
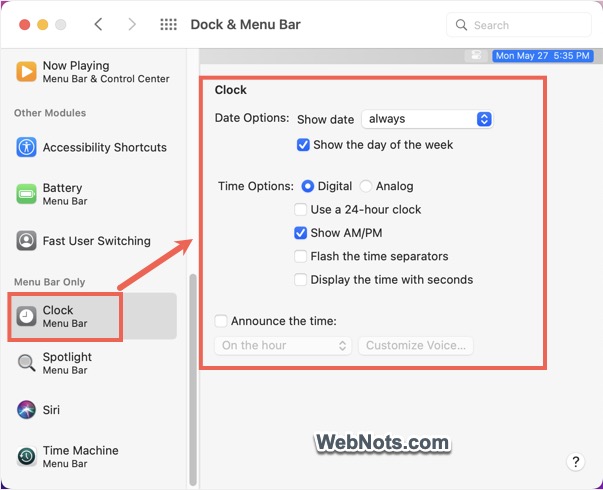
The changes will be applied instantly and you can also check the preview showing inside the preferences window.