By default, Microsoft Word will add author name and other personal information to document properties. This name is used from the details provided during installation or from Microsoft account. There are many situations you need to change the author’s name of your documents. In this article, we will explain how you can do that in Windows and Mac versions. Also, learn how to change company name in Office documents.
Why to Change the Author Name in a Word Document?
Since the author’s name is not shown in the document, many users will simply share the file with personal information stored. Unfortunately, your name will be shown in the document’s properties which you need to remove manually. Here are some of the reasons why you should remove or add additional author name(s):
- If you are working on someone’s computer, the document you prepared will show their name as an author. You should change to your name to get the credit.
- When a document is prepared by multiple people, it is a good idea to add all those as authors.
- Sometimes, you may want to remove your name from document properties for privacy reasons (you do not want anyone to find that you have prepared that document). For example, the name will be shown in PDF files converted from Word documents. You can easily open the PDF in Edge and find the author’s name by clicking on the gear settings icon.

Now, let’s go through the options to change the author’s name.
Method 1: Change or Remove Author Name for an Existing Document
Follow the below steps if you want to change or remove the author’s name in a specific Word file. This means, other files (both old and new) will NOT be affected with this change.
- Open your document file in Word app and go to “File > Info” menu.
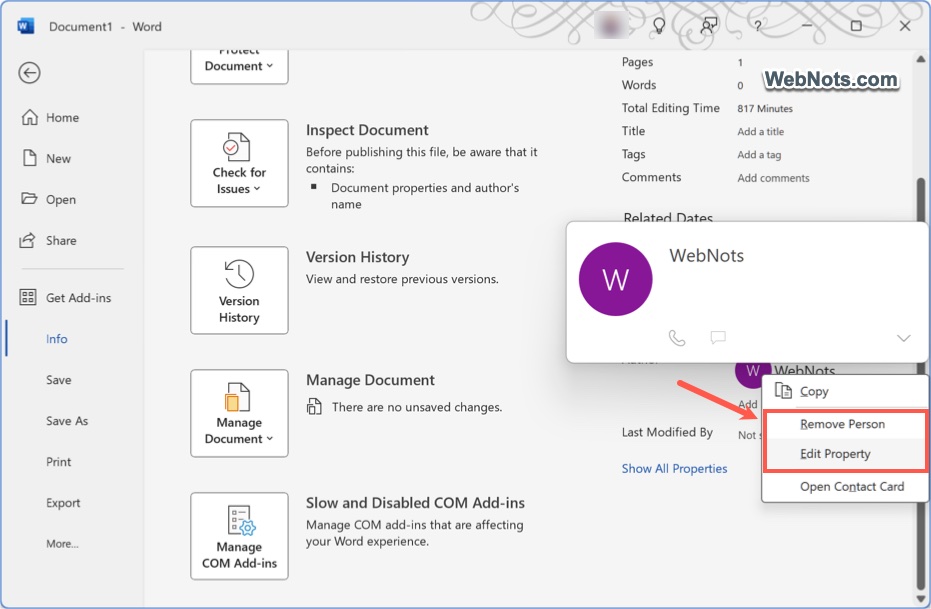
- Under the right column, find “Related People” heading.
- Below that you will see “Author Name” and “Last Modified By” fields showing the corresponding names.

- Right-click on the name of the author and select “Remove Person” option to delete the name. For changing the name, select “Edit Property” and type a new name. Word will try to fetch the details from your address book (contacts list). You will see a warning if the entered name is not in your address book. Don’t worry, simply click outside to add that name as your author. Alternatively, you can also open the global address book and select an existing name.
Make sure to get back to document and save the file for the changes to be applied.
1.1. Add Multiple Authors to a Document
- Click “Add an author” link showing below the current author’s name.
- Type a name in the box to add another author name. Or, you can select a name from global address book.

- You can add as many as author names to make the document multi-authored.

- Back to your document and save the file.
Method 2: Setting a Default Author Name for All New Documents
If you want to set a new default author name for all documents you create going forward (old files will not be affected), you need to adjust the settings in Microsoft Word’s options. This method is helpful if you regularly work under a different author name than logged account’s name.
- Launch Word app and open an empty file or any existing file.
- Navigate to “File > Options” menu to open “Word Options” dialog box.
- Go to “General” tab and find “Personalize your copy of Microsoft Office” section.
- Change the name in “User name” box and check “Always use these values regardless of sign in to Office” option. Optionally, you can also update the “Initials” field to reflect the new author’s initials.
- Click “OK” button to save your changes.

Method 3: Removing All Personal Information
Using method 1, you can only remove author’s name. However, Word also saves other details like dates, title and company name along with other document’s properties. You can use this method to remove all personal information and document properties to share it anonymously. Note that this works only on a specific document.
- Open the document in which you want to remove document properties.
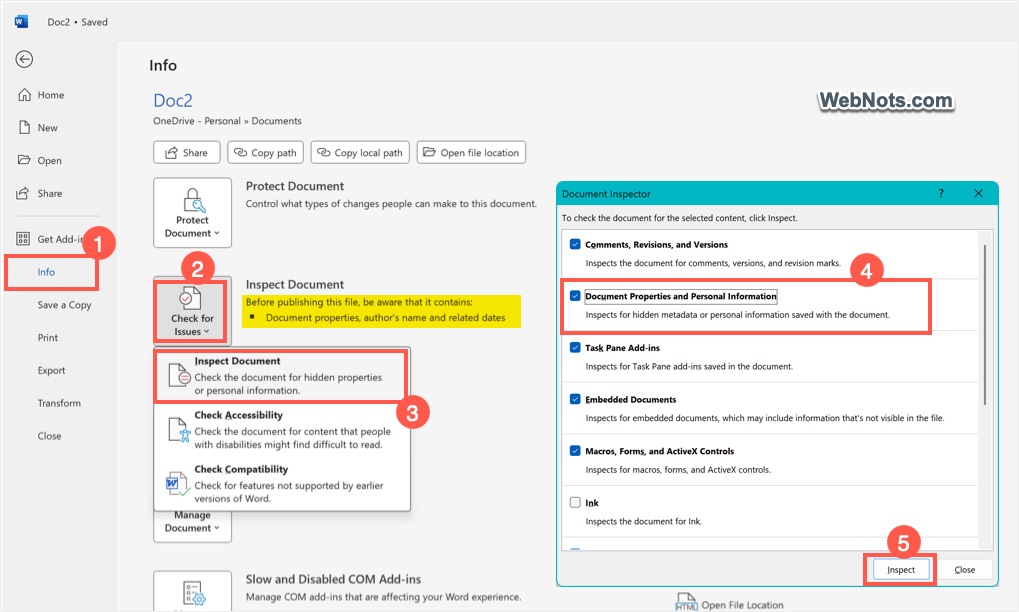
- Go to “File > Info” menu and click on the “Check for Issues” button showing before the “Inspect Document” option. You can actually see a message showing the details contained in the document (it shows document properties, author’s name and related dates in our case).
- Select “Inspect Document” option from the dropdown to open “Document Inspector” pop-up.
- Make sure to check “Document Properties and Personal Information” option and click on “Inspect” button.
- The tool will run and show the inspection results with the personal details the document contains. Click “Remove All” button to make that item to show in green.

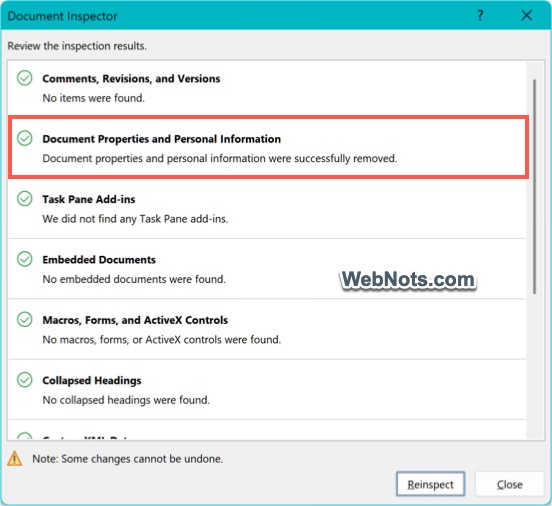
- Close the Document Inspector tool and now you will see a different message below “Inspect Document” option. It will show an automatic setting will remove the personal information and document properties when the file is saved.

- Get back to the document and you will see a “Personal Information Removal Enabled” warning. Clicking on the “Change setting” button will revert the changes and add your personal information including author name in the document properties.
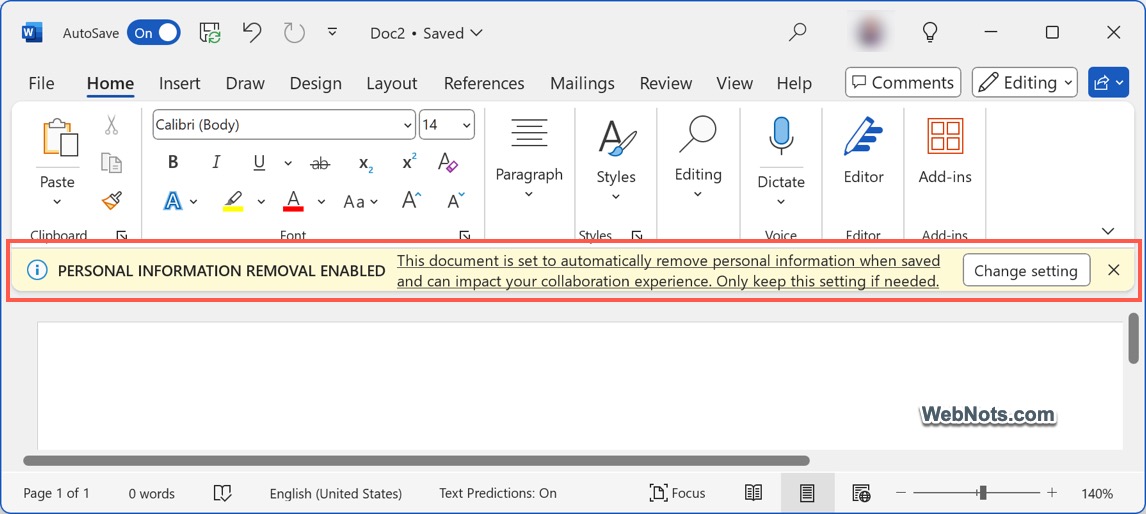
- For deleting the personal details, close the warning notification and save your document.
Note that removing author name and personal information using Document Inspector is irreversible. You need to add the details manually if required as explained in method 1.
Method 4: Choosing Personal Information in File Properties
You can choose what type of information should be saved in your document’s properties for a specific Word document.
- Find the document in File Explorer, right-click on it and select “Properties” option (or press “Alt + Enter” keys).
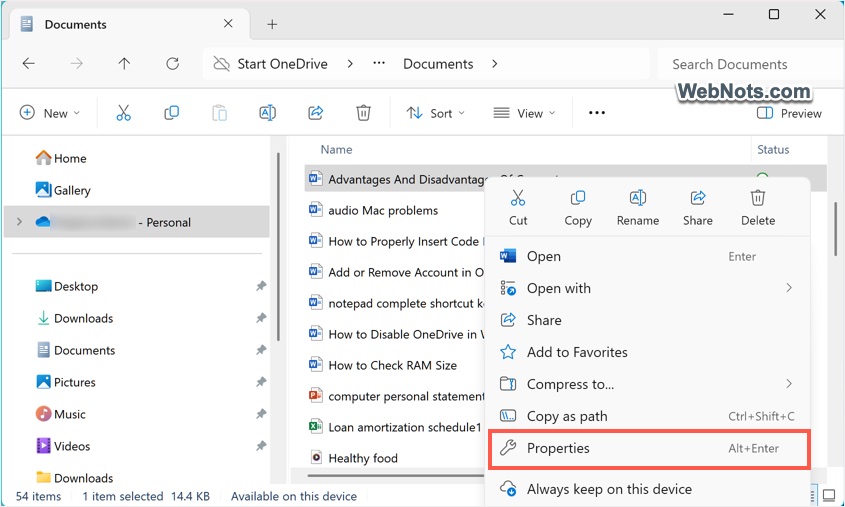
- In the Properties window, go to “Details” tab.
- Find the current author’s name, document title and other details. Click on the “Remove Properties and Personal Information” link showing below all the items.

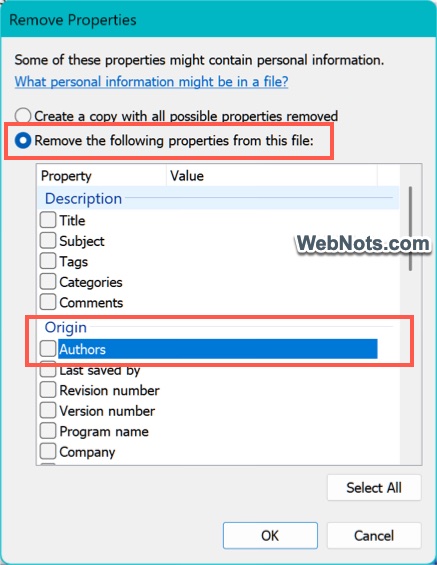
- On the “Remove Properties” dialog box, select “Remove the following properties from this file:” option.
- Click “Select All” button and then click “OK”. For only removing author name, select “Authors” option and uncheck all other items.
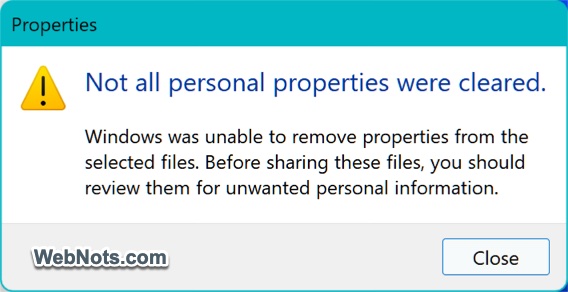
If there are problems in removing personal details, Word will show a notification that not all personal properties were cleared. In this case, you should follow the previous method 4 and manually remove the details.
Method 5: Changing the Author Name on a Mac
If you are using Microsoft Word on a Mac, the process to change the author’s name is similar, though the interface may differ slightly.
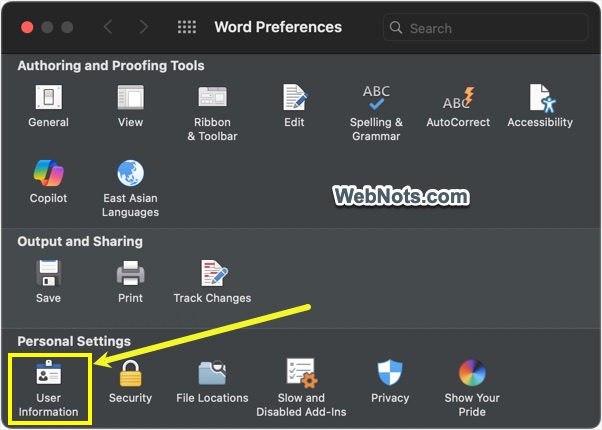
- Open a Word document and go to “Word > Preferences…” menu.
- Click on “User Information” option showing under “Personal Settings” section.
- Change the “Name” and “Initials” fields under “User Information” section. Make sure to check “Always use this name regardless of how I’m singed into Office” option.
- Close the preferences box and save your document.
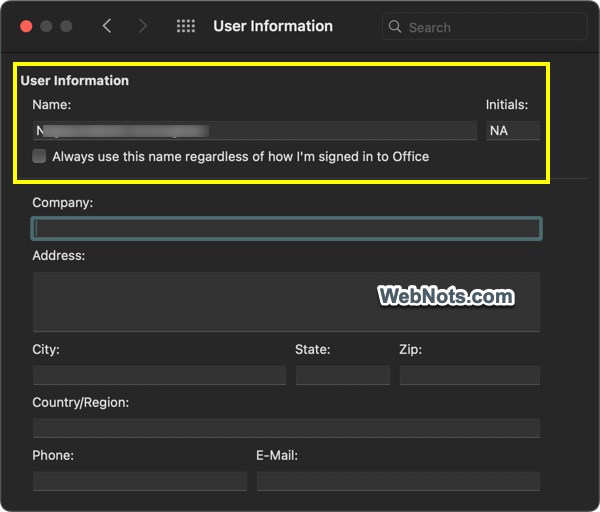
Note: Unfortunately, Word will always try to use the author’s name from the logged in Microsoft account on Mac versions. So, removing or changing the name will not work most of the time.
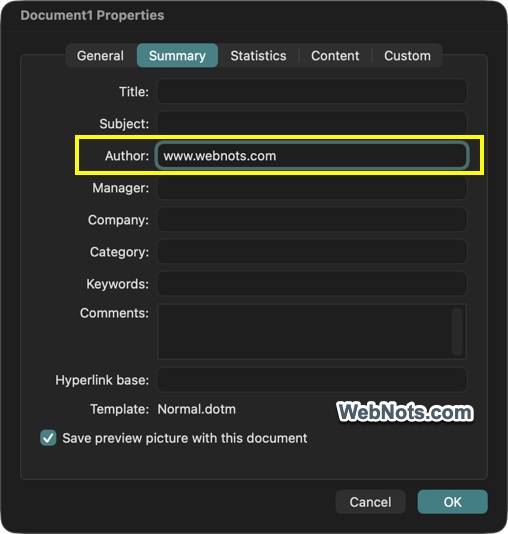
To change the author name for a single document, open the file and go to “File > Properties” menu. The “Author” field is automatically populated from the “User Information” section in the preferences. Delete the existing name and enter the new author name.
Method 6: Change Author Name in PDF from Word (Mac)
Follow the below steps if you want to change the author name in PDF file converted from a Word document on Mac.
- When you are in Word document, press “Command + P” keys to open print dialog box.
- Click the “PDF” button showing on bottom left corner and select “Save as PDF…” option.

- This will open “Save As” dialog box where you can change the author name and save the file as a PDF document.

Final Words
Whether you need to update a single document, apply a new author name to all new documents, or anonymize a file before sharing, Word offers flexible options for managing author information. In addition to author name, you can also remove or change other personal details and document properties as explained above. After removing author name, always make sure to check the properties before sharing the document with your colleagues or on public domains.