If you want to block notifications while using an app on your iPhone, you might think of using the Do Not Disturb mode (part of Focus feature). However, Do Not Disturb is designed for long periods, such as when you’re sleeping, and might not be the best option if you just want a distraction-free experience for a short time – like when playing a game or focusing on an important task.
For this purpose, iOS offers a Guided Access feature that allows you to “lock” your iPhone to a particular app, preventing notifications, calls, and other distractions. Here’s how to enable and use Guided Access to block notifications while using an app.
Step 1: Enable Guided Access
- Open the Settings app on your iPhone and go to “Accessibility” section.
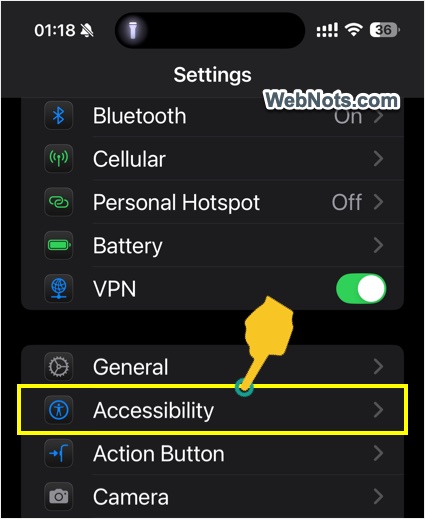
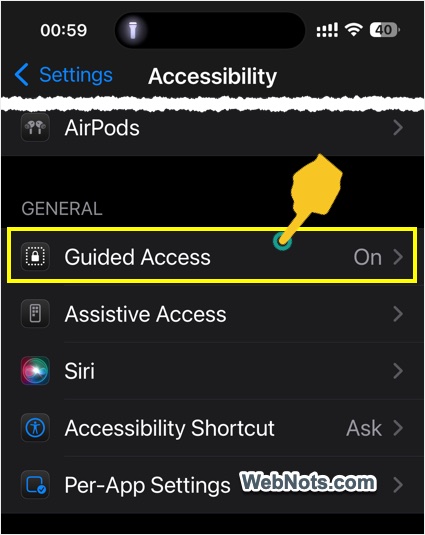
- Scroll to the bottom and tap “Guided Access” option under “General” section.
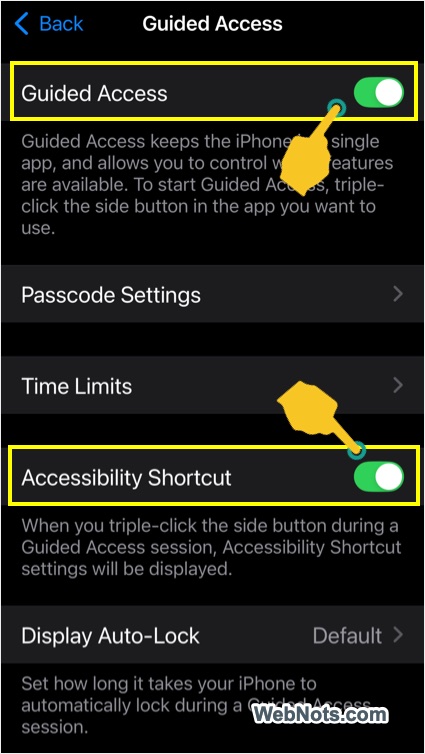
- Toggle the switch to turn on “Guided Access”.
- Turn on “Accessibility Shortcut” which allows you to quickly activate and deactivate Guided Access using the Home or Side button.
- Exit the Settings app.
Step 2: Activate Guided Access for an App
Once Guided Access is enabled, follow these steps to use it in any app:
- Open the app you want to use without interruptions.
- Triple-click (press three times quickly) the side button (or the Home button on older iPhones).
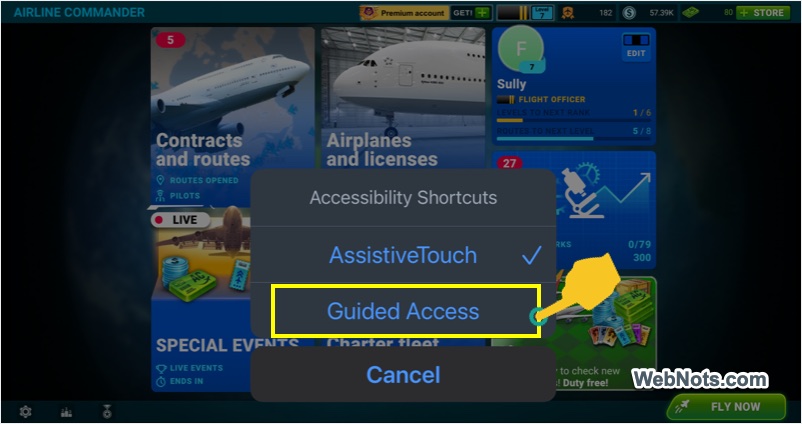
- If you have enabled multiples options under “Settings > Accessibility > Accessibility Shortcut” section, you will be prompted to choose an accessibility shortcut and select “Guided Access” option. If you have enabled only “Guided Access”, then you will not see any prompt.
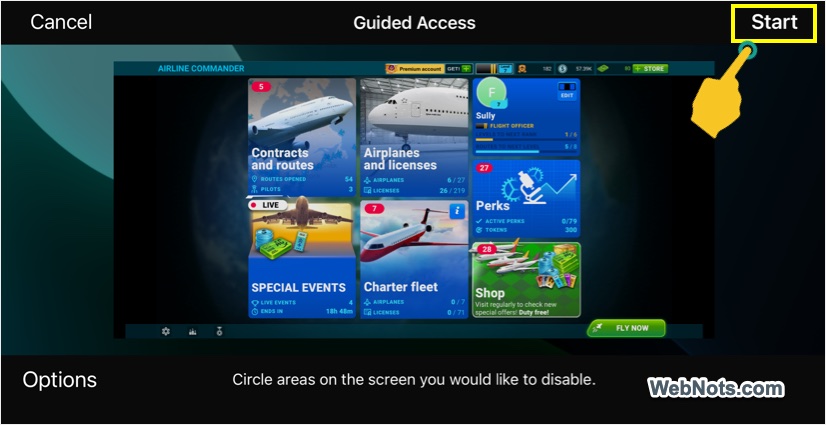
- Tap “Start” in the top-right corner of the screen.
- The first time you do this; you’ll be prompted to set a passcode and verify for Guided Access. You can use the same passcode as your iPhone’s lock screen or set a unique one.

Once activated, your iPhone will be locked to the selected app, and notifications, calls, and other distractions will be blocked.
Step 3: Exiting Guided Access
To unlock your iPhone and exit Guided Access:
- Triple-click the Side or Home button again.
- If prompted, tap on “Guided Access” to disable it (prompt appears when you have multiple accessibility shortcuts)
- Enter the passcode you set earlier.
- Tap “End” in the top-left corner.
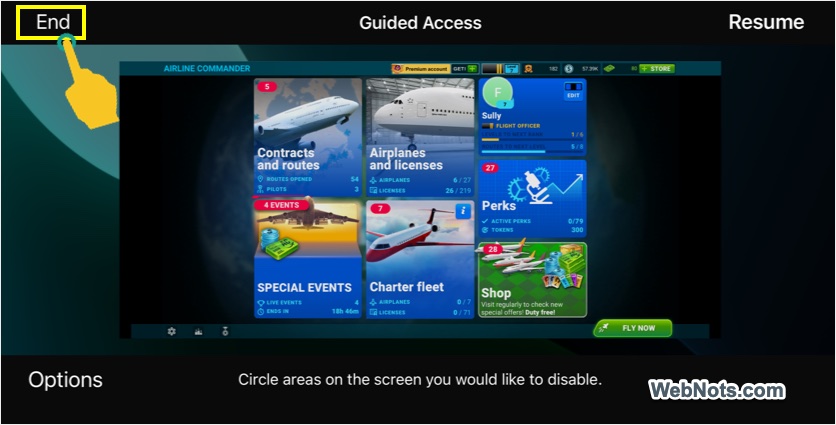
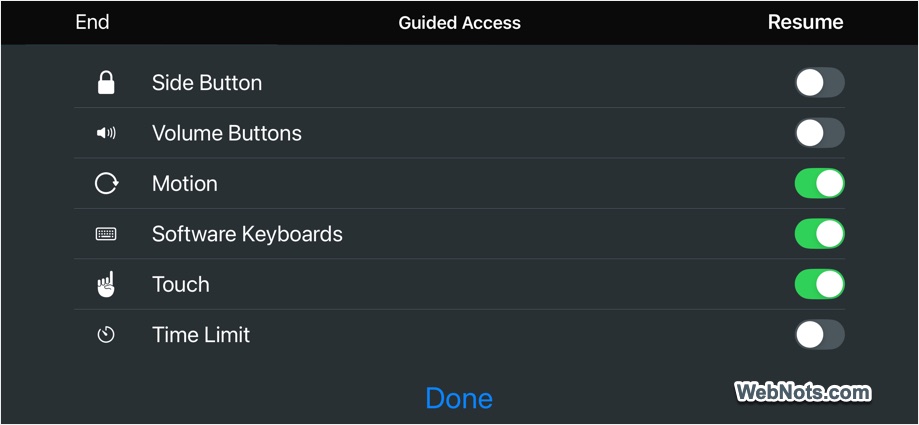
- If you want to enable certain functions while using Guided Access mode, then tap on “Options” showing on bottom left-corner. You can enable side button, volume buttons and disable touch to use like a child lock when using an app.
Note that you can also use Face ID to end Guided Access by turning it on under “Settings > Accessibility > Guided Access > Passcode Settings” section.
Important Things to Note
While Guided Access is active, you won’t be able to:
- Switch to another app.
- Access the Control Center or Notification Center.
- Adjust the volume or power off (if these options are disabled).
- Receive calls (they will go straight to voicemail).
- To permanently disable Guided Access, go back to “Settings > Accessibility > Guided Access” and toggle it off.
Final Words
This feature is perfect for ensuring uninterrupted focus while using an app. Whether you’re gaming, reading, or working, Guided Access provides a simple way to block distractions on your iPhone.