Most of us have a Gmail account as it is the single-sign-on account for using all Google services. Though it is robust and reliable, sometimes you may receive unwanted emails from specific individuals or businesses. This will be annoying if you continue to receive spam emails in your primary inbox folder. Fortunately, Gmail makes it simple to block these contacts to keep your inbox clutter-free thus allowing to focus on your work. In this article, we will explain on how to block a contact in Gmail, both on website and mobile apps.
Why Block a Contact?
By default, Google will try to identify spam emails and deliver those emails to Spam or Junk folders in your account. These folders are part of a Gmail account and taken care automatically. However, you may need to manually block a contact in Gmail for various reasons.
- You know the contact very well, yet you want to block him or her as you no longer wish to communicate with them.
- Want to block a continuous and irritating replies from a contact that wastes your time with notifications and meaningless responses.
- Unwanted emails from newsletter subscriptions and other services that you no longer want to read.
Good thing is that you can anytime unblock a person and continue receiving emails.
Block a Contact in Gmail Website
- Open Gmail website and log into your account using your credentials.
- Go to Inbox and find an email from the person or company you wish to block. Open the email by clicking on it.
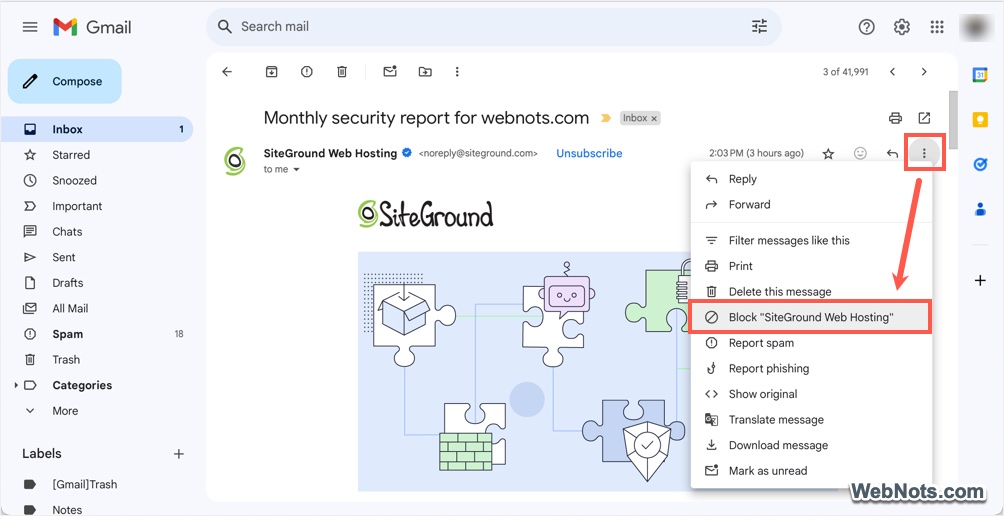
- Once the email is opened, click on the three vertical dots (“More” options) at the top-right corner of the email (next to the reply button).
- Select “Block <Contact Name>” option from the dropdown menu that appears.
- Gmail will show a pop-up asking you to confirm the action and click the “Block” button.
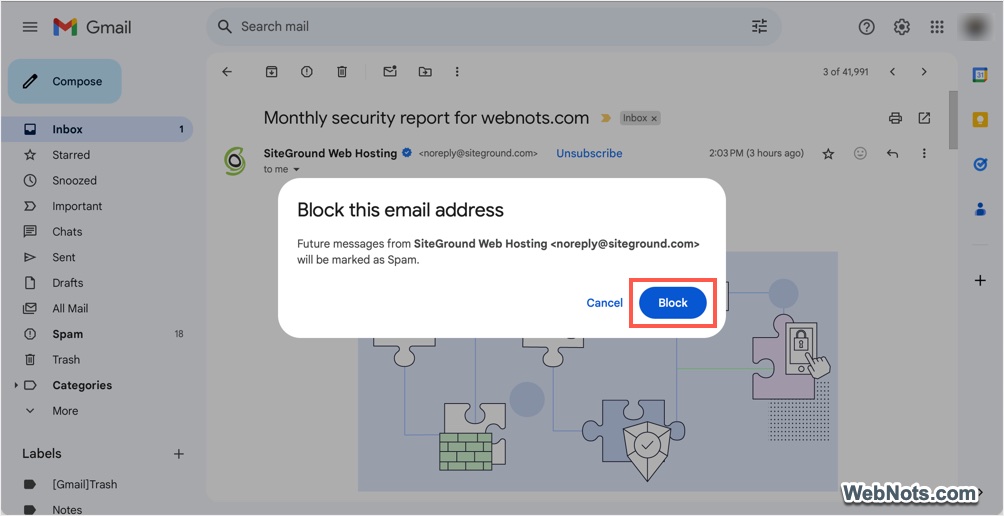
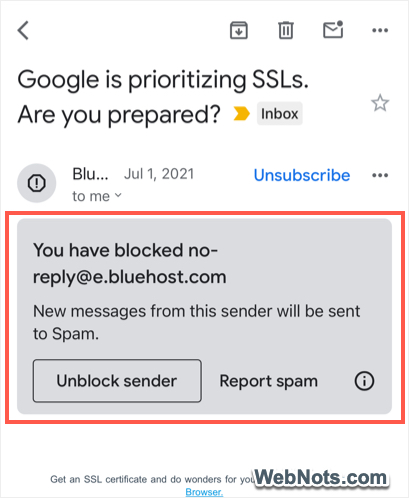
- You will see a notification that new emails from that contact will be sent to Spam folder.

Block a Contact in Gmail Mobile App
Blocking a contact in Gmail iOS and Android mobile app is also just as simple.
- Open Gmail app and log in if you are not already signed in.
- Go to primary Inbox, find the email from the person or company you want to block and open it.
- Tap the three horizontal dots icon (“More” options) and select “Block <Contact Name>” from the slide out menu that appears from the bottom.

- A notification will be shown in the email that the contact is now blocked. Any future emails from this sender will go to your spam folder.
Unblocking a Single Contact in Gmail Website and Apps
If you have mistakenly blocked a contact or wanted to unblock a blocked contact, there are multiple ways to do that either from the site or from the app.
- If you are on the same email after blocking, simply click on the “Unblock sender” button.
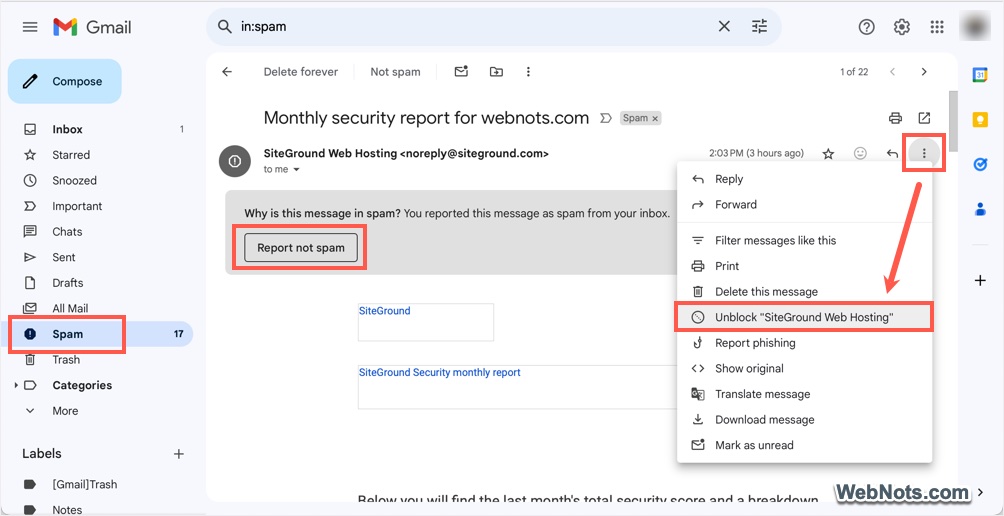
- Otherwise, click the “More” icon, select “Unblock <Contact Name> option and confirm.

- Last option is to go to “Spam” folder and open an email from the blocked contact. Simply click on the “Report not spam” button to move the emails to Inbox. Otherwise, go to “More > Unblock <Contact Name>” to unblock the contact.
Unblocking Multiple Contacts in Gmail Website
If you have blocked multiple contacts over period of time, it is difficult to remember their names and unblock one by one. In this case, you can bulk unblock by selecting the contact names from the list.
- When you are in Gmail website, click the gear settings icon showing on top right corner.
- Click on the “See all settings” button.

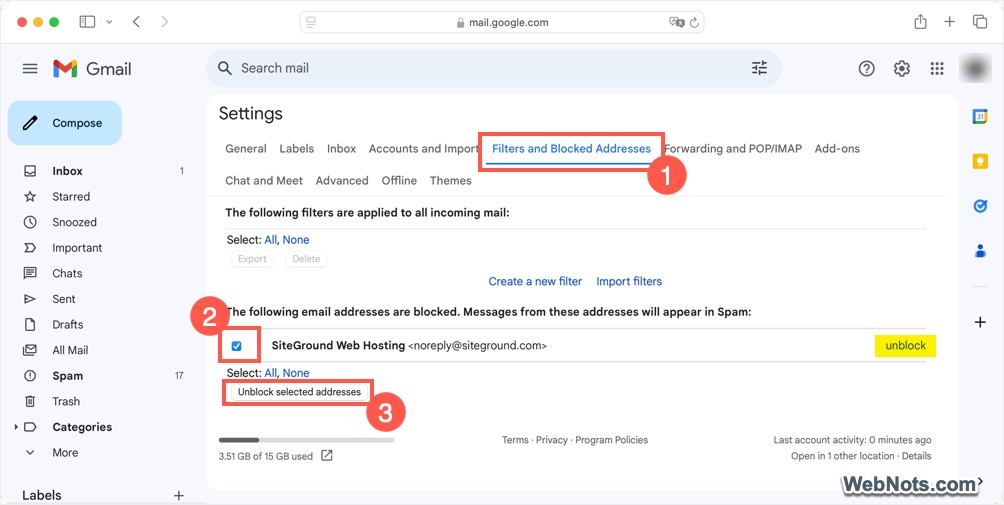
- Navigate to “Filters and Blocked Addresses” tab and check under “The following email addresses are blocked……” heading.
- Select the required contact names by checking the box in the front of each address.
- Click on “Unblock selected addresses” button. You can also click the “unblock” link against an address to unblock a single contact.
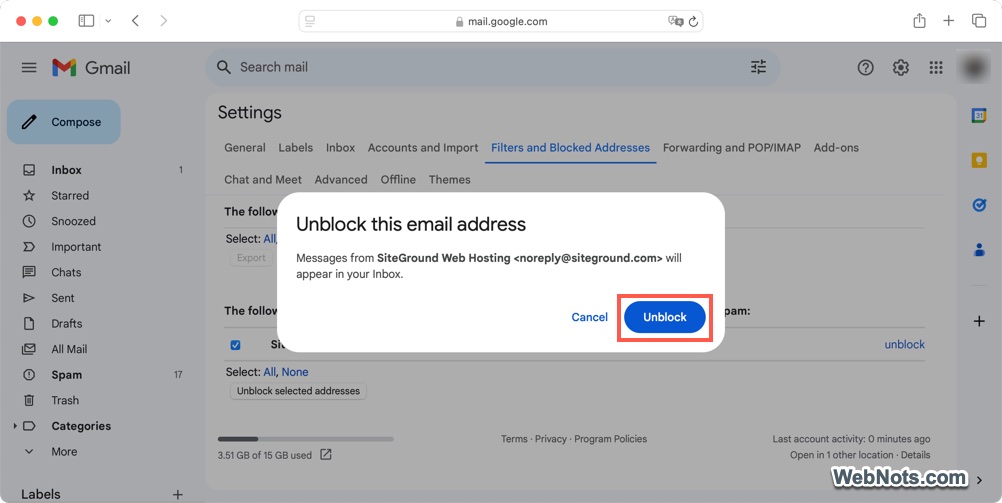
- Confirm your action by clicking on the “Unblock” button.
Unblocking Multiple Contacts in Gmail Apps
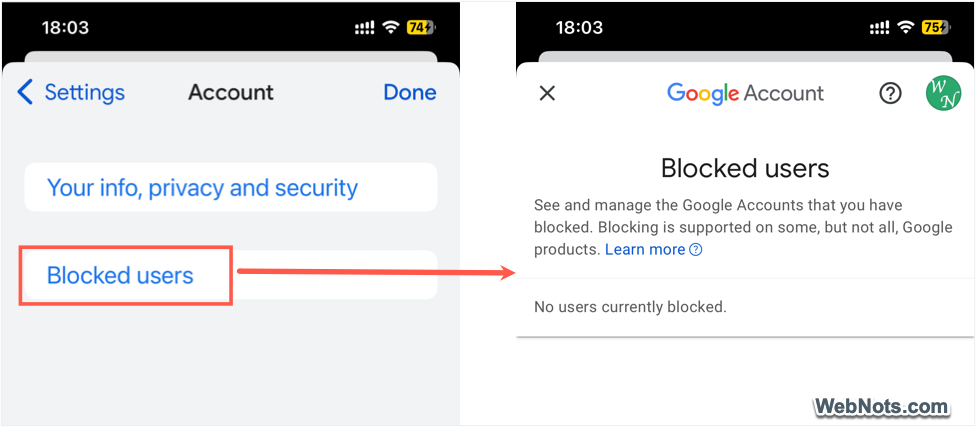
Bulk unblock is also available in mobiles apps, though it will open your Google account webpage.
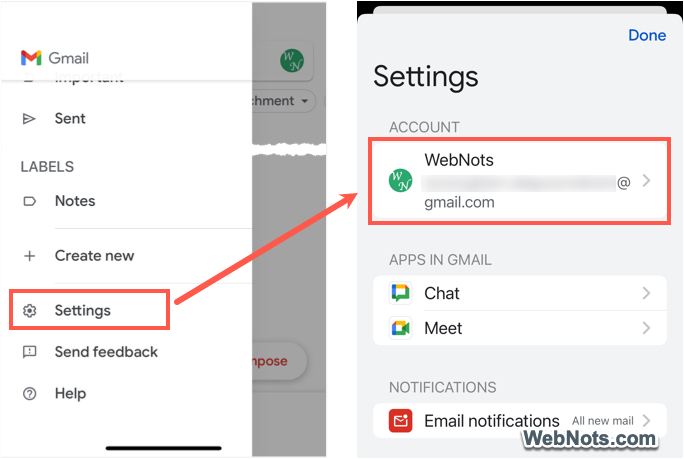
- Open Gmail app and tap on the three horizontal line icon (Hamburger icon) showing on top left corner.
- Scroll down and select “Settings” from the list of menu items.
- Tap on your email address showing below the “Account” heading.
- Tap on “Blocked users” option to open Google account page where you can select and unblock contacts in bulk.
What Happens After You Block a Contact?
Once you block a contact in Gmail, the following happens:
- You will no longer see their messages in your primary inbox, but they won’t be completely deleted. Gmail will send all future emails from the blocked contact directly to the Spam folder.
- You will not get any notifications when the blocked contact sends you emails, making it easier to avoid unwanted communications.
Additional Gmail Tips for Managing Unwanted Emails
Though blocking and unblocking contact is easy, Gmail also provides various other options to manage unwanted emails:
- Unsubscribe from Newsletters – Gmail offers a quick “Unsubscribe” option at the top of promotional emails to quickly opt-out from the service.
- Report Spam or Phishing – If an email looks suspicious, report it as spam or phishing. Open the email, click on the three dots and select “Report spam” or “Report phishing” option.
- Create Filters – you can create custom filters to automatically archive, delete or mark emails from certain contacts or with specific keywords.