Authenticator apps are popular for setting up two-factor authentication (2FA) which has become an essential shield against unauthorized access. Microsoft Authenticator is a popular choice among many other apps for securing accounts, offering an easy and reliable way to generate time-based one-time passwords (TOTPs) for a variety of services. However, as with any authentication tool, it’s important to ensure your data is backed up and you know how to restore it in case of device loss, upgrade to new iPhone, or malfunction.
Why Backup is Important?
Imagine losing your iPhone or needing to migrate to a new device. Without a backup of your Microsoft Authenticator data, you could be locked out of accounts protected by 2FA, potentially causing delays and complications in regaining access. Proper backup procedures ensure that you can restore your authentication codes quickly and efficiently. Before proceeding, ensure you have the following:
- Access to your current device with the Authenticator app installed.
- Reliable internet connectivity.
- Your account recovery details (email or phone number) are up to date.
Backup Microsoft Authenticator App on iPhone
Microsoft Authenticator uses cloud backup to securely store your accounts, streamlining the restoration process. On Android, simply go to app’s settings to turn on “Cloud Backup” and select your Microsoft account. However, the latest Authenticator app on iOS works with Apple’s iCloud setup to store the data. So, the process is bit lengthier especially if you are not familiar with iCloud.
Step 1 – Turn On iCloud Backup in iPhone
Apple offers 5GB free storage for getting started with iCloud and automatically backup your entire device periodically (and also automatically). Though Authenticator’s data won’t be larger, make sure to have sufficient iCloud storage while using the service (you may need to upgrade if necessary).
- Tap on the “Settings” app on your iPhone’s home screen.
- Your Apple account’s name will be shown on the top and tap on it and then navigate to “iCloud” section.
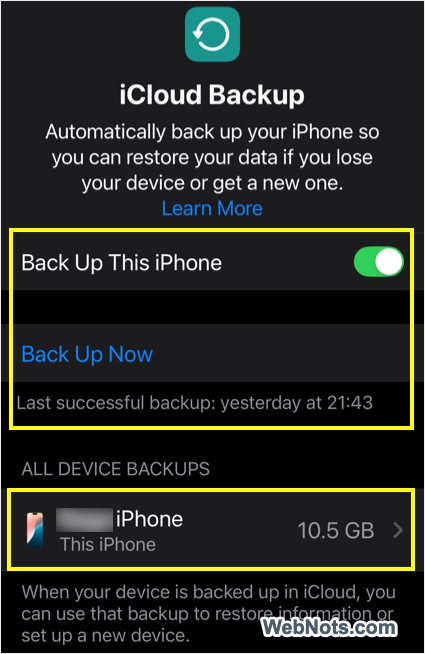
- Scroll down to find “iCloud Backup” option and tap on it.
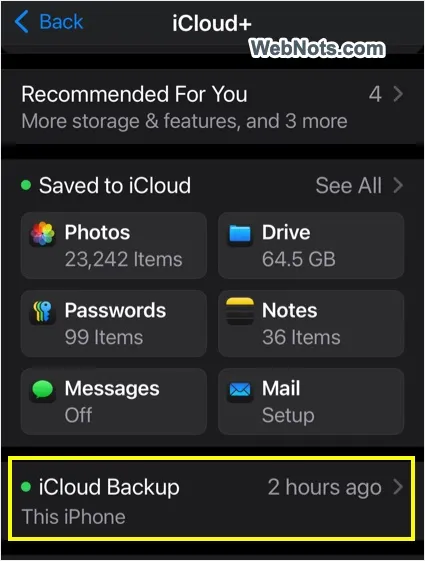
- Turn on “Back Up This iPhone” to enable automatic backup. If you want to transfer (restore) the backup data immediately on another iPhone, tap on “Back Up Now” option to generate the latest backup.
- Tap on the device name showing the backup’s size.
- You will see the details along with the list of apps and tap “Show All Apps” option.
- Scroll down to “Authenticator” app to make sure it is turned on.

You can find the app’s backup size and anytime turn off the backup from here while keeping all other app’s backup on your iPhone.
Step 2 – Turn On iCloud Keychain in iPhone
The next step is to enable iCloud Keychain on your iPhone which needs the 2-factor authentication (2FA) for your Apple account. Learn how to enable 2FA for your Apple accountand then follow the below steps.
- Navigate to “Settings > Apple Account > iCloud” section.
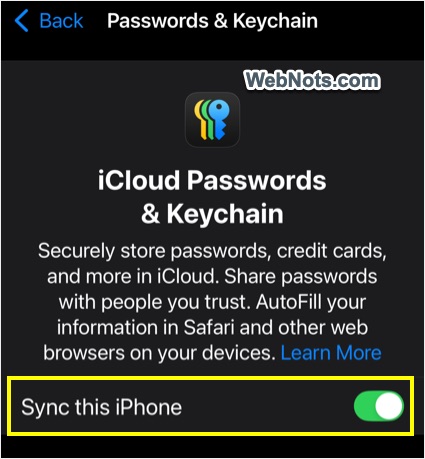
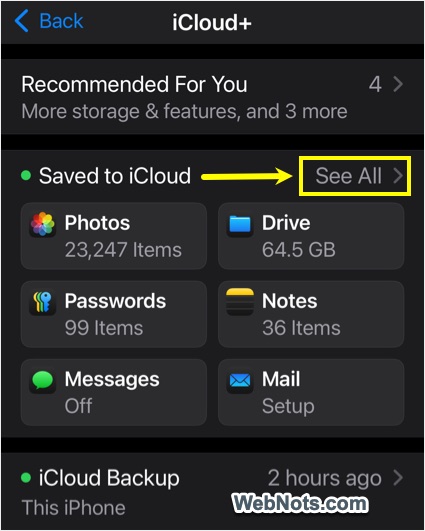
- Tap on “Passwords” option showing in “Saved to iCloud” section (otherwise, tap on “See All” and then navigate to “Passwords and Keychain” section).
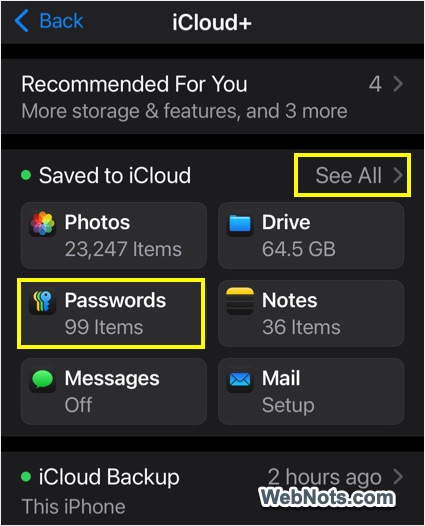
- Turn on “Sync this iPhone” option for iCloud Passwords & Keychain.
- Provide your iPhone passcode or account password if prompted to confirm your action.
Step 3 – Enable Authenticator to Save on iCloud
- Navigate to “Settings > Apple Account > iCloud” section.
- Tap “See All” option next to “Saved to iCloud” heading.
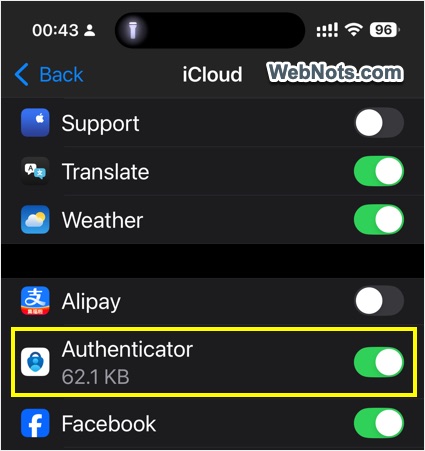
- Scroll down to find and turn on “Authenticator” app.
Step 4 – Turn on Cloud Backup in Authenticator App
This is the last step to be finished within the Authenticator app.
- Open Authenticator app and tap on the hamburger icon (three horizontal lines) on top left corner.
- Select “Settings” from the menu to open app’s settings page.

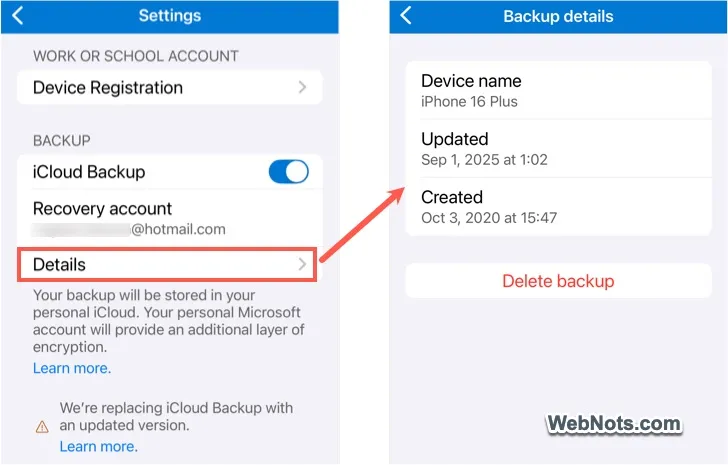
- Enable “iCloud Backup” option under “Backup” heading.
- Select your personal Microsoft account as a “Recovery account” and then tap on “Details”.
- You will find the last updated backup date along with your device name (and also with the first created backup date).
Step 5 – Restoring Microsoft Authenticator App
If you have a new iPhone or have reset your existing device, you can easily restore your accounts.
- Follow the first three steps as explained above to make sure iCloud Backup is turned on for Authenticator app on your new device.
- Download and install the Microsoft Authenticator app from the App Store.
- Data will be restored depending on the account you use to login.
- For personal accounts: items using one-time passcode will be restored and you need to sign in again if the account is also used for passwordless login.
- For work accounts: you need to sign in to each account to finish the restore.
- For third-party accounts: all accounts with one-time passcode with be restored in the app.
Note: Microsoft retired passwords and autofill features in Authenticator app. Henceforth, you can only use passwordless login.
Final Words
As you can see, backing up the Microsoft Authenticator app on iPhone is more complicated than on Android, as it relies on iCloud storage. Since the free 5GB of iCloud can be quickly used up by photos and videos, you may need to upgrade your plan or disable other features to reserve space for backups. This is a hassle compared to the previous setup of storing data in your Microsoft account.