Finder is the default file explorer app in Mac which always run in background even when you are not using the app. You can see the Finder app’s menu showing in top bar when you are in desktop and the app always has a dot below in Dock indicating it is running in background. Unlike other apps, there is no “Quit Finder” menu to quit the app when you do not use it. Always keeping Finder in open mode is useless if you are relying on alternate options like Spotlight, Dock, Launchpad, Mission Control or any other third-party app. So, here is how you can add “Quit Finder” menu item in Mac Finder app.
2 Ways to Add Quit Finder Menu
Below is how the default Finder menu will look without any option to quit.
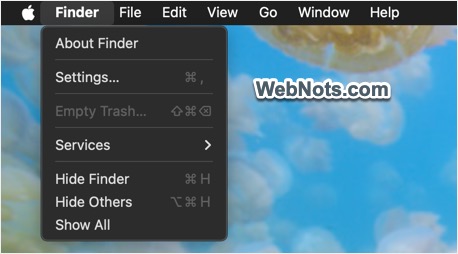
Fortunately, you have few options to add the quit menu and kill Finder app in Mac.
- Using Terminal command
- By editing PLIST file
Since Finder is yet another app in macOS, killing the app will not affect other operations. Note that you can’t force quit Finder as it will only show the option to relaunch.
1. Using Terminal to Add Quit Finder Menu
Make sure you have administrator rights on the Mac and follow the below steps.
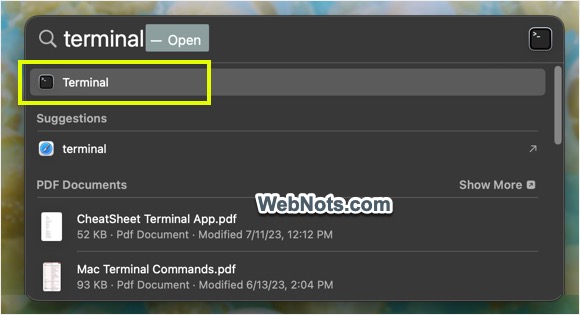
- Press “Command + Space” to open Spotlight. Type “terminal” to search and open Terminal app.
- Type or copy/paste the following command and press enter key.
defaults write com.apple.finder QuitMenuItem YES
- Now, you need to kill all Finder open windows and relaunch the app. for that, type the following command in Terminal and press enter key.
Killall Finder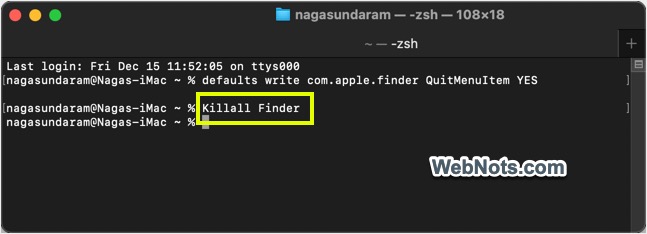
- Open Finder or go to desktop and now you can see the app has “Quit Finder” menu added under “Finder” top menu.
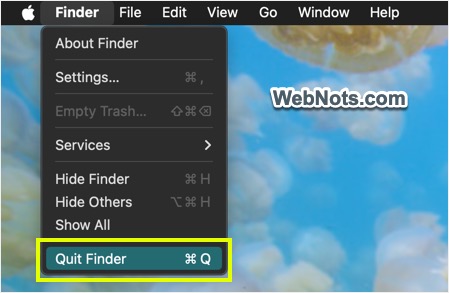
- Select “Quit Finder” option to close the app and you will not see the top menu as well the dot below the app in Dock anymore.
Reverting the Changes
Open Terminal and type the following command to remove “Quit Finder” menu item anytime later.
defaults write com.apple.finder QuitMenuItem NOThen relaunch the app using the same kill command:
Killall FinderNow, Finder will not show the quit menu and always running in background as default.
2. Add Quit Finder Menu from PLIST File
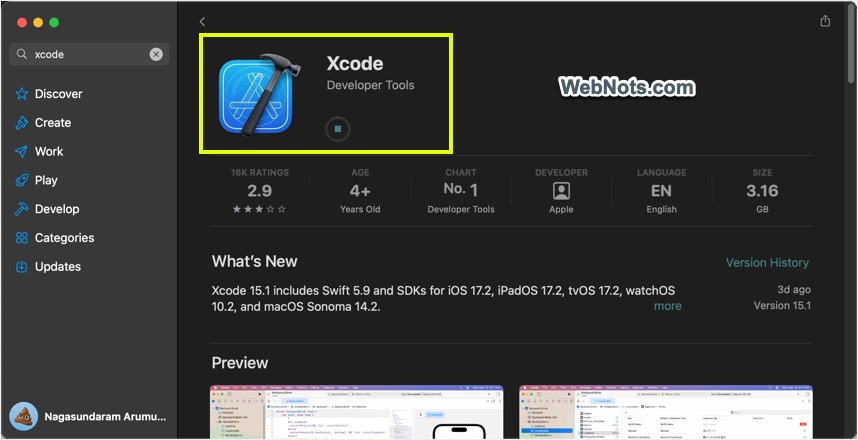
PLIST (preferences or property list) is a configuration file in Mac that allows you to change app’s parameters. As you can see in the Terminal command, we basically change QuitMenuItem parameter to Yes or No to show or hide the menu item. You can change the same parameter in PLIST file and bring the same result. However, the problem is that editing PLIST files need a special binary test editor app like Xcode. The app is huge in size with 3+ GB and is not recommend if you need only for this purpose. I am showing here with Xcode as I already use, otherwise, go to App Store and install any small PLIST editor apps before proceeding.
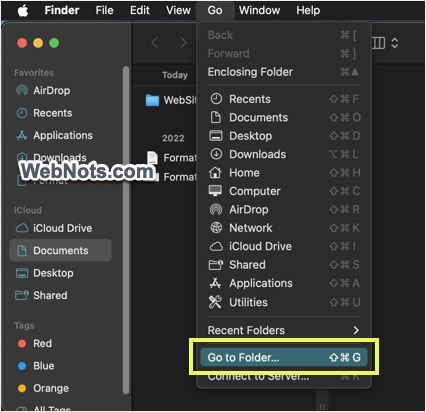
- Open Finder app and go to “Go > Go to Folder…” menu (or use “Shift + Command + G” shortcut keys).
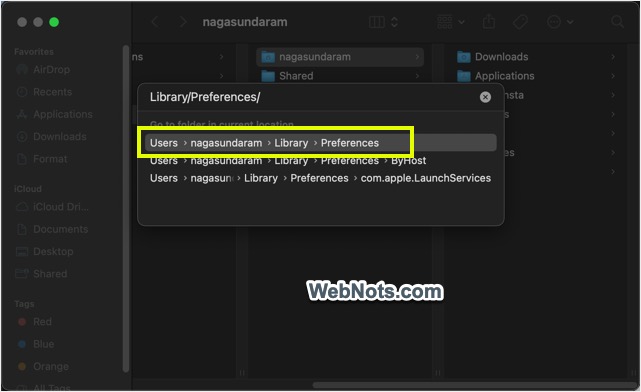
- Type Library/Preferences/ in the pop-up and select “Users > username > Library > Preferences” folder from the dropdown suggestions.
- Find com.apple.finder.plist file in Preferences folder.
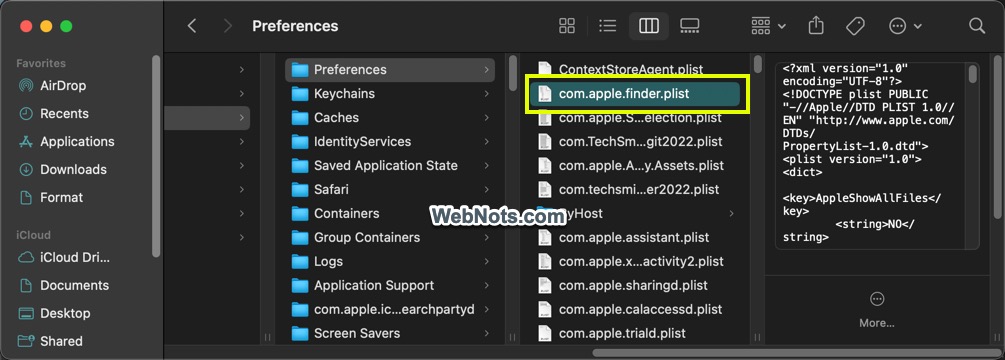
- Double click to open the file with Xcode. If you are using any other apps, control click on the file (right-click) and select your app from “Open With” list.
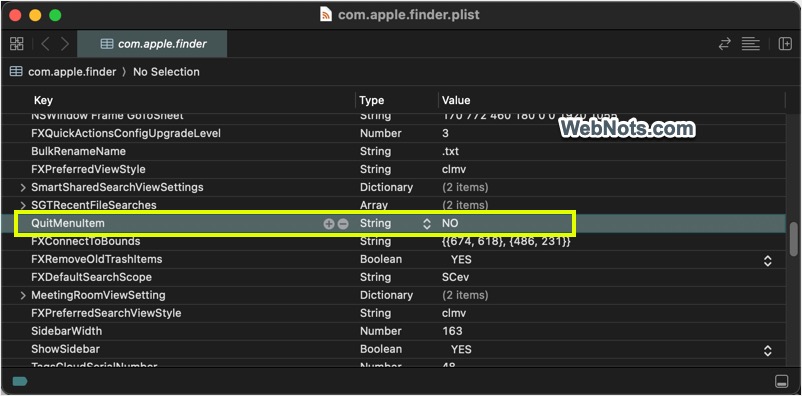
- When the file opens in text editor, check and find QuitMenuItem under “Key” column. The value for the key is set as “NO” by default.
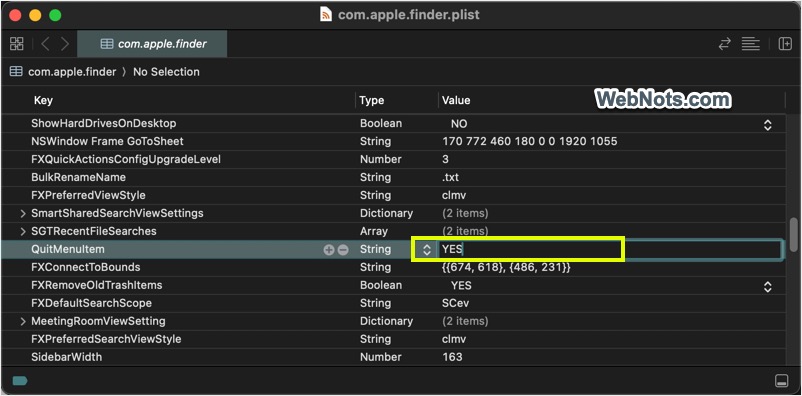
- Select the QuitMenuItem key and press Tab for editing the line item. Press tab another time to jump to Value field and change the value from NO to YES.
- Press “Command + S” or go to “File > Save” menu and save your changes.
- Now, control click (right-click) on Finder app in Dock and select “Relaunch” option. This will kill all open instances and relaunch the app.
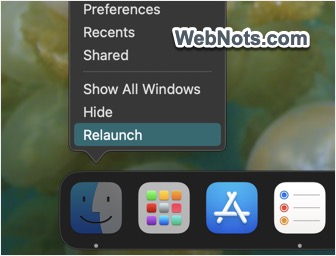
- Open Finder app if it did not relaunch automatically, go to “Finder” menu in the app and you will find “Quit Finder” sub-menu item is added.
Remove Quit Finder from PLIST
You can anytime edit Finder property file using Xcode or other editor and change QuitMenuItem value to NO for removing the sub-menu item.
Note: Library folder is hidden in Mac by default. So, if you are not able to see the folder or PLIST file, enable viewing hidden files.
Finder and Desktop
Though it is handy to add quit menu in Finder app, all your desktop icons will be hidden when you actually quit the app. This is because Finder controls desktop in Mac. Hence, icons will disappear and right-click context menu will not work on desktop. However, you can continue to work with Dock, Spotlight and other features. Most importantly, no files will be deleted from your desktop and they will be simply hidden.
You can bring back the default desktop features by removing the quit menu either from Terminal or by editing PLIST file as explained above.