macOS 26 redesigned the Launchpad app and introduced Apps to quickly find your apps and files. In addition, you can use Spotlight Search to find your favorites items with no time. However, you might be frequently opening few apps and every time searching for the same apps doesn’t make much sense. The solution is to simply add the apps to Dock, the bottom pallet, and access them without searching.
Adding Apps to Dock
- Open Finder and go to Applications folder to find all your installed apps. Some systems apps like Terminal are located inside “Utilities” folder.
- Simply drag an app and drop anywhere on the bottom Dock.
- This will place the app’s shortcut icon on the Dock.
- Click on the icon to launch the app whenever you need.
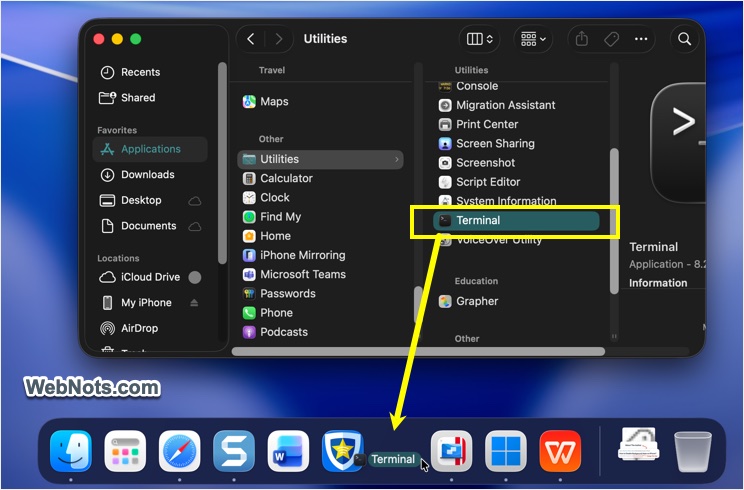
Good thing is that you can drag an icon and rearrange its position anywhere on the Dock.
Remove Apps from Dock
If you have added too many apps to Dock, it’s easy to get rid of the unnecessary items.
- Simply drag an app icon and drop it in Trash icon. You will see a “Remove from Dock” notification on the Trash bin when moving.

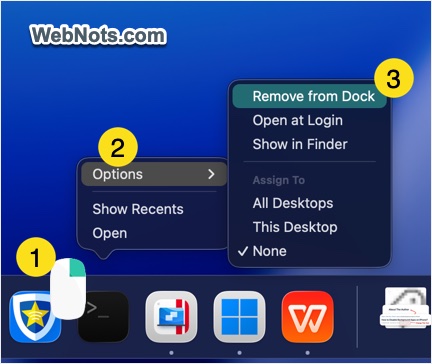
- Alternatively, Control-click (right-click) on an app icon and go to “Options > Remove from Dock” to delete the icon.
Showing Recently Accessed Apps on Dock
If you don’t want to manually add and remove the icons, there is an option to automatically show recently accessed apps on your Dock
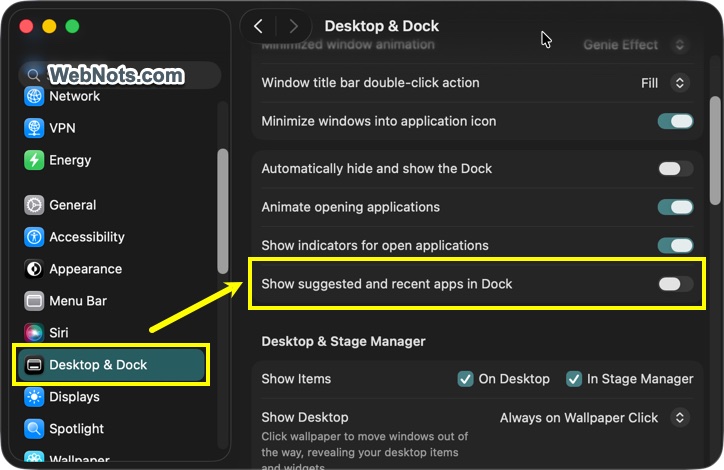
- Click the Apple logo manu and select “System Settings…” option.
- Navigate to “Desktop & Dock” section from the sidebar.
- Scroll down and turn on “Show suggested and recent apps in Dock” option.
- This will add a new section in Dock to show frequently opened apps.
Note: By default, Dock is located on the bottom and you can change the position to left or right on the same settings page.