Though Microsoft considerably changed the interface, right-click context menu is one of the frustrating things in Windows 11. The operating system offers no built-in settings to customize the default menu items. For example, adding options such as Empty Recycle Bin would save time by removing the need to locate the Recycle Bin manually. It would also allow you to empty it directly from the desktop or File Explorer without interrupting your workflow.
Add Empty Recycle Bin in Context Menu
Since Windows 11 does not offer any default settings for this, you need to edit the registry entries. Before making any changes, backup your registry as a safety precaution. You can do this from “Registry Editor > File > Export” and get the backup file. In case of any issue, you can import (Registry Editor > File > Import) the entries back and restore to previous state. Make sure you have the administrative rights and follow the below steps:
Step 1 – Create a Registry Key for Recycle Bin
- Press Win + R keys to open Run dialog box.
- Type regedit in the box and press enter.

- If prompted by User Account Control (UAC), select “Yes” to continue.
- In the Registry Editor, navigate to the following location:
HKEY_CLASSES_ROOT\Directory\Background\shell
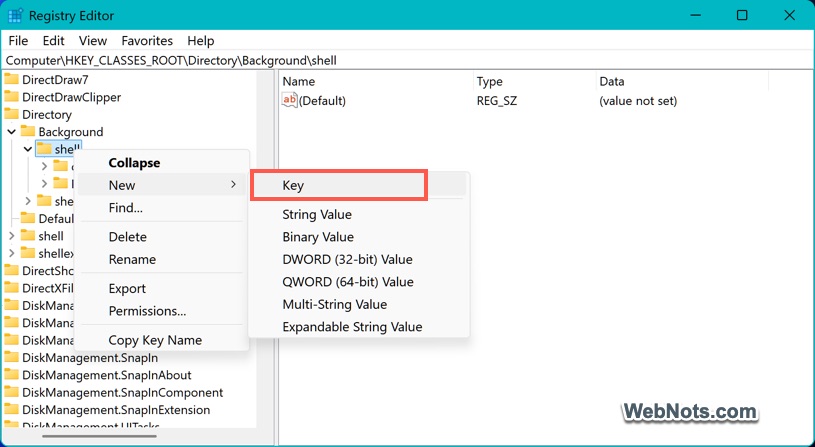
- If the “shell” key does not exist, right-click on “Background”, select “New > Key”, and name it as “shell”.
- Right-click on the “shell” key, select “New > Key”, and name it as “Empty Recycle Bin” (or any name you prefer).
Step 2 – Assign Recycle Bin Icon
- Within the new “Empty Recycle Bin” key, right-click on the right pane, select “New > String Value”, and set the name to “Icon”.
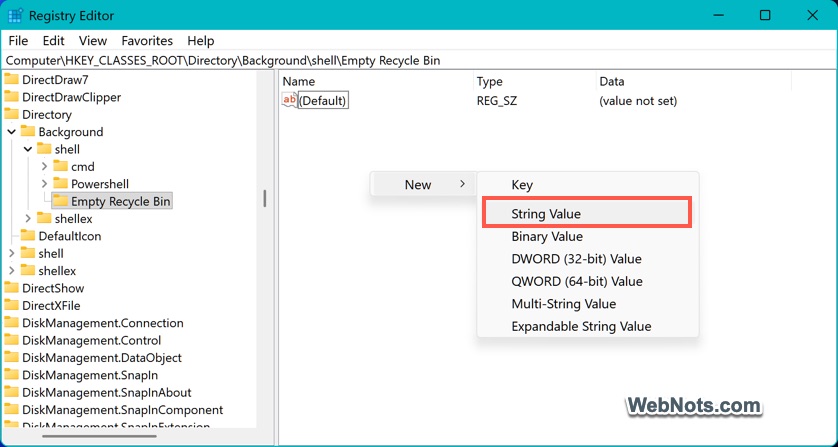
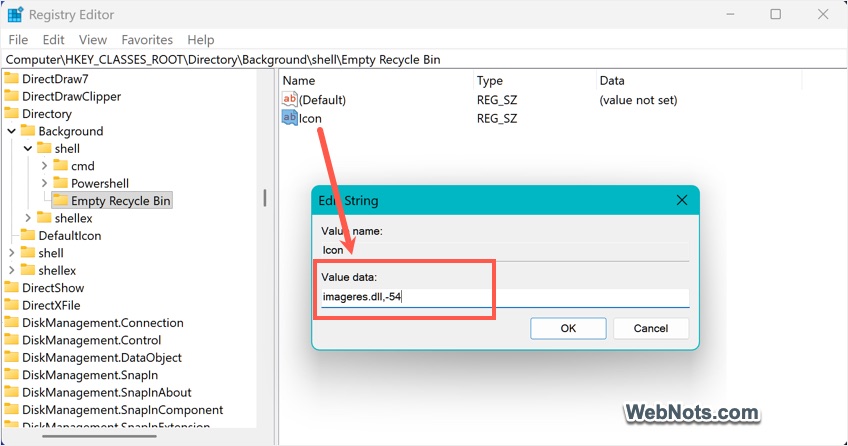
- Double-click the “Icon” to edit the string.
- Enter the “Value data” as imageres.dll,-54 in the box and click “OK”.
- This sets the icon to the standard Recycle Bin image.
Step 3 – Add Cleanup Command
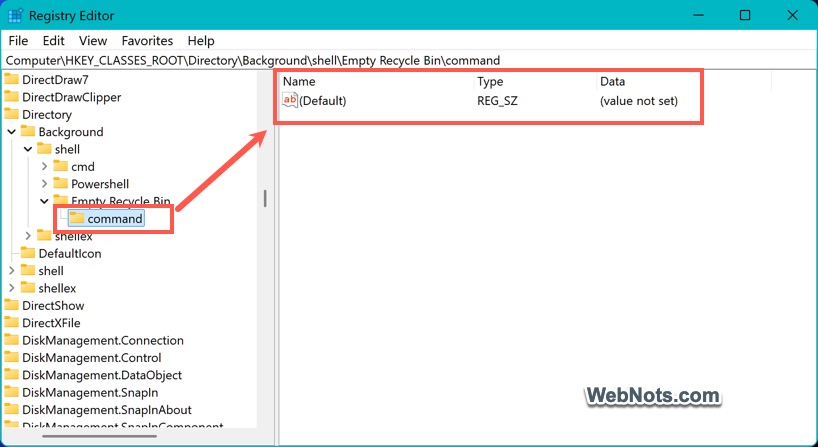
- Right-click the “Empty Recycle Bin” key, select “New > Key”, and name it as “command”.
- Select the “command” key, double-click the “(Default)” value on the right pane.
- Enter the following command in the “Value data” and press “OK”.
cmd.exe /c "echo Y|PowerShell.exe -NoProfile -Command Clear-RecycleBin"
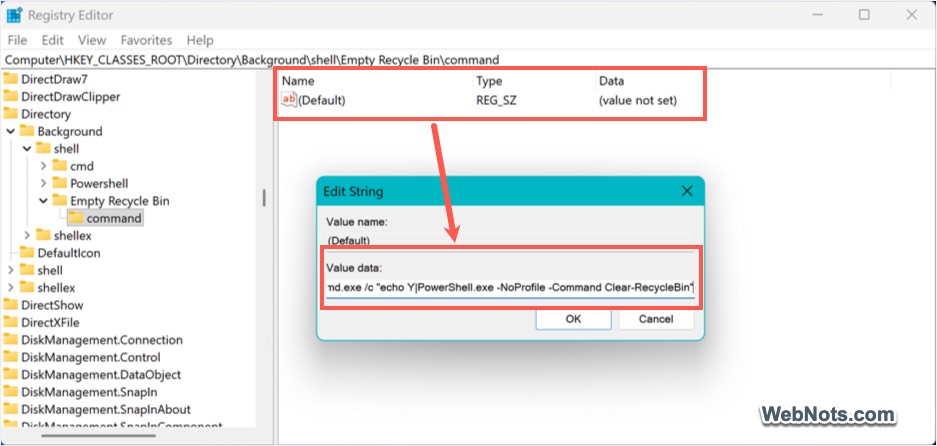
- This command empties the Recycle Bin by automatically answering “yes” to any confirmation prompts.
Step 4 – Test Context Menu
- Close your Registry Editor and right-click on the empty area on your desktop or inside the File Explorer app.
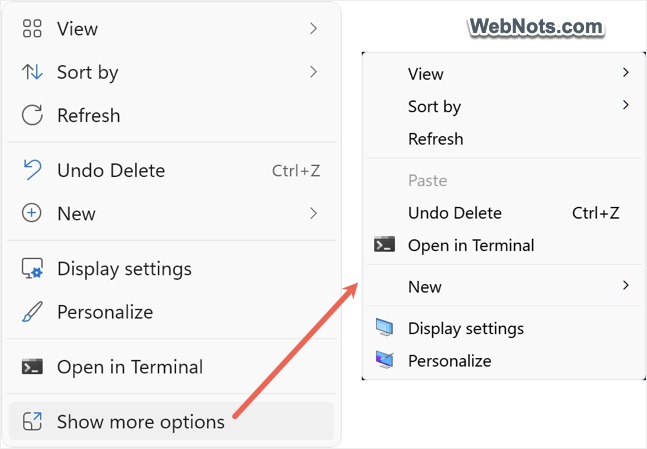
- Select “Show more options” and you should now see a new menu item named “Empty Recycle Bin”.
- Select that menu and the command will be executed in a flashing Command Prompt (that will pop-up and disappear like when you are running a script or batch file).
- This will instantly clear out the contents of your Recycle Bin.
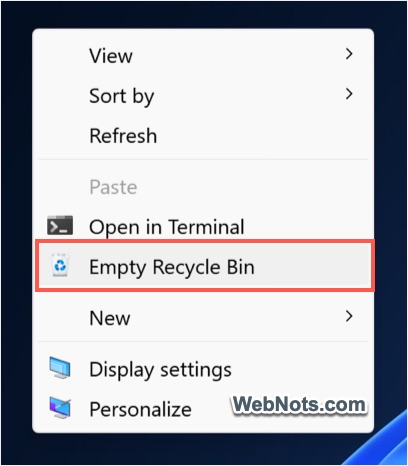
By default, Windows 11 context menu shows the short list and you need to click on “Show more options”. If this additional step is inconvenient, you can revert to long menu list like Windows 11 by following the steps explained in this article. In this way you can reduce one click every time.
Final Words
Instead of “Empty Recycle Bin”, you can use any name for the context menu item by changing the key name in step 1. It is also possible to use another recycle bin icon using imageres.dll,-55. anytime you can delete the newly created registry entries to remove the item from your context menu.