
Keeping important apps and files shortcuts on desktop helps to access them easily. Though Mac allows to add items to Dock, you can’t keep many items as it will distract the screen usage. In this article, we will explore how to add desktop shortcuts for apps, files and folders in Mac.
Shortcut Vs Alias
If you are familiar with Windows, the file type is called “Shortcut” while it is called “Alias” in macOS. Unlike Windows, macOS does not offer an option to add aliases directly from right-click context menu on desktop.
1. Add App Alias on Desktop
- Open Finder and go to “Applications” folder.
- Simply drag an app and drop on the desktop area.
- You will see an arrow mark on the app icon while dropping indicating it is a shortcut and not the app is moving to desktop location.
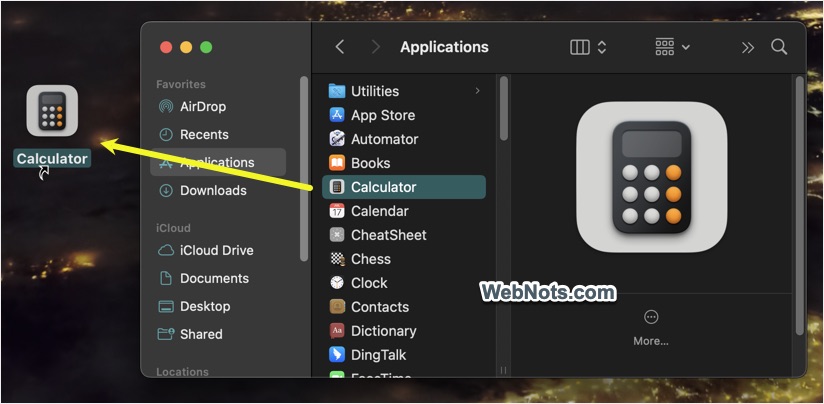
Note: Dragging an app from Dock to desktop will remove it from the dock.
2. Add File Alias on Desktop
You can’t drag a file like an app which will move the file location to desktop instead of creating an alias.
- Open Finder and locate the file that you want to create an alias.
- Control-click or right-click on the file and select “Make Alias” menu.
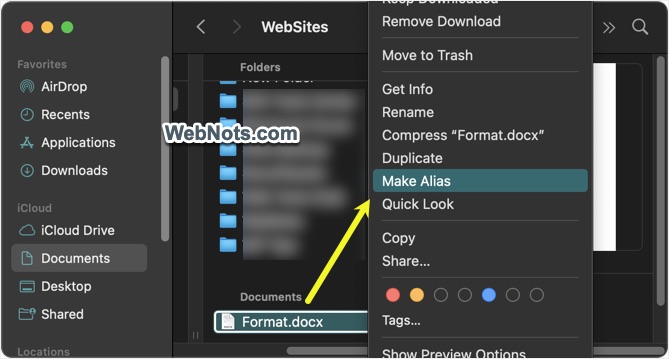
- This will create a file shortcut and drag that shortcut to desktop.

3. Add Folder Alias on Desktop
This works similar to adding file aliases.
- Open Finder and locate your folder.
- Right-click or control-click on it and select “Make Alias” option.
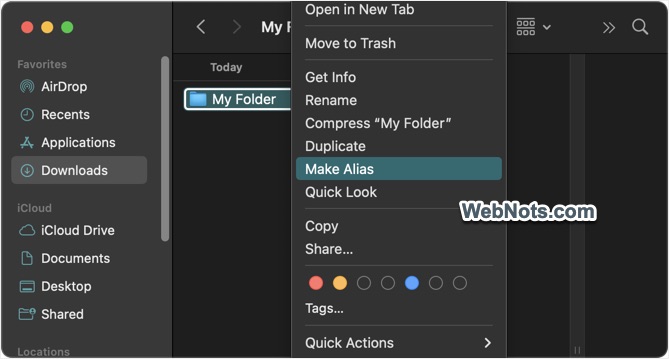
- Simply drag the created alias to desktop.
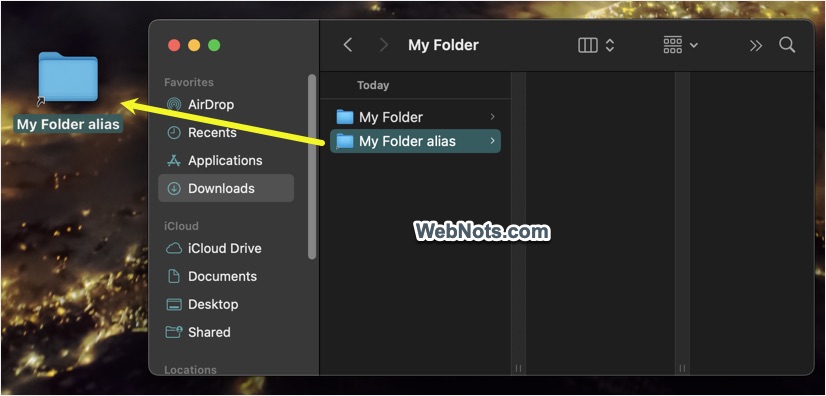
Alias folder will contain all original files and sub-folders or parent folder. This means deleting them will delete the original items. This is different than alias app or file as deleting them will not delete the source item.
Finding Source of an Alias File / App
For the alias folder, you can double-click to open it and view the source folder’s content in Finder. Since alias app and file will open the item itself, you may not know the source location.
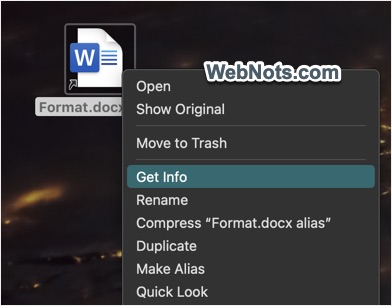
- Select an alias file / app and control-click or right-click on it.
- Select “Get Info” from the context menu that appears.
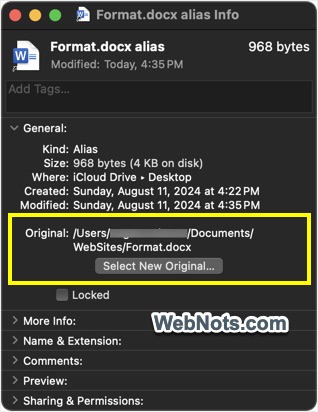
- On the pop-up that appears, check source location against “Original” option under “General” section.
- If required, click on the “Select New Original…” button and assign a new source to your alias.
Generally, Mac will automatically correct the source file’s location linked with alias when the source file is moved to another location. However, if the source file is deleted, opening the alias will show an error like below. Click on the “Fix Alias…” button and then assign a new source for the shortcut. Otherwise, select “Delete Alias” button to send the alias to trash bin.

Final Words
You can create multiple aliases for the same app, file or folder on desktop. After adding the shortcut, select the alias and press enter to rename it as per your need.



helpful thanks for uploading this as I find looking for answers to fundamentals like this is never easy to find on apple – you would think apple would happily create similar walk through explanations like this … if wishes were fishes … thx again