It is common to use automated debit from your bank account when paying for digital services. Apple makes it easy to add your bank details or credit / debit card to your account depending on your country. Though this is easier, manually adding fund is better option for seamless transactions. Whether you are purchasing apps, games, subscriptions or even using Apple Pay, adding money to your Apple account offers both convenience and flexibility. In this article, we will explain both the “how” and the “why” of manually adding funds to your Apple account.
Why Add Money to Your Apple Account?
Before diving into the “how,” it’s important to understand why you might want to add funds to your Apple account in the first place. Remember that adding a payment method is mandatory regardless of whether you want to manually add money or use automatic recurring payment.
1. Get Bonus Amount
Wonder how to get some discount or bonus on your Apple purchases? Most times, Apple offers additional bonus like 10% or 20% when you add fund to your account. You can make use of such opportunities to get bet deal by choosing the larger amount. For example, you can calculate and pre-load the amount needed for 1-year of all your app and iCloud+ subscriptions. Below screenshots show 10% and 20% bonus for adding fund.


You can also purchase a gift card with additional bonus amount and redeem. The amount will be credited to your account balance and available for subscriptions and purchases.
2. Country Restrictions
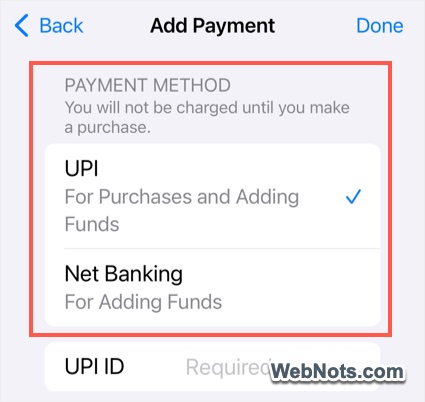
Some countries do not allow automatic debit from credit or debit card for protecting consumers. For example, Reserve Bank of India rules prevent Apple and other companies from collecting recurring payments from Indian customers through credit / debit cards. So, internet banking and Unified Payment Interface (UPI) are the only options offered for Indian customers for manually adding funds. So, if you have country level restrictions like this, you have no options other than manually adding funds to your account.
3. Security and Privacy
When you add money to your Apple account, you minimize the need to enter your credit or debit card information online. This reduces the risk of fraud and keeps your personal payment details secure. Instead of sharing your card number, you are using the balance in your Apple account for any purchases, adding an extra layer of security.
4. Streamlined Purchases
Whether you are downloading apps from the App Store, subscribing to services like Apple Music, or renting movies from Apple TV, the funds are automatically deducted from your balance, allowing for quick and seamless transactions without needing to enter payment details every time.
From iCloud storage plans to in-app purchases, there are numerous Apple services that require you to pay regularly. Having funds available in your Apple account ensures that you won’t run into issues when your subscriptions renew. Instead of worrying about linking a new card or payment method, your balance will take care of it.
5. Budgeting
Adding money to your Apple account can help you better manage your finances. You can control how much you want to spend by pre-loading funds monthly, which prevents overspending. It is a great way to create a budget for apps and subscriptions, ensuring you do not exceed your desired limits.
6. Family Sharing
If you’re part of a Family Sharing group, you can add money to your Apple account for all shared family purchases. This makes it easier to manage shared app and media subscriptions while keeping track of overall spending.
How to Add Money to Your Apple Account?
Now that you know why it’s beneficial, let’s dive into how you can add funds to your Apple account. Depending upon the device you have, follow one of the below methods convenient for you.
1. Add Money from iPhone or iPad Settings App
- Launch the Settings app on your iPhone or iPad and tap on your name at the top of the screen.
- Tap “Payment & Shipping” and authenticate with your Apple account password, Face ID or Touch ID.
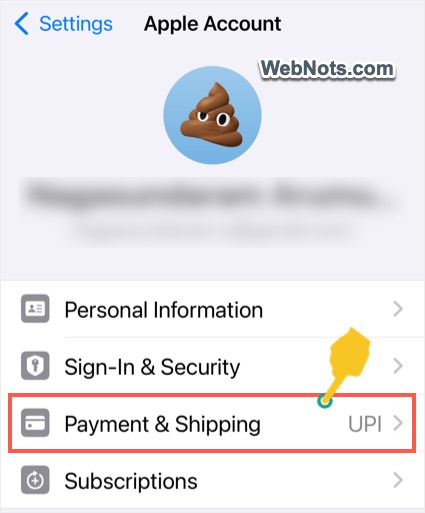
- Find and tap “Add Funds” option.
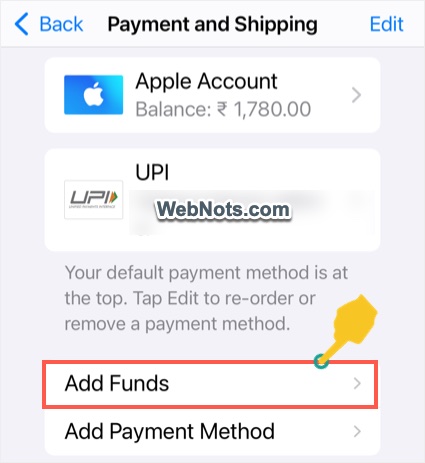
- You will see options to add funds in various increments along with the bonus amount (if offered). Select the amount you would like to add.

- If you want to add different amount, tap on “Other” and type a custom amount in the box and press “Next” button.

- Confirm your payment by double pressing the side button.
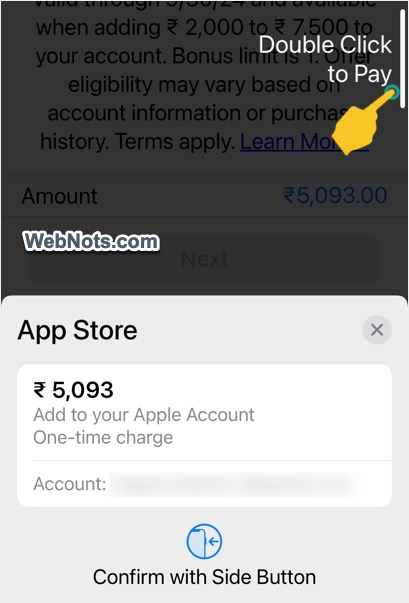
- This will trigger the payment request to your default payment method. Depending upon your payment setup, you may need to authorize the payment. It could be a linked credit or debit card, net banking, Apple Pay or another method linked to your Apple account. You will see a notification on the screen about this.

- If authorization is needed, open your bank or credit card provider’s app and accept the request.

- Make sure the payment is successfully done to Apple Services.
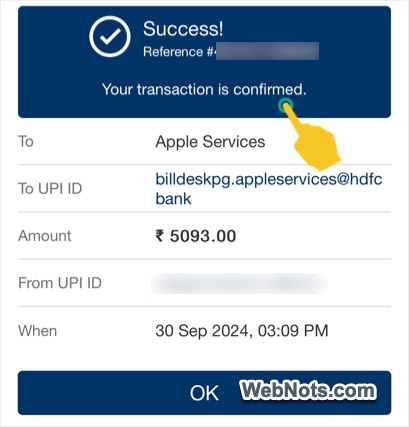
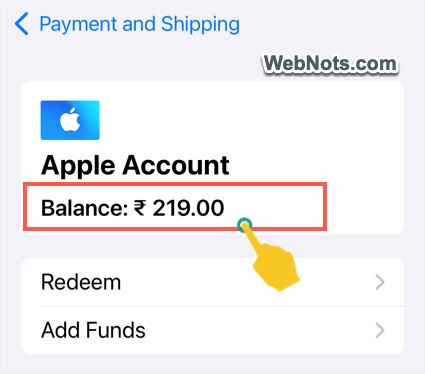
- After successful payment, you will get an instant notification and the fund will be added to your account immediately. You can see the balance amount under “Payment & Shipping > Apple Account” page.
2. Add Money Using iPhone or iPad Add Store
It is also possible to add money to your Apple account through the App Store.
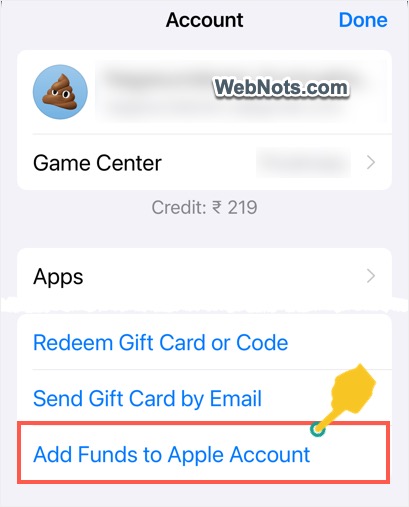
- Open App Store app and tap on your profile icon showing on top right corner.
- Tap on “Add Funds to Apple Account” link.
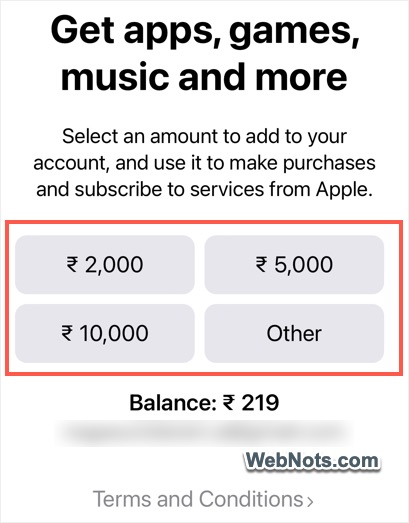
- Select one of the amounts or tap “Other” and enter a custom amount.
- Confirm your payment by double pressing the side button.
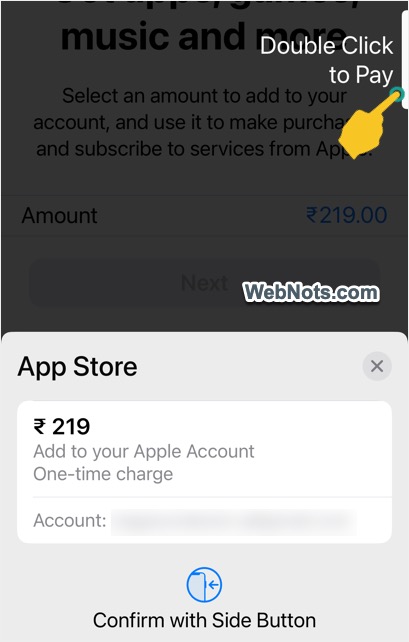
- If needed, approve your payment request received in default payment method. You will receive an instant notification after successful payment.

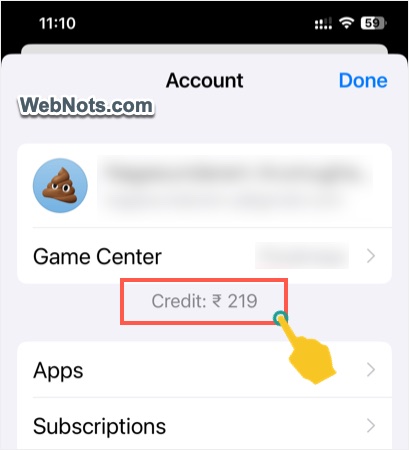
- You can view the balance showing as “Credit” in your App Store account.
3. Add Money Using a Mac
Unlike iPhone or iPad, you can’t add funds to Apple account from Mac System Settings app. However, you will be able to use the App Store for adding funds.
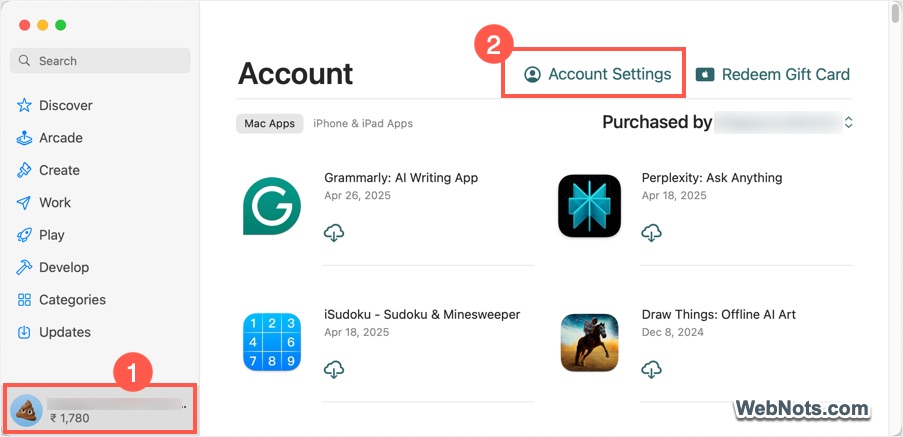
- Open Mac App Store app and click your account name showing on bottom left. After that, click on the “Account Settings” link showing on top right corner.
- Unlock your account by using Touch ID or by entering your password.

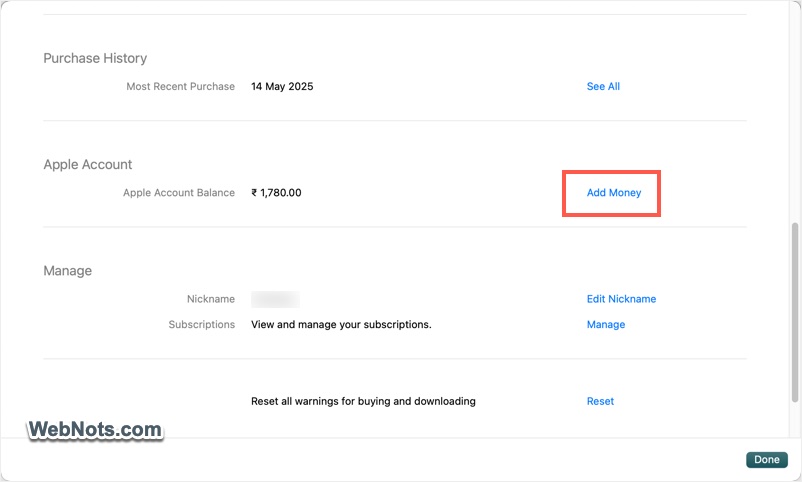
- Scroll down and click the “Add Money” link under “Apple Account” section.
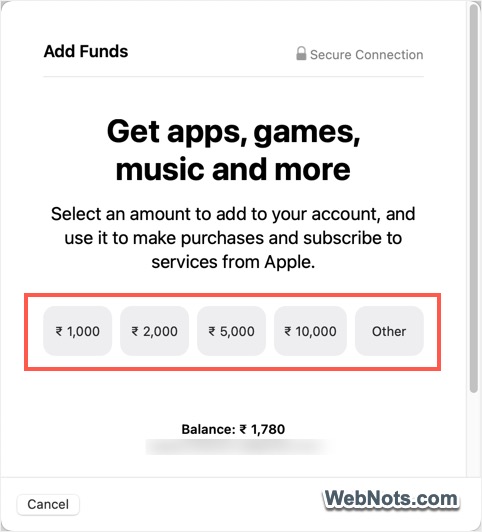
- Select the amount or type a custom amount to trigger payment request to the default payment method.
- Confirm the payment request in your banking or credit / debit card app / site. Once confirmed, the funds will be added to your Apple account which you can see against “Apple Account Balance” on the account page. Otherwise, go to App Store and check the left sidebar to find the balance amount is showing below your account name.
4. Add Money Using Apple Cash (iPhone or iPad)
For users who have Apple Cash set up, you can add funds directly from your bank account.
- Launch the Wallet app on your iPhone.
- Tap on Apple Cash and select Add Money.
- Choose the amount you want to add, then select your bank account or debit card linked to Apple Pay as the payment method.
- Review your transaction and confirm. The funds will be transferred into your Apple account almost instantly.
What to Keep in Mind When Adding Money to Your Apple Account
Through it is easy to add funds, here are some of the important points to remember.
1. Minimum and Maximum Limits
There are some minimum and maximum amounts that you can add to your Apple account. These limits may vary depending on your country, so it’s always a good idea to check the guidelines specific to your region.
2. Payment Methods
To add money, your Apple account must be linked to a valid payment method. You can link a credit card, debit card, PayPal, or internet banking. If you are adding funds through Apple Cash, ensure that your bank account is connected to your Apple Pay.
3. Switching Country
There should be no amount in the balance if you want to switch the country of your Apple account. It is not possible to convert the balance amount to another currency and use on another country’s Apple store. So, make the balance to 0 if you are planning for a country change.
4. Family Sharing Considerations
If you are part of a Family Sharing group, all purchases made by family members will be deducted from your account balance if you are the organizer. Therefore, it is important to monitor your balance and update it as necessary to avoid any disruption in service.