WordPress needs a core software, database and a theme to create a base setup. You can install additional plugins to enhance the base features. All your text content, theme settings and plugins settings are stored in MySQL database. WordPress core files will pull the content from database and show as per your theme’s layout whenever users visit the site in browser. Almost all web hosting companies offers WordPress setup which handles automatic database creation process in the backend. So, many users do not know how to create a MySQL database when it is needed for manual WordPress installation. If you are looking for creating a database manually in MySQL, here is a step-by-step process.
Creating MySQL Database
You need to create a database with a user name and password. These credentials are important for WordPress core to connect with the database to store and retrieve your content. So, make sure to use complex username and password for security reasons. Here we discuss the step-by-step process in cPanel which is commonly used by most shared hosting companies. Though some companies like SiteGround offers custom setup, the overall process of creating a database and connecting it your WordPress site remains same.
Create MySQL Database in cPanel Hosting
Below is the process in HostGator which uses cPanel hosting. The look and appearance may be different in your case depending on the hosting company’s setup.
Step 1 – Accessing MySQL Databases
Login to your hosting account and go to cPanel section.

Go to “Databases” section to find and open “MySQL Databases” app. Alternatively, you can use the search box to filter the app easily.

Step 2 – Creating a New Database
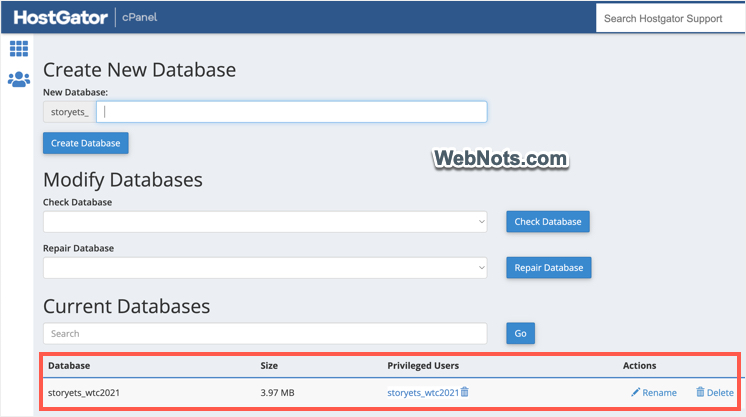
Enter your database name under “Create New Database” section and click on “Create Database” button.

Created database will show under “Current Databases” section which you can rename or delete anytime.
Step 3 – Creating a New User
Next step is to create a new user under “Add New User” section. Enter a name, password and click on “Create User” button.

Step 4 – Connecting Username and Database
Now you have an username and a database, connect them under “Add User to Database” section. You can find the username under “Current Users” section and edit the name password if required. Type your username and database name in the corresponding boxes and click on “Add” button.

You will be prompted to provide necessary privileges to the user to modify the database. Select “All Privileges” to provide a complete access of database to this user.

Step 5 – Connecting Database to WordPress
Now that your database is ready and the final step is to connect it to your WordPress site. During installation process WordPress will prompt you to enter database details where you need to enter the database name, username and password as created in the above steps.

The other way is to modify the wp-config.php file and add your database credentials. This is the option when you want to change the database or changed password after setting up WordPress.

Once connected successfully you will be able to access your WordPress admin dashboard. If you have entered wrong username, password or database name, then you will see “Error establishing database connection” when trying to access your site.

Hostname for your database is always “localhost”, if this is not working then use your hosting server name as a hostname. You can get this server name from your hosting company’s support team.