Whenever a problem occurs with Windows 11, you need to search for a few technical details like IP address, DNS, computer name, network adapter, etc. Network adapter is the hardware in your computer for establishing communication with other devices and accesses the internet. So, checking its details is necessary for troubleshooting any network connectivity issues. Good thing is that there are multiple ways you can do that in Windows 11.
Method 1: Using the Settings App
Windows 11’s Settings app offers a user-friendly way to view all network adapter information.
- Press Windows + I keys to open the Settings app.
- Go to “Network & internet” section and select “Advanced network settings”.

- Under “Network adapters” heading, you will see a list of all network devices connected to your computer.
- Expand the desired adapter to view its status and properties.

- Click “Rename” button against “Rename this adapter” to change the adapter’s name.
- Click “View additional properties” to view or edit IP and DNS details.

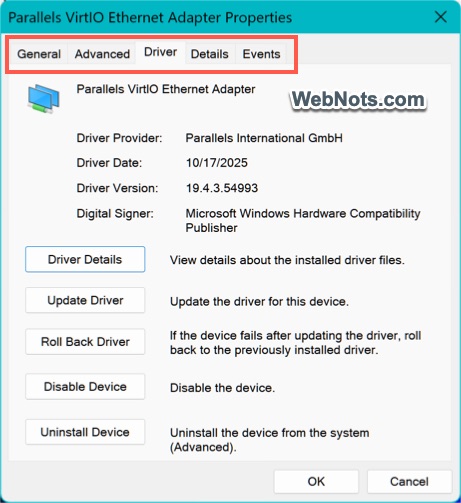
- Click the “Edit” button against “More adapter options” and then click “Configure” button. This will open your network adapter’s properties where you can find tabs for General, Advanced, Driver, Details, and Events. Each tab offers specific insights:
- General: Shows device type, manufacturer, and status (working or not).
- Advanced: Check and change all adapter’s properties.
- Driver: Displays driver version, provider, and date. You can view, update, and rollback driver. It is also possible to disable or uninstall the device.
- Details: Provides advanced information like hardware IDs, device instance path, and more.
- Events: Records changes and issues related to the adapter.
Method 2: Device Manager
Device Manager is a powerful tool in Windows PC for viewing and managing hardware devices, including network adapters.
- Right-click on the Start menu button or press Windows + X keys to open the power user menu and choose “Device Manager” option.
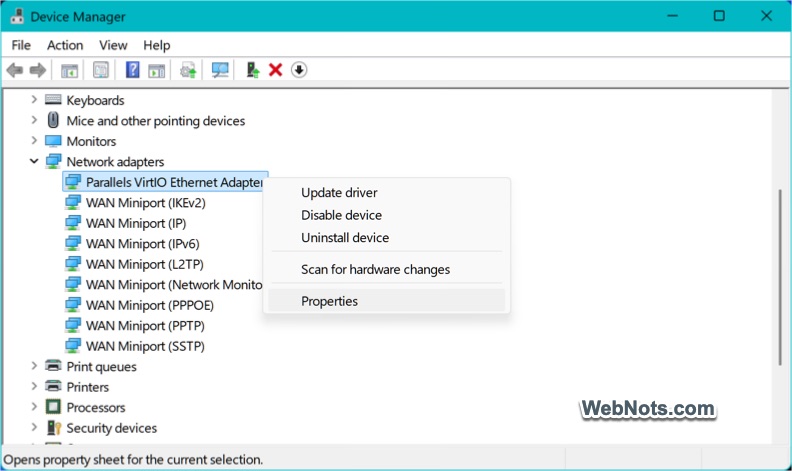
- Expand the “Network adapters” section to see all installed adapters (such as Ethernet and Wi-Fi devices).
- Right-click on an adapter and use the menu items to update driver, disable device, or uninstall device. Select “Properties” to open network adapter’s properties window, when you can find details under various tabs.
Method 3: Command Prompt
For those comfortable with command-line utilities, Command Prompt app provides a quick and comprehensive way to access network adapter details.
- Press Windows + R keys to open Run dialog box. Type cmd in the box and press “OK” button to open Command Prompt app.
- Type ipconfig /all command and press enter key.
- This command lists all network adapters and their configurations including Adapter name, Physical (MAC) address, DHCP status, IP addresses, Subnet mask, Default gateway, and DNS servers.

Method 4: PowerShell
PowerShell is another command-line option to get information about your network adapter.
- Search and open Windows PowerShell app.
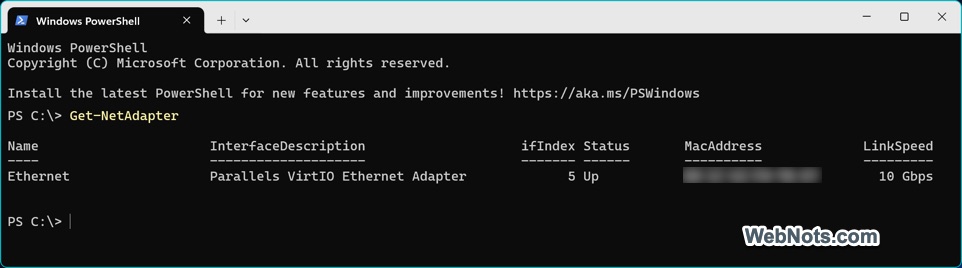
- Type Get-NetAdapter command and press enter.
- PowerShell will display a list of network adapters with their names, status, MAC addresses, link speed, etc.
- For more in-depth info, use Get-NetAdapter | Format-List * command. This command outputs all properties of each network adapter in a detailed format.

Method 5: System Information Tool
Windows 11 includes a built-in System Information utility that can display a broad overview of your hardware. This is a useful method for generating a report or printing out the details.
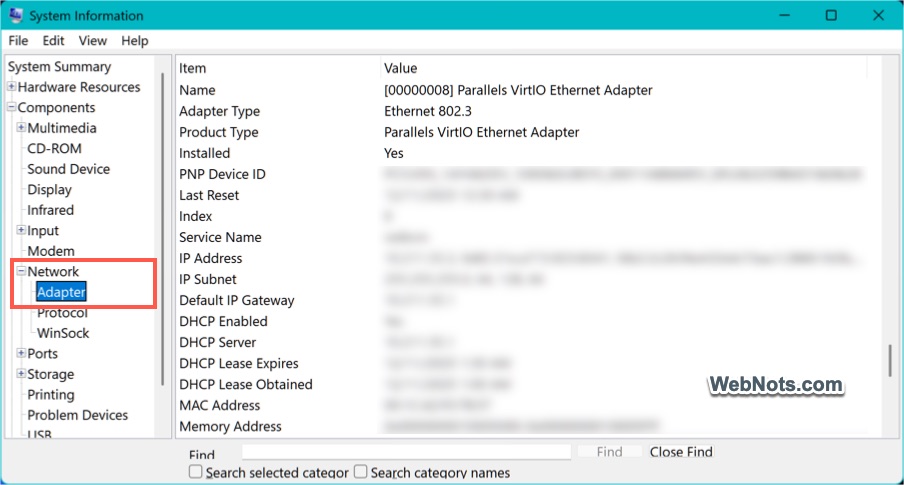
- Press Windows + R, type msinfo32, and press “OK” button.
- Navigate to “Components > Network > Adapter” in the left pane.
- Here you will find detailed information about each network adapter, such as type, installed status, IP address, MAC address, etc.
Method 6: Using Control Panel
The classic Control Panel is still available in Windows 11 for those who prefer traditional navigation.
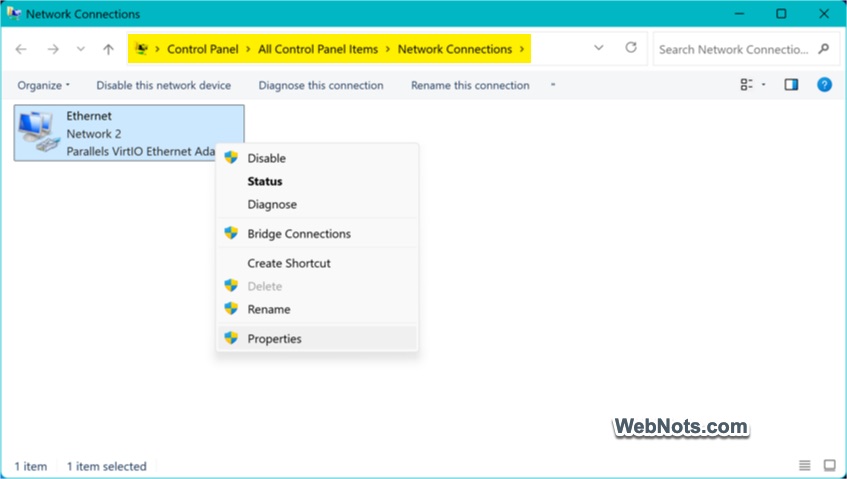
- Press Windows + R, type ncpa.cpl, and press “OK” button.
- This will open the “Network Connections” window, displaying all network adapters as icons.
- Right-click an adapter and choose “Status” or “Properties” for information on connection status, speed, and more.
- Use the top menu items to rename or disable the device.
Understanding Network Adapter Details
Now that you know where to find your network adapter information, let’s break down what the details mean:
- Adapter Name: The model and manufacturer of your network hardware.
- MAC Address: A unique identifier assigned to your adapter by the manufacturer. Used for communication within local networks.
- Link Speed: The maximum data transfer rate supported by your adapter.
- Driver Version: The software version enabling your adapter to communicate with Windows 11.
- Connection Status: Shows if the adapter is enabled, disabled, or experiencing issues.
- IP Address: The network address assigned to your adapter for communication over the internet or local network.
- DHCP Status: Indicates if your adapter automatically receives network configuration from a DHCP server.
- DNS Server: The server your adapter uses to resolve domain names to IP addresses.
Fixing Network Adapter Issues
If you notice that your network adapter isn’t functioning correctly, try the following troubleshooting tips:
- Restart your computer: This simple action can resolve many hardware issues.
- Disable and re-enable the adapter: In Device Manager, right-click and choose “Disable Device”, then choose “Enable Device”.
- Update your drivers: Go to “Driver” tab in network adapter’s properties window to update the driver.
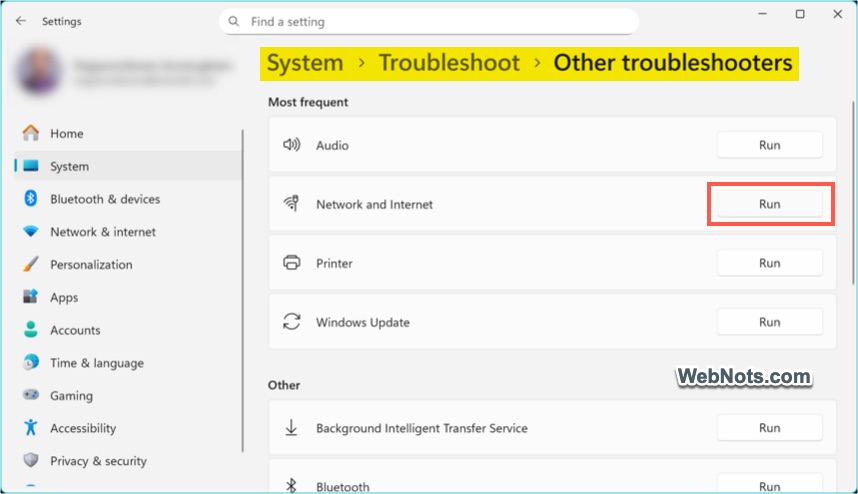
- Run Windows Troubleshooter: Go to “Settings > System > Troubleshoot > Other troubleshooters” and click “Run” button against “Network and Internet” option. Using this troubleshooter, you can run diagnostics and restart the adapter to fix network related issues.