
Instead of manually opening the apps you use every day, you can set them to launch automatically when you log into your system. This can save you a lot of time whether you’re working on a project, managing your workflow, or simply want your favorite apps ready to go when you start. In our earlier article, we have explained how to do that in Windows PC. In this article, we’ll cover various methods to automatically launch apps on your Mac after login.
1. Add Login Items from System Settings
There are third-party apps allow you to manage the login items on Mac. However, you can make use of the default feature for this purpose. macOS offers a simple way to manage which apps open automatically when you login.
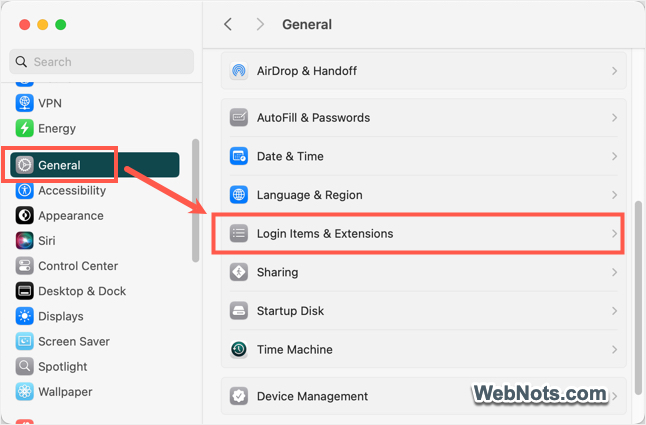
- Click on the Apple menu in the top left corner of your screen and select “System Settings…” menu.
- Go to “General > Login Items & Extensions” section.
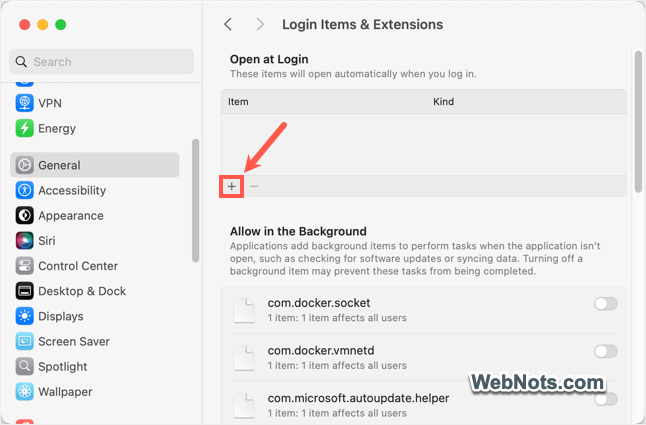
- To add apps, click the + button below the “Open at login” section.
- A new window will open, allowing you to choose the application you want to add. Go to “Applications” folder and select the app (in our case, we choose Safari).
- You’ll see the app in the list of login items.
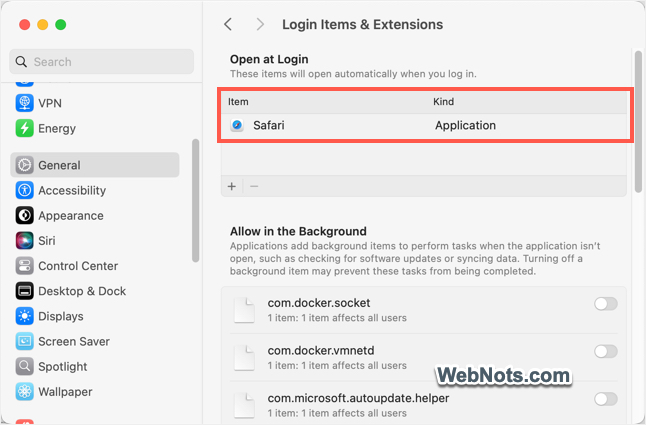
- Once you’re done, close the System Settings window. Your selected apps will now open automatically whenever you log into your Mac.
If you no longer want an app to start automatically, simply click on the app you want to remove and then click the – icon below the list.
2. Add Login Item from Dock
While the Dock isn’t technically a place to manage login items, you can configure it to launch apps with one click. By keeping apps in the Dock, you’ll have them accessible immediately after login.
- Open Finder, then navigate to the “Applications” folder. Find the app you want to add and drag its icon to your Dock. Otherwise, just open the app to view its icon on Dock.
- Right-click on the app icon and select “Options > Open at Login” to ensure they launch automatically after login. You can also, right-click and go to “Options > Keep in Dock” to permanently place the icon on Dock for quick access.
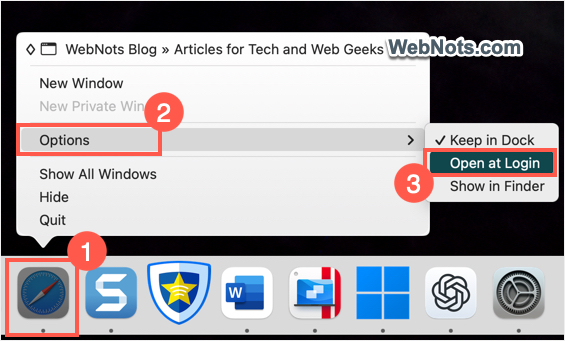
Note: This will essentially add the app to login items list in System Settings as explained in method 1.
3. Creating a Simple Automator Script
For users who enjoy scripting, macOS offers Automator, a tool that allows you to create custom workflows. Here’s how to use it to launch apps after login:
- Open Automator by searching for it in Spotlight.
- Select “New Document” and choose “Application”.
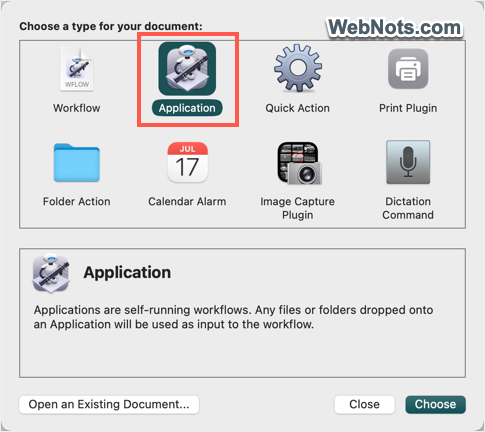
- Type “launch” in the search box and find “Launch Application” action.
- Drag that action and drop into the workflow area (last column).
- Click the dropdown and choose the app you want to launch from the dropdown list.
- Save the workflow as an Application in a folder of your choice (e.g., Applications).

- Follow the steps as explained in method 1 to add this Automator application to your login items.
Now, every time you log in, your Automator script will run and launch the apps you’ve specified. Though this method is similar to method 1, you can add additional steps in the workflow. For example, you can open specific website URLs (step 2 in workflow) after launching Safari (step 1 in workflow) at login.
4. Using Terminal for Advanced Users
If you’re comfortable with the Terminal, you can also use command-line to control apps at login. This method offers a more hands-on approach but is less user-friendly than the previous methods.
- Go to “Finder > Applications > Utilities” to find and open Terminal app.
- Copy and paste the following command in Terminal prompt and press enter. Replace “Safari” and the path /Applications/Safari.app with the actual app’s name and actual file location on your system.
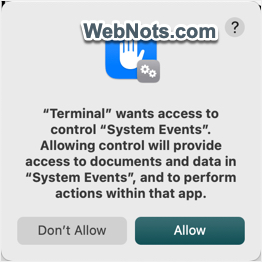
osascript -e 'tell application "System Events" to make login item at end with properties {name:"Safari", path:"/Applications/Safari.app", hidden:false}'- You will be prompted to confirm allow access to Terminal and click “Allow” button.
Conclusion
As you can see, you can easily launch your favorite apps as soon as you log in, making your Mac experience even more efficient. Using macOS login items is the best option though you can use other methods as well.


